Brother International BES-100E BE-100 Workbook - English - Page 73
Pasting to Change the Sewing Order
 |
View all Brother International BES-100E manuals
Add to My Manuals
Save this manual to your list of manuals |
Page 73 highlights
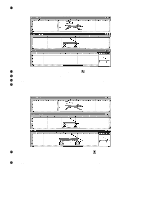
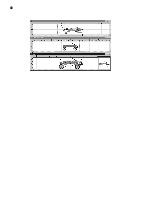
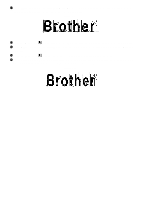
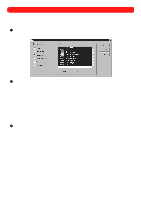
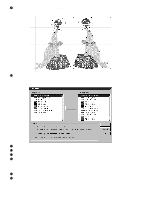
Chapter 30: Pasting to Change the Sewing Order When pasting a shape into a design, it may also be necessary to change the order in which the shapes will be sewn. To cut a shape from the design and paste it so that it will be sewn before or after an existing shape: 1 Using the Move tool ( ), select the design shape whose sewing order you wish to change. "Dancing ants" (moving dashes) appear around the shape. 2 On the Edit drop-down menu, click Cut. The shape is removed from the design and put on the Windows clipboard. 3 Using the Move tool ( ), select the design shape that will precede or follow the one to be pasted. "Dancing ants" appear around the shape. 4 On the Edit drop-down menu, click Paste Before (to paste the shape so that it is sewn before the selected one) or click Paste After (to paste the shape so that it is sewn after the selected one). s Example To rearrange the sewing order by pasting shapes: 1 Click the Simple Text tool ( dialog box appears. ), and then right-click in the design area. The Text tab of the Text Properties 2 In the Text box, type "Brother". 3 In the Font drop-down list, select "Helsinki". 4 In the Size box, type "1.0". 5 Click the OK button. Figure 103 6 Using the Move tool ( ), select the text shape. "Dancing ants" appear around the shape. 7 On the Shape drop-down menu, click Deconstruct Text. A box of "dancing ants" appears around each letter, as shown below. Figure 104 8 Click outside of the text shape. The "dancing ants" disappear. 9 Using the Move tool ( ), select the letter "t". "Dancing ants" appear around the letter. 0 On the Edit drop-down menu, click Cut. The letter is removed from the design and placed on the Windows clipboard. A Using the Move tool ( ), select the letter "B". "Dancing ants" appear around the letter. 70
-
 1
1 -
2
-
3
-
4
-
5
-
6
-
7
-
8
-
9
-
10
-
11
-
12
-
13
-
14
-
15
-
16
-
17
-
18
-
19
-
20
-
21
-
22
-
23
-
24
-
25
-
26
-
27
-
28
-
29
-
30
-
31
-
32
-
33
-
34
-
35
-
36
-
37
-
38
-
39
-
40
-
41
-
42
-
43
-
44
-
45
-
46
-
47
-
48
-
49
-
50
-
51
-
52
-
53
-
54
-
55
-
56
-
57
-
58
-
59
-
60
-
61
-
62
-
63
-
64
-
65
-
66
-
67
-
 68
68 -
 69
69 -
 70
70 -
 71
71 -
 72
72 -
 73
73 -
 74
74 -
 75
75 -
 76
76 -
 77
77 -
 78
78 -
79
-
80
-
81
-
82
-
83
-
84
-
85
-
86
-
87
-
88
-
89
-
90
-
91
-
92
-
93
-
94
-
95
-
96
-
97
-
98
-
99
-
100
-
101
-
102
-
103
-
104
-
105
-
106
-
107
-
108
-
109
-
110
-
111
-
112
-
113
-
114
-
115
-
116
-
117
-
118
-
119
 |
 |
