Brother International BES-100E BE-100 Workbook - English - Page 68
Synchronizing the design library, Loading designs from a CD-ROM, Specifying search criteria for
 |
View all Brother International BES-100E manuals
Add to My Manuals
Save this manual to your list of manuals |
Page 68 highlights
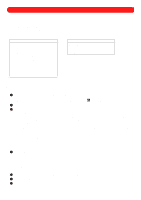
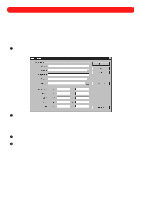
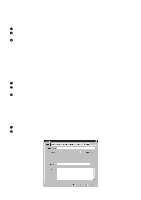
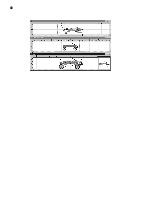
s Synchronizing the design library It is important to synchronize the design library after many designs have been saved on the hard disk from outside of BE-100. After synchronizing the design library, these designs can be accessed through the design library as well as the folder to which they were saved. To synchronize the design library: 1 On the Options drop-down menu, click Library Maintenance. The Library Maintenance dialog box appears. 2 On the Utilities tab, click the Synchronize Library button. A message appears warning that this process may take a long time. 3 Click the OK button to begin synchronizing. NOTE: To quit the synchronization operation, click the Cancel button. s Loading designs from a CD-ROM By loading designs from a CD-ROM, a thumbnail of each design on the CD-ROM is added to the design library, even if the design is encrypted. Although the designs are not actually copied onto the hard disk, the thumbnails contain the information needed to search the design library, therefore saving memory. NOTE: Keywords and/or a customer must be entered and saved for each design. To sew a design loaded from a CD-ROM, the CD-ROM must be in the CD-ROM drive and the design should be opened with BE-100. To load designs from a CD-ROM: 1 On the Options drop-down menu, click Library Maintenance. The Library Maintenance dialog box appears. 2 On the Utilities tab, click the Load CD-ROM Designs button. A message appears warning that this process may take a long time. 3 Click the OK button to begin loading the CD-ROM designs. NOTE: To quit the loading operation, click the Cancel button. s Specifying search criteria for a design Any design saved with BE-100 is added to the design library with the following criteria automatically specified: file type, file name, file size, needles (thread colors) used, stitch count, and date. In addition, keywords and/or a customer must be specified for each design. To specify keywords or a customer for a design: 1 Open the design. 2 On the File drop-down menu, click Design Info. The Design Info dialog box appears. Figure 99 65
-
 1
1 -
2
-
3
-
4
-
5
-
6
-
7
-
8
-
9
-
10
-
11
-
12
-
13
-
14
-
15
-
16
-
17
-
18
-
19
-
20
-
21
-
22
-
23
-
24
-
25
-
26
-
27
-
28
-
29
-
30
-
31
-
32
-
33
-
34
-
35
-
36
-
37
-
38
-
39
-
40
-
41
-
42
-
43
-
44
-
45
-
46
-
47
-
48
-
49
-
50
-
51
-
52
-
53
-
54
-
55
-
56
-
57
-
58
-
59
-
60
-
61
-
62
-
 63
63 -
 64
64 -
 65
65 -
 66
66 -
 67
67 -
 68
68 -
 69
69 -
 70
70 -
 71
71 -
 72
72 -
 73
73 -
74
-
75
-
76
-
77
-
78
-
79
-
80
-
81
-
82
-
83
-
84
-
85
-
86
-
87
-
88
-
89
-
90
-
91
-
92
-
93
-
94
-
95
-
96
-
97
-
98
-
99
-
100
-
101
-
102
-
103
-
104
-
105
-
106
-
107
-
108
-
109
-
110
-
111
-
112
-
113
-
114
-
115
-
116
-
117
-
118
-
119
 |
 |
