Brother International BES-100E BE-100 Workbook - English - Page 60
Punchpoints Drop-Down Menu
 |
View all Brother International BES-100E manuals
Add to My Manuals
Save this manual to your list of manuals |
Page 60 highlights
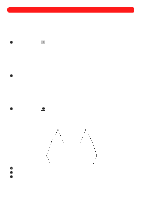
Chapter 24: Punchpoints Drop-Down Menu Punchpoints define the outline of a design shape and the stitch sequence in which it is sewn. The design shape can be reshaped by manipulating its punchpoints. Adding new punchpoints provides finer control during reshaping by breaking down the outline into smaller segments. The Punchpoints drop-down menu contains various commands for making changes to punchpoints. s Inserting punchpoints To insert punchpoints before or after existing ones: 1 Using the Reshape tool ( ), select the punchpoint that will precede or follow the new one. The selected punchpoint changes to light blue. NOTE: When working on a path, column or polygon, just one punchpoint may be selected. However, since punchpoints for regions are always inserted as pairs, always select both punchpoints of a pair; otherwise, the region will "bow tie". (The punchpoints of a pair are on opposite sides of the region and are connected with a gray line.) For more information about selecting punchpoints, see chapter 4. For more information about using the buttons in the Navigation palette to select punchpoints, see Navigating through the design in chapter 23. 2 On the Punchpoints drop-down menu, click Insert Point Before (to insert a punchpoint before each one that is selected) or click Insert Point After (to insert a punchpoint after each one that is selected). The new point is centered between the punchpoint that was selected and the one that was either before or after it. s Splitting manual stitches By splitting manual stitches, you can add trims to a stitch file or split a design element in pieces, making it easier to edit the stitch file. To split manual stitches: 1 Using the Reshape tool ( ), select the punchpoint of the manual stitch that you wish to split. The selected punchpoint changes to light blue, as shown in figure 96 below. NOTE: For more information about using the buttons in the Navigation palette to select punchpoints, see Navigating through the design in chapter 23. Figure 96 !!NEWILLUST1.bmp!! 2 On the Punchpoints drop-down menu, click Split Manual Stitches. 3 Select the same (light blue) punchpoint selected in step 1. 4 Press the Delete key. The stitch is deleted and a dotted line appears, as shown in figure 97 below. 57
-
 1
1 -
2
-
3
-
4
-
5
-
6
-
7
-
8
-
9
-
10
-
11
-
12
-
13
-
14
-
15
-
16
-
17
-
18
-
19
-
20
-
21
-
22
-
23
-
24
-
25
-
26
-
27
-
28
-
29
-
30
-
31
-
32
-
33
-
34
-
35
-
36
-
37
-
38
-
39
-
40
-
41
-
42
-
43
-
44
-
45
-
46
-
47
-
48
-
49
-
50
-
51
-
52
-
53
-
54
-
 55
55 -
 56
56 -
 57
57 -
 58
58 -
 59
59 -
 60
60 -
 61
61 -
 62
62 -
 63
63 -
 64
64 -
 65
65 -
66
-
67
-
68
-
69
-
70
-
71
-
72
-
73
-
74
-
75
-
76
-
77
-
78
-
79
-
80
-
81
-
82
-
83
-
84
-
85
-
86
-
87
-
88
-
89
-
90
-
91
-
92
-
93
-
94
-
95
-
96
-
97
-
98
-
99
-
100
-
101
-
102
-
103
-
104
-
105
-
106
-
107
-
108
-
109
-
110
-
111
-
112
-
113
-
114
-
115
-
116
-
117
-
118
-
119
 |
 |
