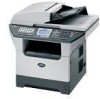
Brother International MFC 8870DW Quick Setup Guide - English - Page 32
Setup WLAN, WEP Key, Select, & OK, the MFL-Pro Software suite, continue - wireless setup
 |
UPC - 012502615101
View all Brother International MFC 8870DW manuals
Add to My Manuals
Save this manual to your list of manuals |
Page 32 highlights
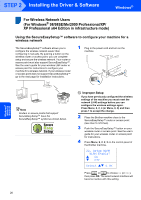
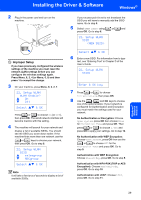
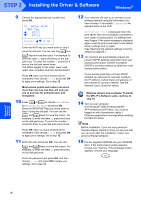
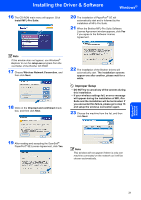
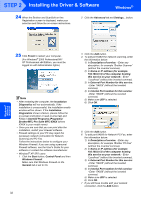
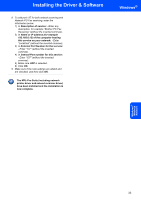
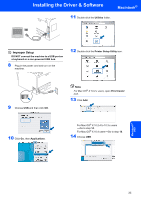
STEP 2 Installing the Driver & Software Windows® 9 Choose the appropriate key number and press OK. 22. Setup WLAN WEP Key a KEY1: b KEY2: Select ab & OK Enter the WEP key you wrote down in step 1 using the dial pad. You can use the and keys to move the cursor. For example, to enter the letter a, press the 2 key on the dial pad once. To enter the number 3, press the 3 key on the dial pad seven times. The letters appear in this order: lower case, upper case, numbers and then special letters. Press OK when you have entered all the characters, then choose 1.Yes and press OK to apply your settings. Go to step 12. Most access points and routers can store more than one key, but they will only use one at any time for authentication and encryption. 10 Press or to choose TKIP or AES for Encryption Type and press OK. Enter the WPA-PSK Pass you wrote down in step 1 using the dial pad. You can use the and keys to move the cursor. For example, to enter the letter a, press the 2 key on the dial pad once. To enter the number 3, press the 3 key on your dial pad seven times. Press OK when you have entered all the characters, then choose 1.Yes and press OK to apply your settings. Go to step 12. 11 Enter the user and press OK. You can use and keys to move the cursor. For example, to enter the letter a, press the 2 key on the dial pad once. Enter the password and press OK, and then choose 1.Yes and press OK to apply your settings. Go to step 12. 12 Your machine will now try to connect to your wireless network using the information you have entered. If successful, Connected will appear briefly on the LCD. Connection Error is displayed when the print server has not successfully connected to your router or access point. Try starting from step 3 again. If the same message is displayed again, reset the print server back to the default factory settings and try again. (See Restoring the network settings to factory default on page 55.) 13 The machine will automatically acquire the correct TCP/IP address information from your access point (router) if DHCP is enabled (DHCP is normally enabled as default for most access point routers). If your access point does not have DHCP enabled you will need to manually configure the IP address, subnet mask and gateway of the machine to suit your network. See the Network User's Guide for details. Wireless setup is now complete. To install the MFL-Pro Software suite, continue to step 14. 14 Turn on your computer. (For Windows® 2000 Professional/XP/ XP Professional x64 Edition, you must be logged on with Administrator rights.) Close any applications running before installing the MFL-Pro Suite. Note Before installation, if you are using personal firewall software, disable it. Once you are sure that you can print after the installation, restart your personal firewall software. 15 Put the supplied CD-ROM into your CD-ROM drive. If the model name screen appears, choose your machine. If the language screen appears, choose your language. Windows® Wireless Network 30
-
 1
1 -
2
-
3
-
4
-
5
-
6
-
7
-
8
-
9
-
10
-
11
-
12
-
13
-
14
-
15
-
16
-
17
-
18
-
19
-
20
-
21
-
22
-
23
-
24
-
25
-
26
-
 27
27 -
 28
28 -
 29
29 -
 30
30 -
 31
31 -
 32
32 -
 33
33 -
 34
34 -
 35
35 -
 36
36 -
 37
37 -
38
-
39
-
40
-
41
-
42
-
43
-
44
-
45
-
46
-
47
-
48
-
49
-
50
-
51
-
52
-
53
-
54
-
55
-
56
-
57
-
58
-
59
-
60
 |
 |
