Canon BJ-200EX User Manual
Canon BJ-200EX Manual
 |
View all Canon BJ-200EX manuals
Add to My Manuals
Save this manual to your list of manuals |
Canon BJ-200EX manual content summary:
- Canon BJ-200EX | User Manual - Page 1
BJ-200ex USER'S MANUAL Canon - Canon BJ-200EX | User Manual - Page 2
Installing the Ink Cartridge Turning On the Printer Cleaning the Print Head Loading a Stack of Paper Printing a Test Pattern Installing a Printer Driver Installing the Windows Printer Driver and Visual Guide Using the Visual Guide Using the BJ-200ex Windows Driver Installing the Canon TrueType - Canon BJ-200EX | User Manual - Page 3
Ink Installing the Ink Cartridge Cleaning the Print Head Storing the Ink Cartridges Ink Cartridges Continually Run Out of Ink Transporting the Printer Troubleshooting Check List Error Light Problems Operational Problems Printing Problems Paper Loading Problems Print Quality Problems Windows Problems - Canon BJ-200EX | User Manual - Page 4
A Appendix B Glossary DIP Switch Setting BJ-10 Mode Epson LQ Mode Changing a DIP Switch Setting Specifications Application Notes Printing Envelopes in Microsoft Windows AmiPro 3.0 Microsoft Publisher Microsoft Word for Windows WordPerfect Works 3.0 for Windows Index editiing by Jason Plank and - Canon BJ-200EX | User Manual - Page 5
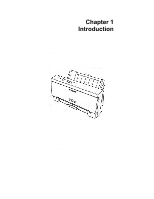
Chapter 1 Introduction Congratulations on your purchase of the Canon BJ-200ex Bubble Jet Printer. We appreciate your choosing this printer to meet your printing needs. The BJ-200ex offers excellent print quality, fast print speed, and trouble-free operation with the convenience of compact size and - Canon BJ-200EX | User Manual - Page 6
or 15 envelopes. Software Compatibility Two resident printer control modes enable the printer to work with a wide variety of software applications: § BJ-10 mode emulates the IBM Proprinter X24E printer. § Epson LQ mode emulates the Epson LQ-510 printer. Three Print Modes/Speeds The print modes allow - Canon BJ-200EX | User Manual - Page 7
. Supplies are offered at the manufacturer's suggested list price. Ink Cartridge Canon offers the following ink cartridge: § Canon Ink Cartridge BC-02 (black) Print Media Canon manufactures the following print medium for this bubble jet printer. Canon Transparencies Q07-001-M1 These overhead clear - Canon BJ-200EX | User Manual - Page 8
and holidays. If you seem to have an operational problem, try to solve it by referring to the information in Chapter 7, Troubleshooting, or by using your Visual Guide. If you cannot quickly resume normal operations, contact Canon's experienced support personnel at the help desk number above. Fax - Canon BJ-200EX | User Manual - Page 9
to the information in Chapter 7, Troubleshooting. If you cannot solve the problem, contact Canon's support personnel at the help desk. If you fell that your BJ-200ex Bubble Jet Printer needs servicing, call the Canon help desk to locate the Canon Authorized Service Facility (ASF) nearest you or - Canon BJ-200EX | User Manual - Page 10
. It also describes how to load a stack of paper and print a self test followed by installing the printer driver and managing your printer's features. If you already set up your printer using the Quick Start Guide, you may want to look through this chapter to find any additional information it - Canon BJ-200EX | User Manual - Page 11
Documentation and Diskettes: User's Manual (this manual) Quick Start Guide Product Warranty Card Registration Card Canon Windows Driver and Visual Guide and WordPerfect™ Drivers diskettes (two diskettes in an envelope) TrueType Font Pack (diskette in envelope) If your printer was damaged in shipping - Canon BJ-200EX | User Manual - Page 12
the paper guide to the left. 2. Remove the shipping tape inside the printer. § Open the front cover by grasping the sides of the cover and pulling it down. § Remove the tape that secures the ink cartridge holder. § Make sure the paper thickness lever is set to the left for printing on normal paper - Canon BJ-200EX | User Manual - Page 13
guidelines: § Choose a flat, sturdy surface with enough space for the paper to flow freely into and out of the printer. Angled print stands may cause quality and reliability problems. § Fully extend the paper rest and paper output tray to ensure enough space is available for proper operation. The - Canon BJ-200EX | User Manual - Page 14
install the printer printer clean. Dust accumulation may prevent the printer from functioning properly. § To protect the printer from damage, hold both sides when you move it. § While the BJ-200ex Bubble Jet Printer is small and compact, it is not designed for mobile printing. Examining the Printer - Canon BJ-200EX | User Manual - Page 15
Operator Panel - Canon BJ-200EX | User Manual - Page 16
From the Back - Canon BJ-200EX | User Manual - Page 17
Hz 0.5A. This is the standard for an electrical outlet in the United States or Canada. § Use only the power cord that came with the printer. Using a longer cord or an extension cord may result in reduced voltage or malfunctions. § If you smell a peculiar odor or see smoke, unplug the power - Canon BJ-200EX | User Manual - Page 18
power cord into a properly grounded AC outlet. Connecting Your Printer to the Computer Your printer has an 8-bit parallel interface port, which allows you to use it with IBM PCs and compatible computers. You need to purchase a Centronics-compatible parallel interface cable from your dealer. Ask your - Canon BJ-200EX | User Manual - Page 19
) in HS mode. The actual amount varies according to the print density of a page. If you print a lot of graphics, you may need to change cartridges more often. NOTE: Canon makes numerous ink cartridges; the BC-02 is designed specifically for the BJ-200ex and is the only one you should use. Using the - Canon BJ-200EX | User Manual - Page 20
Take the ink cartridge out of its protective packaging. NOTE: Install the ink cartridge immediately after removing it from its protective packaging. 3. Slide off the orange protective cap from the print head and remove the orange tape. 4. Locate the cartridge holder on the right side of the printer. - Canon BJ-200EX | User Manual - Page 21
5. Lift the green lock lever on the cartridge holder. 6. Fit the ink cartridge over the yellow mounting base with the print head facing down. § When installed correctly, the label on the cartridge will appear upside down. - Canon BJ-200EX | User Manual - Page 22
the circuit card inside the cartridge holder. Do not move the ink cartridge after installing it. Moving the ink cartridge to the left and leaving it there may uncap the print head and cause it to dry out. 9. Close the front cover. When you turn off the printer, the ink cartridge moves to the home - Canon BJ-200EX | User Manual - Page 23
you power off the printer via a power strip while it is printing. § If you move the ink cartridge from the home position. If, after installing the new ink cartridge, the printer seems to be printing but no ink appears, stop the print operation. Remove and replace the ink cartridge making sure it is - Canon BJ-200EX | User Manual - Page 24
Cleaning the Print Head The print head on a new ink cartridge needs to be cleaned to ensure the best possible print quality. The printer automatically cleans the print head when you follow these steps: 1. Make sure the printer is turned on and on-line. 2. Press the ON LINE and PRINT MODE buttons at - Canon BJ-200EX | User Manual - Page 25
2. Pull the paper support up until it stops and pull out the paper output tray. 3. Fan the paper. § For best results, fan the paper before loading it. § Always fan a stack of paper along the edge that will feed into the printer first. - Canon BJ-200EX | User Manual - Page 26
4. Slide the stack of paper into the sheet feeder until it stops. § Align the edge of the paper with the right edge of the sheet feeder. § Secure the stack with the paper guide. Do not force the paper into the printer. Printing a Test Pattern - Canon BJ-200EX | User Manual - Page 27
seconds apart. The printer starts to print Demo Print 1: 4. To stop printing the Demo Print, press the ON LINE button for one second. § The printer stops printing, ejects the page, and goes back on-line. Installing a Printer Driver Before you can print documents from your software applications, you - Canon BJ-200EX | User Manual - Page 28
Using the Printer With Your Software, for details. Installing the Windows Printer Driver and Visual Guide The Canon Windows Driver and Visual Guide diskettes contain a setup program called SETUP.EXE. This program automatically installs both the Canon BJ-200ex printer driver for Windows 3.1 and the - Canon BJ-200EX | User Manual - Page 29
click of your mouse. If, for some reason, your computer and /or Visual Guide are not available, you can look up the information you need in the User's Manual. Using the BJ-200ex Windows Driver When you first install the Canon BJ-200ex driver for Windows, it's a good idea to run the Setup program and - Canon BJ-200EX | User Manual - Page 30
that are unique to the current print job. This screen shows the default settings for the BJ-200ex. see Chapter 4, Using the Printer With Your Software, for details on selecting other printer settings for the BJ-200ex printer driver for Windows. Installing the Canon TrueType Fonts for Microsoft - Canon BJ-200EX | User Manual - Page 31
of the BJ-200ex printer with your software application, with the printer's operator panel, or with the printer's DIP switches. Each method allows you to select some or all of the printing features that control the appearance of your printed documents. Software Applications Your software applications - Canon BJ-200EX | User Manual - Page 32
sets, and so on. See Chapter 8, Customizing the Printer, for details. Line Printers Versus Page Printers Line Printers Your Canon BJ-200ex Bubble Jet printer is an example of a line printer. Line printers, sometimes called band printers, process and print information one line (band) at a time. The - Canon BJ-200EX | User Manual - Page 33
you can print on your BJ-200ex Bubble Jet Printer. Page Printers and Processing With page printers, the computer and the printer share the processing printer. The printer processes this code into the specific printing instructions on where to put each dot on the page. This means that the printer - Canon BJ-200EX | User Manual - Page 34
you can to do assure the best possible performance of your bubble jet printer is to select the correct paper. Your printer produces letter quality output on most plain papers; it does not require special ink jet papers. However, the print quality varies with different paper types. Be sure to test - Canon BJ-200EX | User Manual - Page 35
page is very high, light paperstock may curl slightly due to the large amount of ink. If you need to print heavy graphics, try printing on heavier stock. § Do not use thicker paper than meets the specifications for this printer. Printing with a paper that is thick enough to come in contact with the - Canon BJ-200EX | User Manual - Page 36
thick paper or envelopes. If you are printing documents with high density graphics or ink and the printed pages are smudges, try setting the paper thickness lever to the right position. This unit moves the print head unit further from the paper. Print quality may diminish slightly, but the smudges - Canon BJ-200EX | User Manual - Page 37
position is for automatic loading of envelopes and for manually feeding any type of print media. § Do not move the paper selection lever after loading paper in the sheet feeder. § This lever is different from the lever on a typewriter or dot matrix printer. You need not pull it forward to load paper - Canon BJ-200EX | User Manual - Page 38
the paper. Printer Settings for Various Print Media The following table summarizes the printer settings for the various types of print media: Paper or Manual Automatic or Manual If you have a problem with the paper misfeeding, see Chapter 7, Troubleshooting, for possible solutions. Printing - Canon BJ-200EX | User Manual - Page 39
displays the Canon BJ200ex Setup dialog box in which you can define all your printer settings. See Chapter 4, Using the Printer With Your Software, for complete details on the printer settings you select using the Windows printer driver. § In Microsoft Word for MS-DOS, you canselect Print from the - Canon BJ-200EX | User Manual - Page 40
2. Make sure the paper selction lever is set to the back position. 3. Extend the paper support and the paper output tray. § Pull the paper support up until it stops. The paper support keeps paper straight and limits the possibility of jams. § Extend the paper output tray. - Canon BJ-200EX | User Manual - Page 41
. 5. Slide the stack of paper into the printer until it stops. § Align the edge of the paper with the right edge of the sheet feeder. § Insert the paper so that the side you want to print on is facing you. If you are using a preprinted stock, such as letterhead, insert the top - Canon BJ-200EX | User Manual - Page 42
Do not force the paper into the printer. 6. Adjust the paper guide to the stack of paper. § This keeps the paper feeding straight into the printer and reduces skewing. § Be sure there is no gap between the paper guide and the edge of the stack of paper. - Canon BJ-200EX | User Manual - Page 43
on the inside of the printer) may become inked if you print data beyond the width of the page. If this happens, clean the platen with a soft cloth. (For details on cleaning the platen, see Chapter 6, Maintaining the Printer. § Depending on the density of your printed pages, the ink may need time to - Canon BJ-200EX | User Manual - Page 44
the stack of paper and the paper guide nor the right edge of the sheet feeder. Printing Single Sheets When you want to print a single page or thick paper, you can manually feed single sheets of paper. Specifying Manual Feed In the Windows driver, you must select Manual Feed for the Paper Source. If - Canon BJ-200EX | User Manual - Page 45
2. Open the top cover and check the paper thickness lever. § If you are manually feeding thick paper or transparencies, set the paper thickness lever to the right. 3. Set the paper selection lever to the front. - Canon BJ-200EX | User Manual - Page 46
the paper support and the paper output tray. 5. Insert the single sheet. § Slide in the paper until it stops inside the sheet feeder and hold it for about two seconds. § Align the sheet with the right edge of the sheet feeder. § Adjust the paper guide to the sheet. § The printer automatically loads - Canon BJ-200EX | User Manual - Page 47
Start your print operation. § If you are using Windows, you must select Manual Feed using the BJ-200ex printer driver for the printer to accept manually fed paper. § After printing on thick paper or envelopes, set the paper thickness lever (inside the printer) to the left before printing on normal - Canon BJ-200EX | User Manual - Page 48
. For example, if you are using Windows, you can specify the Paper Size, Media Type, Paper Source, Print Selection, and Print Quality from within the printer driver. Once your software and driver are ready to print, you can set up the printer for auto feed or manual feed. Both methods are described - Canon BJ-200EX | User Manual - Page 49
sheet feeder; however, Canon cannot guarantee consistent performance BJ-200ex printer driver for Windows, change the Paper Size setting to Envelope. Check your software to see if it prints envelopes in portrait or landscape orientation. It's a good idea to print on a sheet of paper before printing - Canon BJ-200EX | User Manual - Page 50
or thick paper. § Selecting envelope mode cancels reduction mode (if set). Preparing the Printer When you are ready to print on envelopes, follow these steps to stack envelopes in the sheet feeder. (You can also manually feed envelopes one at a time.) 1. Set the green paper thickness lever to the - Canon BJ-200EX | User Manual - Page 51
3. Move the paper guide to the left to match the width of the envelopes. 4. Extend the paper support and the paper output tray. 5. Prepare the envelopes. § Arrange the stack of envelopes on a firm surface and press down firmly on the edges to make - Canon BJ-200EX | User Manual - Page 52
7. Adjust the paper guide to the stack of envelopes. When printing on COM10 envelopes, move the paper guide all the way to the left. Depending on the size and shape of your interface connector, the paper guide may touch it. If this causes the envelopes to misfeed, use an interface cable with a - Canon BJ-200EX | User Manual - Page 53
to set the printer back on-line. 4. In your Windows driver, change the Media Size setting back to 8.5 x 11 inches or to the paper size you are using. Printing on Legal-size Paper You can print on legal-size paper by selecting a page size of 8.5 x 14 from within your software application or from - Canon BJ-200EX | User Manual - Page 54
). When printing on legal-size paper, do not extend the paper output tray: Remove each sheet as it is printed. Printing in Landscape Orientation The BJ-200ex Bubble Jet Printer does not have built-in landscape fonts. However, you can print in landscape orientation through the Windows environment. - Canon BJ-200EX | User Manual - Page 55
Adobe Type Manager Bitstream Facelift for Windows The Publishers Power Pack TrueType Font Packs Many other graphics software packages offer landscape printing. Call your specific software manufacturer to see if they offer landscape printing capabilities. Printing the Test Patterns There are three - Canon BJ-200EX | User Manual - Page 56
the test patterns. If you attempt to print on a smaller sheet, ink will get on the platen. If this happens, see Chapter 6, Maintaining the Printer, for a description of how to clean the platen. Self Test You can print the Self Test in both printer control modes: BJ-10 mode or Epson LQ mode. The - Canon BJ-200EX | User Manual - Page 57
In Epson LQ mode, the self Test looks like this: Font List You can print this sample in both printer control modes: BJ-10 mode or Epson LQ mode. The printer prints all characters in the available print styles and pitches. Starting To start the Font List, follow these steps: 1. Press the POWER - Canon BJ-200EX | User Manual - Page 58
, the pattern looks like this: Demo Prints 1 and 2 You can print these samples in both printer control modes:BJ-10 mode or Epson LQ mode. Demo Print 1 shows normal mode and Demo Print 2 shows Smoothing mode. The Demo Prints describe a few of the printer's features in different languages. Starting - Canon BJ-200EX | User Manual - Page 59
, and press the POWER button until the beeper sounds twice. § The two beeps are approximately three seconds apart. § The printer starts to print Demo Print 1. 3. To start Demo Print 2: press and hold the ON LINE button, and press the POWER button until the beeper sounds three times. § § Stopping - Canon BJ-200EX | User Manual - Page 60
§ The ON LINE light will go off; the printer will stop printing and go off-line. 2. To start printing again, press the ON LINE button. 3. If data remains in the print buffer, the ON LINE light blinks. § To print the data, press the ON LINE button to set the printer off-line and then press the FF - Canon BJ-200EX | User Manual - Page 61
you are using by selecting the printer driver that corresponds to your printer. Canon provides a BJ-200ex printer driver for Microsoft Windows. The easiest way to use your printer is to install the Windows driver and perform your print operations through the Windows environment. If you are using - Canon BJ-200EX | User Manual - Page 62
If you are not using Windows, see the section Setting Up MS-DOS Software Applications (later in this chapter) for information on how to install another printer driver and select a printer control mode. Printer Setup Within Windows After you install the Canon BJ-200ex printer driver, you can run the - Canon BJ-200EX | User Manual - Page 63
Canon BJ-200ex setup dialog box, and then click on the OK button to close the Print Setup dialog box. Selecting Printing Options This section describes the printing options available to you through the BJ-200ex printer driver (inside the printer) is set to the right. If you select User Defined Size, - Canon BJ-200EX | User Manual - Page 64
driver changes printer modes. You can experiment with different settings to see the results you can achieve on different types of media. You may find that you can produce higher quality printing on plain paper using the Transparency mode.Because each situation is different, Canon cannot guarantee - Canon BJ-200EX | User Manual - Page 65
feed, it is a good idea to turn off the Print Manager in the Printers dialog box. If you are feeding paper manually and using the spooler, the printer goes off-line before printing each page to allow you to insert paper. When you select Manual Feed, be sure to set the paper selection lever on the - Canon BJ-200EX | User Manual - Page 66
of printing on the page: Other selections § Click on Options to access the special options provided by the BJ-200ex printer driver for Windows. your printer settings. Special Options The BJ-200ex printer driver for Windows provides several special options. From the Canon BJ-200ex Setup dialog - Canon BJ-200EX | User Manual - Page 67
graphics or photographic images. Using diffusion slows the application release time because a larger, more complex page is generated by the software. This type of page requires more time to calculate as well as send to the printer. However, what you lose in print speed may be gained in quality. - Canon BJ-200EX | User Manual - Page 68
Refer to your program's documentation for the exact printing procedure. 1. Start the program you used to create the document, and open the document you want to print. 2. Choose Printer Setup from the File menu. 3. Select the Canon BJ-200ex as your printer and select Setup. 4. Make any adjustments as - Canon BJ-200EX | User Manual - Page 69
you are feeding paper manually and using the spooler, the printer goes off-line before printing each page to allow you to insert paper. Ways to Improve Print speed in Windows To improve printing speed, you can try the following: § Turn off the Print Manager in the Windows Control Panel This avoids - Canon BJ-200EX | User Manual - Page 70
able to prepare the print file faster. Using the Windows Print Manager The Print Manager is part of the Windows operating system and controls the printing of your files. Background Printing When the Print Manager is active, the print file that your application and printer driver create is not sent - Canon BJ-200EX | User Manual - Page 71
you are not using Windows, follow the guidelines in this section for setting up our applications for use with the Bubble Jet Printer BJ-200ex. If you installed the Canon BJ200ex Windows printer driver as described in the previous section and will be printing only under Windows, you can ignore this - Canon BJ-200EX | User Manual - Page 72
same operating capabilities as the Bubble Jet Printer BJ-200ex. Software developers continuously create printer drivers. If your application software does not list a Canon BJ-200ex driver, call your software application's technical support line and ask if a BJ200ex driver is available. If they are - Canon BJ-200EX | User Manual - Page 73
, select LQ mode if Epson drivers are available. If you plan to print both text and graphics, select BJ-10 mode. If you will be printing in Windows, use the BJ-200ex printer driver for all your printing operations (text and graphics). The BJ200ex Window driver prints all text graphically. The - Canon BJ-200EX | User Manual - Page 74
Bubble Jet Printer BJ-200ex driver for WordPerfect, version 5.1 or 6.0, for MS-DOS. These instructions assume you have installed WordPerfect and are familiar with using it. 1. Make sure your computer is turned on. 2. Make a backup copy of the diskette containing the Canon BJ- 200ex printer drivers - Canon BJ-200EX | User Manual - Page 75
BJ-200ex driver is highlighted; type 1 to select the driver. 13. Choose 7 to initialize the printer. 14. At the Print Option menu, make sure the selected printer is BJ- 200ex. Then press F7 to save all selections. Software and Printer Compatibility Your software sends information and instructions - Canon BJ-200EX | User Manual - Page 76
in the printed copy. If they are, the application printer driver is overriding the commands. If you would like to receive a list of the control codes and ESCape sequences the printer recognizes, you can use Canon's toll-free fax retrieval system to request the BJ200ex Printer Command Summary - Canon BJ-200EX | User Manual - Page 77
application program does not perform these basic functions, you can control them using the printer's operator panel. You can also select specific printer functions, such as print mode selection and print head cleaning. Any setting you make with your softare application override settings mad with the - Canon BJ-200EX | User Manual - Page 78
use the PRINT MODE button to select the current print mode when the printer is off-line. The default selection is HQ mode. Pressing the PRINT MODE button toggles from HQ to HS mode. The HS and HQ lights indicate which mode is selected. The print mode may be overriden by your software application. - Canon BJ-200EX | User Manual - Page 79
will be less than in HQ mode. HS mode uses half the amount of ink as HQ mode. Selecting reduction mode cancel Smoothing mode (if set). Using the Reduction Modes The printer supports two reduction modes for printing spreadsheets and other wide documents on regular paper. In reduction mode, the - Canon BJ-200EX | User Manual - Page 80
reduction mode, the printer automatically sets the print dimensions as follows: Top margin: 0.12 inch Left margin: 0.85 inch Print width (max): MS-DOS applications only (not Windows applications). Windows applications have a fit-to-page feature that is not compatible with reduction mode. Before - Canon BJ-200EX | User Manual - Page 81
is in 2/3 reduction mode. § To set the printer in 1/2 reduction mode, press and hold the LF/FF button and press the PRINT MODE button again. The printer beeps three times. 4. Load paper and begin your print operation. This mode may be overridden by your software. To disable reduction mode, press and - Canon BJ-200EX | User Manual - Page 82
chapter covers the care and maintenance of your Canon Bubble Jet Printer BJ-200ex. This includes guidelines, cleaning the printer, replacing the ink cartridge, and transporting the printer. Printer Guidelines Follow these guidelines to avoid damage to your printer and harm to you or others: § Set - Canon BJ-200EX | User Manual - Page 83
surrounding area inside the printer. § Use a soft cloth to remove any ink mist or paper debris. § Do not use any oil or cleanser inside the printer. § When cleaning inside the printer, avoid the area near the print head on the ink cartridge. Do not touch the print head. Ink may leak out and cause - Canon BJ-200EX | User Manual - Page 84
The Bubble Jet Printer BJ-200ex was designed to be used exclusively with Canon ink cartridges. Other inks may damage the print head capping and cleaning devices in the printer. If you have problems that are caused by using third-party ink or ink cartridges, your warranty will be void. Ink Cartridge - Canon BJ-200EX | User Manual - Page 85
. For optimum printing results, use only the Canon BC-02 ink cartridge. Installing the Ink Cartridge Canon makes numerous ink cartridges; the BC-02 cartridge is designed specifically for the BJ-200ex Bubble Jet Printer and is the only one you should use. To install a new ink cartridge, follow these - Canon BJ-200EX | User Manual - Page 86
the orange protective cap from the print head and then remove the orange tape. Install the ink cartridge immediately after removing it from its protective packaging. 5. Fit the ink cartridge over the yellow mounting base with the print head facing down. § When installed correctly, the label on the - Canon BJ-200EX | User Manual - Page 87
easily into place. § If you hear snapping noises or feel any resistance as you press down on the lever, remove the ink cartridge and try again. 7. Be sure no gap exists between the ink cartridge and cartridge holder. § When secure, the ink cartridge makes contact with the circuit board inside the - Canon BJ-200EX | User Manual - Page 88
to turn off the printer. This ensures that the printer moves the print head to the home position and caps it. Cleaning the Print Head The print head on a new ink cartridge needs to be cleaned to ensure the best possible print quality. The printer automatically cleans the print head when you follow - Canon BJ-200EX | User Manual - Page 89
an ink cartridge immediately after opening its protective packaging. § Only clean the print head when you are having print quality problems. § Never unplug the printer or use a power strip to turn off the printer when the printer's power is turned on. Transporting the Printer While the Bubble Jet - Canon BJ-200EX | User Manual - Page 90
support to their original positions. 8. Repack the printer in its original packing materials. Do not remove the ink cartridge from the printer or ship an ink cartridge from which you have removed the protective cap. An opened ink cartridge that is not installed in the printer may leak, and the print - Canon BJ-200EX | User Manual - Page 91
, and HS lights are blinking Operational Problems No power reaching printer Data from computer in not printed Ink cartridge moves, ink does not appear Overall printing is slow from MS-DOS Overall printing is slow from Windows Printing Problems Data from computer printed, but is not what you expected - Canon BJ-200EX | User Manual - Page 92
Array Error occurs when Installing the Visual Guide Print Manager Problem Occurs In WordPerfect, the BOX prints but the text does not Clearing Paper Jams If you have a problem with your printer and you cannot resolve it by referring to the information in this chapter, contact the Canon help desk at - Canon BJ-200EX | User Manual - Page 93
, printer driver, print manager. The parallel port is disabled Check your computer's CMOS to see if the primary parallel in your computer's CMOS port is set to LPT1. (Your computer should have a setup memory. program that allows you to check the CMOS settings.) Ink cartridge The ink cartridge - Canon BJ-200EX | User Manual - Page 94
the Canon fax retrieval system on the screen. the type of printer and computer and request the BJ-200ex Printer Command being used. Summary. Printing beyond Paper may not be aligned correctly Make sure the paper is aligned correctly in the sheet edge of page. in sheet feeder. feeder. Software - Canon BJ-200EX | User Manual - Page 95
defined by your software so the paper is always between the print head unit and the platen. NOTE: If the print head unit does print on the platen, wipe it clean with a dry cloth. Also, feed a few sheets of paper through the printer to clean the ink off the platen. Printing DIP switch 3 may - Canon BJ-200EX | User Manual - Page 96
on line again. Any of the following paper loading problems may cause the paper to jam in the printer. See page 123 for complete instructions on how to clear a paper jam. Problem Cause Paper is loaded Paper may not be stacked skewed (printing is correctly in sheet feeder. skewed) Solution Make - Canon BJ-200EX | User Manual - Page 97
cartridge. If not, cartridge. replace the ink cartridge with a BC-02. Ink nozzles on the print head may Clean the print head. See Chapter 6, Maintaining the be clogged with dust. Printer, for details. Repeat cleaning if necessary. The ink cartridge may be installed Make sure the ink cartridge - Canon BJ-200EX | User Manual - Page 98
mode most suitable for your needs. smudged ink match your needs. When printing through the Canon BJ-200ex printer driver for Windows, select the suitable print mode from the printer driver dialog box. The print medium being used may Use only print media specified in Selecting Paper Types not - Canon BJ-200EX | User Manual - Page 99
LPT1.DOS. Printer driver may not be Make sure you have selected the Canon BJ-200ex setting in correct. the Printer dialog box or from the printer setting for your particular application. Print Manager may be Disable the Print Manager. causing problems. If the image prints correctly with the - Canon BJ-200EX | User Manual - Page 100
(see page 28). Control Array THREED.VBX file is error occurs when causing a conflict with installing the the new files. Visual Guide Print Manger Problems occur The drive that contains the SET TEMP directory may not have enough available space. If you are using MS-DOS 6.x or later, type - Canon BJ-200EX | User Manual - Page 101
disabled (5.1). 1. Select File 2. Select Preferences 3. Uncheck the Fast Graphic Printing option for the Windows Printer Driver. If you are in WordPerfect 5.2 for Windows, and the BOX prints but your text does not print, follow these steps: 1. Select File 2. Select Preferences 3. Check the - Canon BJ-200EX | User Manual - Page 102
HQ (or HS or SMOOTHING) lights come on and the print head moves to the home position. The printer is now ready for printing. If you are printing high density graphics when a paper jam occurs, feed at least two sheets of paper through the printer to clean the rollers. If the platen is soiled, wipe it - Canon BJ-200EX | User Manual - Page 103
features to meet most of your printing needs. With these settings, your printer emulates any Canon BJ printer and the IBM Proprinter X24E. This means you can use the printer with any software application that supports these printers. Make sure the printer's settings match the requirements of your - Canon BJ-200EX | User Manual - Page 104
KB Download: 0 KB Download: 41 KB BJ-10 mode Epson LQ mode Disabled Enabled DIP switch 1 Use this switch to change the horizontal print position If you are using a software application that assumes 66 lines will fit on each page, set this switch to ON. The printer will reduce the line spacing - Canon BJ-200EX | User Manual - Page 105
control mode is set by DIP switch 11 (OFF selects BJ-10 mode, ON selects Epson LQ mode). Automatic emulation mode is applicable for MS-DOS applications only. When you are using Windows, the BJ-200ex printer driver for Windows selects the appropriate control mode regardless of the settings of DIP - Canon BJ-200EX | User Manual - Page 106
KB. When using Windows, set DIP switches 10, 11 and 12 OFF to maximize the size of your input buffer (62 KB). § If the printer does not seem to be switching between BJ-10 and Epson LQ mode, disable this function and set DIP switch 11 to match your application's printer driver. § If you are - Canon BJ-200EX | User Manual - Page 107
). To see samples of the character sets available in Epson LQ mode, use Canon's toll-free fax retrieval system. Call the Canon help desk and request the fax retrieval system; then request the BJ-200ex Printer Command Summary. DIP switches 5, 6, 7 These switches allow you to select one of eight - Canon BJ-200EX | User Manual - Page 108
making your selections. The new DIP switch settings take effect when you turn on the printer. If you turn off or reset the printer, or if the printer receives the Set Initial Conditions command from a software program, the printer resets its functions to the settings defined by the DIP switches. - Canon BJ-200EX | User Manual - Page 109
the specifications of your printer. Printing Method Bubble jet ink on-demand Paper Handling Automatic feed Manual feed Sheet Feeder Type Plain paper Envelopes (Commercial number 10 or European DL) OHP film / transparency film (Canon #Q07-0001-M1 or 3M CG-3480) Paper Weight 17 to 24 lb (64 to 90 - Canon BJ-200EX | User Manual - Page 110
Horizontal a = 8.3 to 8.5 in (210 to 216 mm) b = 0.25 in (6.4 mm) -- Letter-size paper b = 3.4 mm (0.13 in) -- A4-size paper Vertical c = 11 to 14 in (279 to 356 mm) d = 0.125 in (3.18 mm) e = 0.3 in (7.6 mm) - Canon BJ-200EX | User Manual - Page 111
Envelopes: Horizontal a = 9.5 in -- Commercial number 10 a = 220 mm for DL size b = 0.25 in (6.4 mm) c = 1.24 in -- Commercial number 10 c = 10.4 mm for DL size Vertical d = 4.125 in -- Commercial number 10 d = 110 mm for DL size e = 0.67 in (17 mm) f = 1.0 in (25.4 mm) Reduction Mode U.S. paper - Canon BJ-200EX | User Manual - Page 112
- Canon BJ-200EX | User Manual - Page 113
Resident Printer Control Modes BJ-10 mode: IBM Proprinter X24E emulation Epson LQ mode: Epson LQ-510 emulation Line Feed Pitch BJ-10 mode: 1/6", 1/8", n/60", n/72", n/180", n/216", and n/360" Epson LQ mode: 1/6", 1/8", n/180", and n/360" (n: programmable) Printing Characters Typeface: BJ - Canon BJ-200EX | User Manual - Page 114
18 out of 36 (h) x 48 (v) dot matrix in HS mode Character Set: BJ-10 mode IBM Character Sets 1 and 2 and 3 (Code Page 437, 850) 15 cpi double-wide 7.5 cpi 60 cpl Proportional spacing PS Varies Graphic Image Print Data format: Vertical 8, 24, and/or 48-dot format Resolution: Horizontal - Canon BJ-200EX | User Manual - Page 115
fax retreival system. Call the Canon fax retrieval system at 1-800-526-4345; then request the BJ-200ex Interface Specifications Ink Cartridge Type: Ink color: Print head: Number of characters printed: Ink amount: BC-02 (single cartridge ink supply) Black 64 bubble jet nozzles Approx. 700,000 - Canon BJ-200EX | User Manual - Page 116
Appendix B Application Notes This appendix contains information on using specific software applications with your Canon BJ-200ex Bubble Jet Printer. Many popular applications are covered here. Although the software versions described may not be the latest or may not be the version you have, these - Canon BJ-200EX | User Manual - Page 117
print envelopes in Microsoft Publisher, follow these steps: 1. Start the Windows Control Panel. 2. Double click the printers icon. 3. Select the Canon BJ-200ex Bubble Jet Printer. 4. Set up the following options on the printer: Portrait, Envelope, and Manual choose Install. 5. In the Install - Canon BJ-200EX | User Manual - Page 118
. 8. After selecting all your options, choose OK. If you are using the Windows driver, you see this message: Windows printer driver did not accept the requested paper size. Document will print on paper size the printer did select. 9. Choose OK to print the envelope. If you are using the WordPerfect - Canon BJ-200EX | User Manual - Page 119
. 7. After selecting all your options, choose OK. If you are using the Windows driver, you see this message: Windows printer driver did not accept the requested paper size. Document will print on paper size the printer did select. 8. Choose OK to print the envelope. If you are using the WordPerfect
-
 1
1 -
 2
2 -
 3
3 -
 4
4 -
 5
5 -
 6
6 -
 7
7 -
8
-
9
-
10
-
11
-
12
-
13
-
14
-
15
-
16
-
17
-
18
-
19
-
20
-
21
-
22
-
23
-
24
-
25
-
26
-
27
-
28
-
29
-
30
-
31
-
32
-
33
-
34
-
35
-
36
-
37
-
38
-
39
-
40
-
41
-
42
-
43
-
44
-
45
-
46
-
47
-
48
-
49
-
50
-
51
-
52
-
53
-
54
-
55
-
56
-
57
-
58
-
59
-
60
-
61
-
62
-
63
-
64
-
65
-
66
-
67
-
68
-
69
-
70
-
71
-
72
-
73
-
74
-
75
-
76
-
77
-
78
-
79
-
80
-
81
-
82
-
83
-
84
-
85
-
86
-
87
-
88
-
89
-
90
-
91
-
92
-
93
-
94
-
95
-
96
-
97
-
98
-
99
-
100
-
101
-
102
-
103
-
104
-
105
-
106
-
107
-
108
-
109
-
110
-
111
-
112
-
113
-
114
-
115
-
116
-
117
-
118
-
119
 |
 |

BJ-200ex
USER’S
MANUAL
Canon