Canon BJ-200EX User Manual - Page 107
Changing a DIP Switch Setting, BJ-200ex Printer Command Summary.
 |
View all Canon BJ-200EX manuals
Add to My Manuals
Save this manual to your list of manuals |
Page 107 highlights
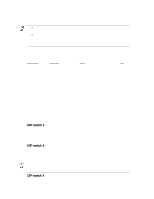
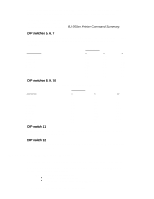
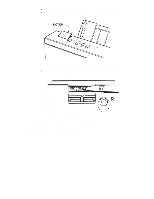
Graphics character set, which is the same as the MS-DOS code page 437 (this character set includes sysmbols, lines, corners, and European characters). To see samples of the character sets available in Epson LQ mode, use Canon's toll-free fax retrieval system. Call the Canon help desk and request the fax retrieval system; then request the BJ-200ex Printer Command Summary. DIP switches 5, 6, 7 These switches allow you to select one of eight international character sets. These character sets provide you with the characters and sy\mbols used in other languages. Character set USA United Kingdom Germany France Denmark Sweden Italy Spain DIP switches 5 6 7 OFF OFF OFF OFF OFF ON OFF ON OFF OFF ON ON ON OFF OFF ON OFF ON ON ON OFF ON ON ON DIP switches 8, 9, 10 These switches allow you to select one of eight font typefaces. Typeface Roman Sans serif Draft Courier Prestige Script Orator Orator-S DIP switches 8 9 10 OFF OFF OFF ON ON OFF ON ON ON OFF OFF ON OFF ON OFF OFF ON ON ON OFF OFF ON OFF ON ON ON OFF ON ON ON DIP switch 11 When this switch is OFF, the printer is in BJ-10 mode. When this switch is ON, the printer is in Epson LQ mode. DIP switch 12 This switch enables or disables automatic emulations switching mode. (See page 129 for a description.) Changing a DIP Switch Setting The DIP switches are located to the left of the operator panel under a small cover. A DIP switch is OFF when it is up, and ON when it is down. To change a DIP switch setting, follow these steps: 1. Make sure the printer is turned off. § The POWER light should be off. § If the power is on now, press the POWER button to turn off the printer. 2. Open the DIP switch cover on the top of the printer.
-
 1
1 -
2
-
3
-
4
-
5
-
6
-
7
-
8
-
9
-
10
-
11
-
12
-
13
-
14
-
15
-
16
-
17
-
18
-
19
-
20
-
21
-
22
-
23
-
24
-
25
-
26
-
27
-
28
-
29
-
30
-
31
-
32
-
33
-
34
-
35
-
36
-
37
-
38
-
39
-
40
-
41
-
42
-
43
-
44
-
45
-
46
-
47
-
48
-
49
-
50
-
51
-
52
-
53
-
54
-
55
-
56
-
57
-
58
-
59
-
60
-
61
-
62
-
63
-
64
-
65
-
66
-
67
-
68
-
69
-
70
-
71
-
72
-
73
-
74
-
75
-
76
-
77
-
78
-
79
-
80
-
81
-
82
-
83
-
84
-
85
-
86
-
87
-
88
-
89
-
90
-
91
-
92
-
93
-
94
-
95
-
96
-
97
-
98
-
99
-
100
-
101
-
 102
102 -
 103
103 -
 104
104 -
 105
105 -
 106
106 -
 107
107 -
 108
108 -
 109
109 -
 110
110 -
 111
111 -
 112
112 -
113
-
114
-
115
-
116
-
117
-
118
-
119
 |
 |
