Canon MP370 MultiPASS MP370/360 User's Guide - Page 28
Making Copies, Press [COPY].
 |
UPC - 013803037111
View all Canon MP370 manuals
Add to My Manuals
Save this manual to your list of manuals |
Page 28 highlights
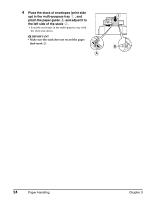
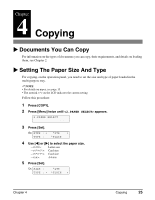
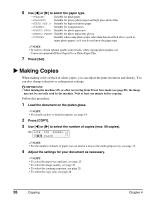
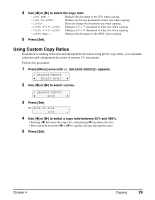
6 Use [W] or [X] to select the paper type. - : Suitable for plain paper. - : Suitable for glossy photo paper and high gloss photo film. - : Suitable for high resolution paper. - : Suitable for transparencies. - : Suitable for photo paper pro. - : Suitable for photo paper plus glossy. - : Suitable when using photo paper other than that described above (such as matte photo paper), or if you do not know the paper type. NOTE • In order to obtain optimal quality print results, when copying photographs, use Canon-recommended Photo Paper Pro or Photo Paper Plus. 7 Press [Set]. X Making Copies When making color or black & white copies, you can adjust the print resolution and density. You can also change reduction or enlargement settings. IMPORTANT • After turning the machine ON, or after recovering from Power Save mode (see page 88), the image may not be correctly read by the machine. Wait at least one minute before copying. Follow this procedure: 1 Load the document on the platen glass. NOTE • For details on how to load documents, see page 14. 2 Press [COPY]. 3 Use [W] or [X] to select the number of copies (max. 99 copies). 0 3 Ex: 100% LTR NORMAL PLAIN NOTE • For the number of sheets of paper you can load at a time in the multi-purpose tray, see page 15. 4 Adjust the settings for your document as necessary. NOTE • To select the paper size and type, see page 25. • To select the image quality, see page 27. • To select the scanning exposure, see page 28. • To select the copy ratio, see page 28. 26 Copying Chapter 4
-
 1
1 -
2
-
3
-
4
-
5
-
6
-
7
-
8
-
9
-
10
-
11
-
12
-
13
-
14
-
15
-
16
-
17
-
18
-
19
-
20
-
21
-
22
-
 23
23 -
 24
24 -
 25
25 -
 26
26 -
 27
27 -
 28
28 -
 29
29 -
 30
30 -
 31
31 -
 32
32 -
 33
33 -
34
-
35
-
36
-
37
-
38
-
39
-
40
-
41
-
42
-
43
-
44
-
45
-
46
-
47
-
48
-
49
-
50
-
51
-
52
-
53
-
54
-
55
-
56
-
57
-
58
-
59
-
60
-
61
-
62
-
63
-
64
-
65
-
66
-
67
-
68
-
69
-
70
-
71
-
72
-
73
-
74
-
75
-
76
-
77
-
78
-
79
-
80
-
81
-
82
-
83
-
84
-
85
-
86
-
87
-
88
-
89
-
90
-
91
-
92
-
93
-
94
-
95
-
96
-
97
-
98
-
99
-
100
-
101
-
102
-
103
-
104
-
105
-
106
-
107
-
108
-
109
-
110
-
111
-
112
-
113
-
114
-
115
-
116
-
117
-
118
-
119
-
120
-
121
-
122
-
123
-
124
-
125
-
126
-
127
-
128
-
129
-
130
-
131
-
132
-
133
-
134
-
135
-
136
-
137
-
138
-
139
-
140
 |
 |