Canon S630 Network S630 Quick Start Guide - Page 45
Printing on Canon Photo Paper Pro
 |
View all Canon S630 Network manuals
Add to My Manuals
Save this manual to your list of manuals |
Page 45 highlights
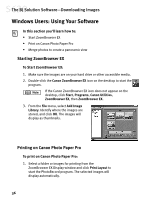
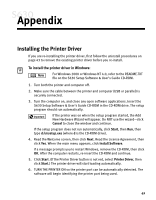
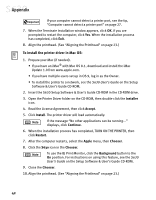
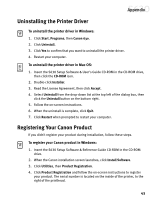
The BJ Solution Software-Downloading Images Printing on Canon Photo Paper Pro To print on Canon Photo Paper Pro: 1. Select the images you desire to print, then click Print Layout. The selected images will display automatically. 2. From the Browser window, you can drag images to change the layout, input descriptive text or captions, or add images. 3. Click Layout Options in the Print window. The Layout Options dialog box will open. 4. Under Layout Type, select Canon perforated paper. Canon Photo Paper Pro 4 x 6 will become the default media. Results will preview, then click OK. 5. The Paper Registration dialog box will open. Click OK. 6. In the Page Setup dialog box, select the Paper Size menu and select Custom 1 - 3. 7. Click Custom. The Custom dialog box will open. Type the Photo Paper Pro values found in the Paper Registration dialog box. Click Apply. Make sure to save your setting for future use. 8. Click OK in the Page Setup dialog box. The paper size is registered. Now that Canon Photo Paper Pro has been registered, you can simply select this custom paper size in the Page Setup dialog box for future use. 9. Click Print. The printer driver setup screen will open. 10. Load a sheet of Canon Photo Paper Pro into the paper tray. Click Print. 39
-
 1
1 -
2
-
3
-
4
-
5
-
6
-
7
-
8
-
9
-
10
-
11
-
12
-
13
-
14
-
15
-
16
-
17
-
18
-
19
-
20
-
21
-
22
-
23
-
24
-
25
-
26
-
27
-
28
-
29
-
30
-
31
-
32
-
33
-
34
-
35
-
36
-
37
-
38
-
39
-
 40
40 -
 41
41 -
 42
42 -
 43
43 -
 44
44 -
 45
45 -
 46
46 -
 47
47 -
 48
48 -
 49
49 -
 50
50 -
51
-
52
-
53
-
54
-
55
-
56
-
57
-
58
-
59
-
60
 |
 |
