Canon SELPHY DS810 DS810 Photo Printing Guide - Page 60
Printing with the Computer - software
 |
View all Canon SELPHY DS810 manuals
Add to My Manuals
Save this manual to your list of manuals |
Page 60 highlights
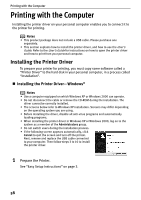
Printing with the Computer Printing with the Computer Installing the printer driver on your personal computer enables you to connect it to the printer for printing. Notes • This product package does not include a USB cable. Please purchase one separately. • This section explains how to install the printer driver, and how to use the User's Guide. Refer to the User's Guide for instructions on how to open the printer driver and how to print from your personal computer. Installing the Printer Driver To prepare your printer for printing, you must copy some software called a "Printer Driver" to the hard disk in your personal computer, in a process called "Installation". „ Installing the Printer Driver-Windows® Notes • Use a computer equipped on which Windows XP or Windows 2000 can operate. • Do not disconnect the cable or remove the CD-ROM during the installation. The driver cannot be correctly installed. • The screens below refer to Windows XP installation. Screens may differ depending on the operating system you are using. • Before installing the driver, disable all anti-virus programs and automatically loading programs. • When installing the printer driver in Windows XP or Windows 2000, log on to the system as a member of the Administrators group. • Do not switch users during the installation process. • If the following screen appears automatically, click Cancel to quit the screen and turn off the printer. Next, remove and replace the USB cable connected to your computer. Then follow steps 3 to 10 to install the printer driver. 1 Prepare the Printer. See "Easy Setup Instructions" on page 3. 58
-
 1
1 -
2
-
3
-
4
-
5
-
6
-
7
-
8
-
9
-
10
-
11
-
12
-
13
-
14
-
15
-
16
-
17
-
18
-
19
-
20
-
21
-
22
-
23
-
24
-
25
-
26
-
27
-
28
-
29
-
30
-
31
-
32
-
33
-
34
-
35
-
36
-
37
-
38
-
39
-
40
-
41
-
42
-
43
-
44
-
45
-
46
-
47
-
48
-
49
-
50
-
51
-
52
-
53
-
54
-
 55
55 -
 56
56 -
 57
57 -
 58
58 -
 59
59 -
 60
60 -
 61
61 -
 62
62 -
 63
63 -
 64
64 -
 65
65 -
66
-
67
-
68
-
69
-
70
-
71
-
72
-
73
-
74
-
75
-
76
-
77
-
78
-
79
-
80
-
81
-
82
-
83
-
84
-
85
-
86
-
87
-
88
-
89
-
90
-
91
-
92
-
93
-
94
-
95
-
96
 |
 |
