Canon SELPHY DS810 DS810 Photo Printing Guide - Page 81
Printed Surface is Scratched or Ink Blots
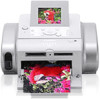 |
View all Canon SELPHY DS810 manuals
Add to My Manuals
Save this manual to your list of manuals |
Page 81 highlights
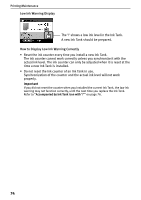
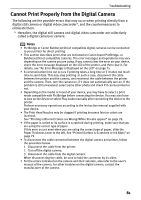
Troubleshooting Note When the color is different from what is displayed on the LCD or when it is not printed with your favorite color You can adjust the brightness, contrast, and color balance of photos for printing from the Settings screen. See "To Change Print Setting" on page 24. Printed Surface is Scratched or Ink Blots Possible Cause There are ink blots on the printed surface There are ink blots on the back side of the printed surface Try This Clean the Paper Feed Roller. See "Paper Does Not Feed Properly/Paper Jam" on page 77. If the protrusions inside the printer are stained, open the Cover of the printer and then wipe ink off the protrusions using a swab or the like as shown. Important Before cleaning, be sure to turned off the printer. Printed on the back side Follow the steps described below to clean the inside of the printer. of the sheet/The roller 1. Ensure that the printer is turned on. inside the printer is 2. Load the Glossy Photo Paper (4"×6"/ 101.6×152.4mm paper). extremely dirty 3. Select Bottom plate cleaning from the menu. • Press the Menu button. • Select Tool box and then press the OK button. • Select Maintenance and then press the OK button. • Select Bottom plate cleaning, and press the OK button. 4. Select Yes and press the OK button. Note If the problem remains after performing, repeat this procedure starting with step 1. If the problem remains, contact a Canon service representative. Important Check that your paper is loaded with the correct print side facing up. Inappropriate paper type Check to see if the paper you are printing on is too thick or curled. used See "Print Media to Avoid" on page 20. Note that smudging may occur at the top and bottom edges of the paper when using Borderless Printing. Note If this does not solve the problem, set the Paper Thickness Lever to the left. See "Paper Thickness Lever" on page 10. Return the Paper Thickness Lever to the right after printing. 79
-
 1
1 -
2
-
3
-
4
-
5
-
6
-
7
-
8
-
9
-
10
-
11
-
12
-
13
-
14
-
15
-
16
-
17
-
18
-
19
-
20
-
21
-
22
-
23
-
24
-
25
-
26
-
27
-
28
-
29
-
30
-
31
-
32
-
33
-
34
-
35
-
36
-
37
-
38
-
39
-
40
-
41
-
42
-
43
-
44
-
45
-
46
-
47
-
48
-
49
-
50
-
51
-
52
-
53
-
54
-
55
-
56
-
57
-
58
-
59
-
60
-
61
-
62
-
63
-
64
-
65
-
66
-
67
-
68
-
69
-
70
-
71
-
72
-
73
-
74
-
75
-
 76
76 -
 77
77 -
 78
78 -
 79
79 -
 80
80 -
 81
81 -
 82
82 -
 83
83 -
 84
84 -
 85
85 -
 86
86 -
87
-
88
-
89
-
90
-
91
-
92
-
93
-
94
-
95
-
96
 |
 |
