Canon imageCLASS MF5950dw imageCLASS MF5960dn/MF5950dw Basic Operation Guide - Page 142
Clearing Jams, Document Jams in the Feeder - troubleshooting
 |
View all Canon imageCLASS MF5950dw manuals
Add to My Manuals
Save this manual to your list of manuals |
Page 142 highlights
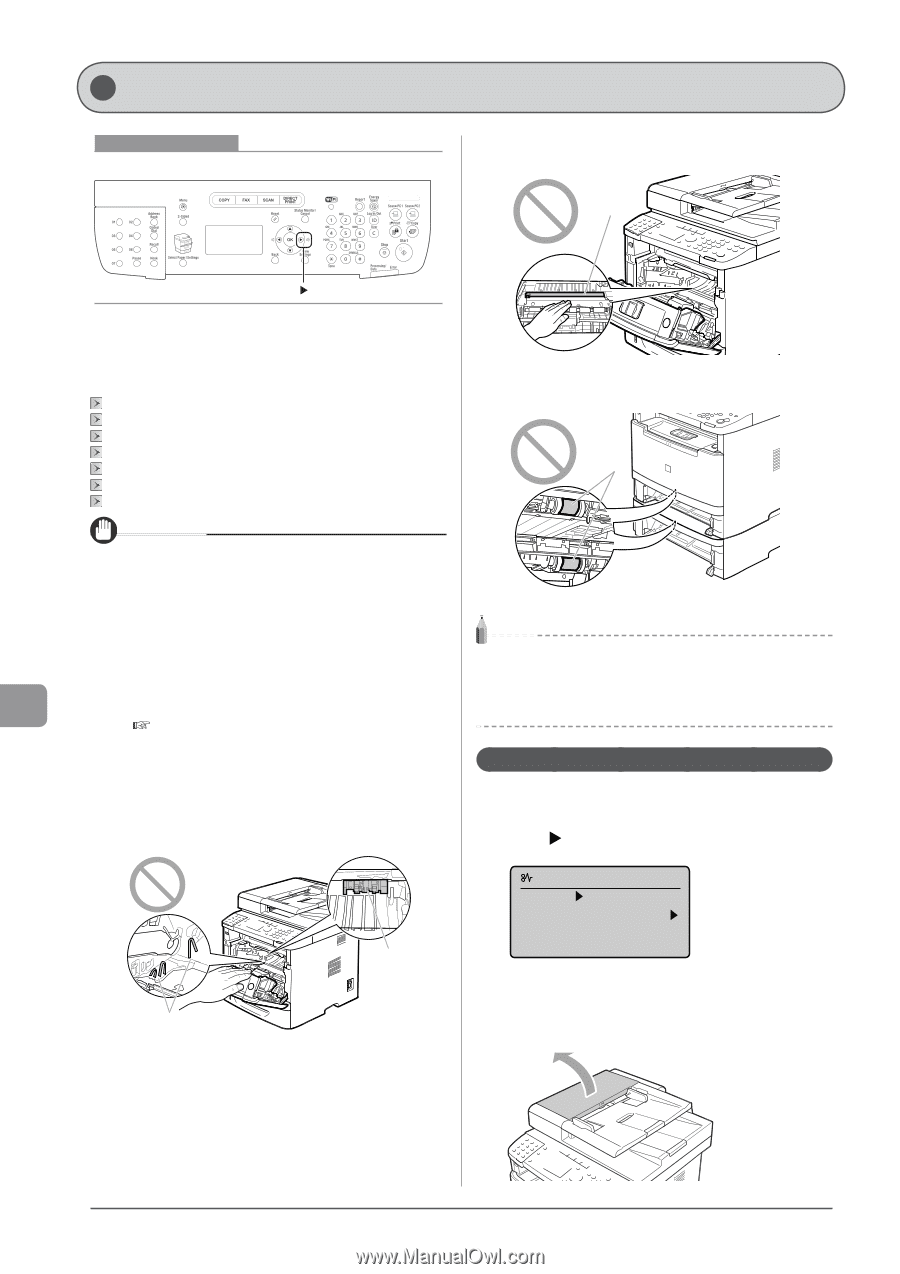
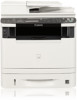
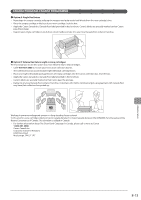
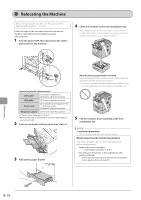
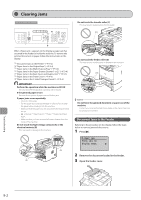
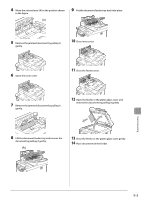
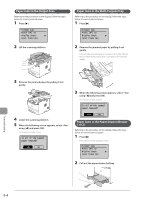
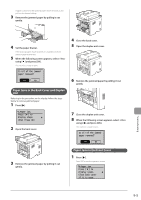
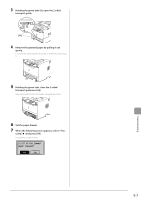
Clearing Jams Keys to be used for this operation Do not touch the transfer roller (C) This may result in deterioration of print quality. (C) When appears on the display, a paper jam has occurred in the feeder or inside the machine. To remove the jammed document or paper, follow the instructions on the display. "Document Jams in the Feeder" (→P. 9-2) "Paper Jams in the Output Area" (→P. 9-4) "Paper Jams in the Multi-Purpose Tray" (→P. 9-4) "Paper Jams in the Paper Drawer (Drawer 1 or 2)" (→P. 9-4) "Paper Jams in the Back Cover and Duplex Unit" (→P. 9-5) "Paper Jams in the Front Cover" (→P. 9-5) "Paper Jams in the 2-sided Transport Guide" (→P. 9-6) IMPORTANT Perform the operation while the machine is still ON If it is turned OFF, the data that is printing will be erased. If the jammed paper is torn Remove all torn pieces of paper to avoid further jams. If paper jams occur repeatedly • Check the followings. • Fan the paper stack and tap the edge on a flat surface to align the paper before loading it into the machine. • Make sure that the paper you are using meets the requirements for use. • e-Manual → Specifications → Paper → Supported Paper Types • Make sure that you have removed all scraps of paper from the inside of the machine. Do not touch the high-voltage contacts (A) or the electrical contacts (B) This may result in damage to the machine. (B) (A) Do not touch the feeder roller (D) This may result in malfunctions or damage to the machine. (D) NOTE Do not force the jammed document or paper out of the machine. Contact your local authorized Canon dealer or the Canon help line for assistance, if needed. Document Jams in the Feeder Referring to the procedure on the display, follow the steps below to remove jammed documents. 1 Press [ ]. Paper jam. Press [ ] to display steps. 2 Remove the document loaded in the feeder. 3 Open the feeder cover. Troubleshooting 9-2
-
 1
1 -
2
-
3
-
4
-
5
-
6
-
7
-
8
-
9
-
10
-
11
-
12
-
13
-
14
-
15
-
16
-
17
-
18
-
19
-
20
-
21
-
22
-
23
-
24
-
25
-
26
-
27
-
28
-
29
-
30
-
31
-
32
-
33
-
34
-
35
-
36
-
37
-
38
-
39
-
40
-
41
-
42
-
43
-
44
-
45
-
46
-
47
-
48
-
49
-
50
-
51
-
52
-
53
-
54
-
55
-
56
-
57
-
58
-
59
-
60
-
61
-
62
-
63
-
64
-
65
-
66
-
67
-
68
-
69
-
70
-
71
-
72
-
73
-
74
-
75
-
76
-
77
-
78
-
79
-
80
-
81
-
82
-
83
-
84
-
85
-
86
-
87
-
88
-
89
-
90
-
91
-
92
-
93
-
94
-
95
-
96
-
97
-
98
-
99
-
100
-
101
-
102
-
103
-
104
-
105
-
106
-
107
-
108
-
109
-
110
-
111
-
112
-
113
-
114
-
115
-
116
-
117
-
118
-
119
-
120
-
121
-
122
-
123
-
124
-
125
-
126
-
127
-
128
-
129
-
130
-
131
-
132
-
133
-
134
-
135
-
136
-
 137
137 -
 138
138 -
 139
139 -
 140
140 -
 141
141 -
 142
142 -
 143
143 -
 144
144 -
 145
145 -
 146
146 -
 147
147 -
148
-
149
-
150
-
151
-
152
-
153
-
154
-
155
-
156
-
157
-
158
-
159
-
160
-
161
-
162
-
163
-
164
-
165
-
166
-
167
-
168
-
169
-
170
-
171
-
172
-
173
-
174
-
175
-
176
 |
 |