Canon imageCLASS MF5950dw imageCLASS MF5960dn/MF5950dw Basic Operation Guide - Page 9
Printing from a Computer, Registering Destinations in the Address, Using the Fax Functions - toner
 |
View all Canon imageCLASS MF5950dw manuals
Add to My Manuals
Save this manual to your list of manuals |
Page 9 highlights
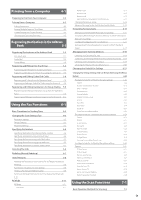
Printing from a Computer 4-1 Preparing to Print from Your Computer 4-2 Printing from a Computer 4-3 Scaling Documents 4-3 Printing Multiple Pages on One Sheet 4-3 1-sided Printing and 2-sided Printing 4-4 Checking and Canceling Print Jobs 4-5 Registering Destinations in the Address Book 5-1 Registering Destinations in the Address Book 5-2 One-touch keys 5-2 Coded dial 5-2 Group dialing 5-2 Registering and Editing One-Touch Keys 5-3 Registering and Editing from the Operation Panel 5-3 Registering and Editing One-Touch Keys using the Remote UI 5-5 Registering and Editing Coded Dial Codes 5-6 Registering and Editing from the Operation Panel 5-6 Registering and Editing a Coded Dial Code Using the Remote UI 5-8 Registering and Editing Destinations for Group Dialing 5-9 Registering and Editing a Destination Group from the Operation Panel 5-9 Registering and Editing a Destination Group Using the Remote UI 5-12 Using the Fax Functions 6-1 Basic Procedures for Sending Faxes 6-2 Changing the Scan Settings (Fax) 6-3 Resolution Settings 6-3 Density Settings 6-3 Sharpness Settings 6-3 Specifying Destinations 6-4 Specifying destinations by entering the fax number 6-4 Specifying destinations using one-touch keys 6-4 Specifying destinations using coded dial codes 6-4 Specifying destinations using group addresses 6-5 Specifying destinations using the address book 6-5 Canceling Fax Jobs 6-6 Redialing (Manual Redialing) 6-7 Useful Features 6-8 Notifying the Recipient of an Incoming Fax by Telephone (Manual Sending) 6-8 Push-button Telephone for Tone Dialing 6-8 Sending a Fax Abroad (Adding Pauses) 6-9 Sending to Multiple Destinations at a Time (Sequential Broadcast) 6-10 RX Mode 6-11 RX Mode 6-11 Auto mode 6-11 Fax/Tel mode 6-12 Answer mode 6-13 Manual mode 6-13 DRPD (Distinctive Ring Pattern Detection) mode 6-13 Changing the Receive Mode 6-14 Advanced Settings for the Fax/Tel Auto Switch Mode 6-14 Forwarding Fax Documents 6-15 Setting Document Transfer (Automatic Forwarding) 6-15 Forwarding Received Faxes Stored in Memory to Other Destinations (Manual Forwarding) 6-15 Configurating Operations for Transfer Errors 6-16 Re-fowarding/Printing/Deleting Documents in Which Transfer Is Failed 6-17 Managing Faxes Stored in Memory 6-18 Checking and Canceling Fax Jobs 6-18 Combining and Printing the Received Documents You Saved 6-18 Checking and Deleting Received Faxes 6-19 Checking the History of Received/Sent Faxes 6-20 Changing the Default Fax Settings 6-21 Changing Fax Settings (Settings that Can Be Specified Using the [Menu] Button) 6-22 The steps to take for configuring the send settings 6-22 Options 6-22 Register Unit Telephone Number 6-23 Select Line Type 6-23 Off-Hook Alarm 6-23 Change Defaults 6-23 Register Unit Name (Fax) 6-23 ECM TX 6-23 Pause Time 6-23 Auto Redial 6-24 Sender ID 6-24 Check Dial Tone Before Sending 6-24 The steps to take for configuring the receiving settings 6-24 Options 6-25 ECM RX 6-25 Incoming Ring 6-25 Remote RX 6-25 Auto RX Switch 6-25 2-Sided Printing 6-25 Reduce RX Size 6-26 RX Page Footer 6-26 Continue Printing When Toner Is Low 6-26 The steps to take for configuring the system settings 6-26 Options 6-27 TX Start Speed 6-27 RX Start Speed 6-27 Memory Lock Settings 6-27 Select Country/Region 6-27 Address Book PIN 6-27 Restrict New Destinations 6-28 Allow Fax Driver TX 6-28 Restrict History TX 6-28 Fax No. Confirmation Re-Entry 6-28 Restrict Sequential Broadcast 6-28 Using the Scan Functions 7-1 Basic Operation Methods for Scanning 7-2 ix
-
 1
1 -
2
-
3
-
 4
4 -
 5
5 -
 6
6 -
 7
7 -
 8
8 -
 9
9 -
 10
10 -
 11
11 -
 12
12 -
 13
13 -
 14
14 -
15
-
16
-
17
-
18
-
19
-
20
-
21
-
22
-
23
-
24
-
25
-
26
-
27
-
28
-
29
-
30
-
31
-
32
-
33
-
34
-
35
-
36
-
37
-
38
-
39
-
40
-
41
-
42
-
43
-
44
-
45
-
46
-
47
-
48
-
49
-
50
-
51
-
52
-
53
-
54
-
55
-
56
-
57
-
58
-
59
-
60
-
61
-
62
-
63
-
64
-
65
-
66
-
67
-
68
-
69
-
70
-
71
-
72
-
73
-
74
-
75
-
76
-
77
-
78
-
79
-
80
-
81
-
82
-
83
-
84
-
85
-
86
-
87
-
88
-
89
-
90
-
91
-
92
-
93
-
94
-
95
-
96
-
97
-
98
-
99
-
100
-
101
-
102
-
103
-
104
-
105
-
106
-
107
-
108
-
109
-
110
-
111
-
112
-
113
-
114
-
115
-
116
-
117
-
118
-
119
-
120
-
121
-
122
-
123
-
124
-
125
-
126
-
127
-
128
-
129
-
130
-
131
-
132
-
133
-
134
-
135
-
136
-
137
-
138
-
139
-
140
-
141
-
142
-
143
-
144
-
145
-
146
-
147
-
148
-
149
-
150
-
151
-
152
-
153
-
154
-
155
-
156
-
157
-
158
-
159
-
160
-
161
-
162
-
163
-
164
-
165
-
166
-
167
-
168
-
169
-
170
-
171
-
172
-
173
-
174
-
175
-
176
 |
 |
