Canon imageCLASS MF5950dw imageCLASS MF5960dn/MF5950dw Basic Operation Guide - Page 146
Paper Jams in the 2-sided Transport Guide, and open the roller cover.
 |
View all Canon imageCLASS MF5950dw manuals
Add to My Manuals
Save this manual to your list of manuals |
Page 146 highlights
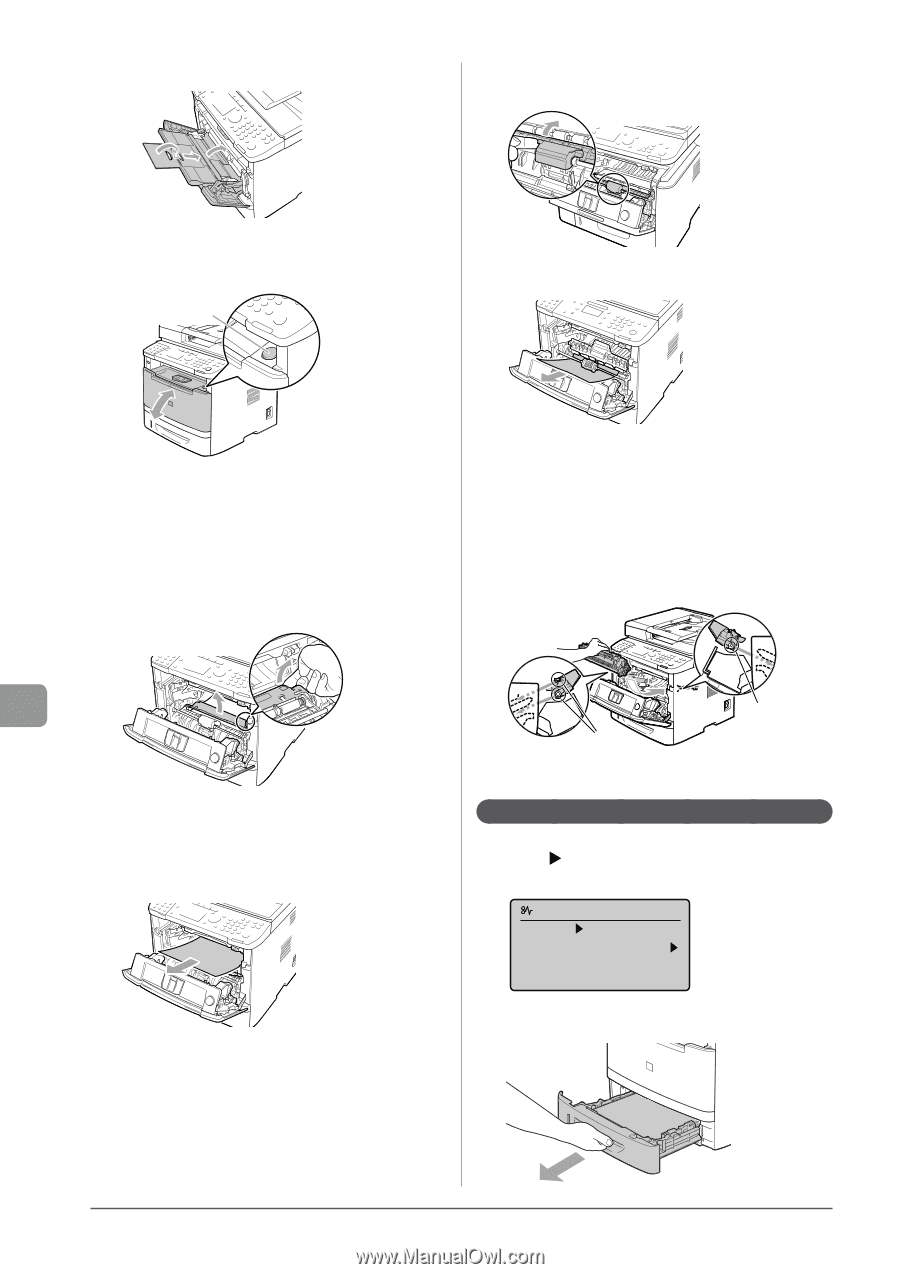
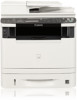
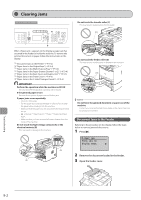
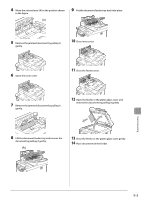
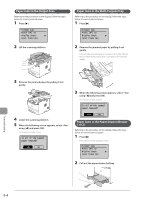
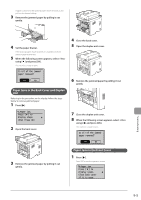
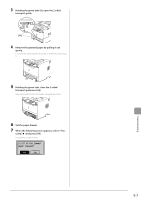
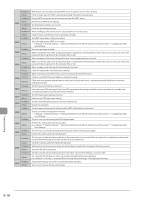
2 If you are using the multi-purpose tray, close it. 8 Hold the part where the green seal is attached and open the roller cover. 3 Open the front cover while holding down the open button. (A) 9 Remove the document by pulling it gently. 4 Remove the toner cartridge. Immediately place the toner cartridge into the original protective bag or wrap it with a thick cloth. 5 Hold the green tabs (A), and push the transport guide forward and down. Do not take your hands off the transport guide until it has reached the original position in Step 7. 10 Put the roller cover back in place gently. 11 Insert the toner cartridge. Fit (A) on both sides of the toner cartridge into the guides located on both sides of the machine and slide the toner cartridge into the machine until the toner cartridge comes to rest and is held against the back of the machine. 6 Remove the jammed paper by pulling it out gently. Remove it as horizontally as possible so that loose toner does not spill out. 7 Slowly move the transport guide to its original position. (A) (A) 12 Close the front cover. Paper Jams in the 2-sided Transport Guide 1 Press [ ]. Press [OK] to exit the operation screen. Paper jam. Press [ ] to display steps. (End: Press OK) 2 Pull out the paper drawer. Troubleshooting 9-6
-
 1
1 -
2
-
3
-
4
-
5
-
6
-
7
-
8
-
9
-
10
-
11
-
12
-
13
-
14
-
15
-
16
-
17
-
18
-
19
-
20
-
21
-
22
-
23
-
24
-
25
-
26
-
27
-
28
-
29
-
30
-
31
-
32
-
33
-
34
-
35
-
36
-
37
-
38
-
39
-
40
-
41
-
42
-
43
-
44
-
45
-
46
-
47
-
48
-
49
-
50
-
51
-
52
-
53
-
54
-
55
-
56
-
57
-
58
-
59
-
60
-
61
-
62
-
63
-
64
-
65
-
66
-
67
-
68
-
69
-
70
-
71
-
72
-
73
-
74
-
75
-
76
-
77
-
78
-
79
-
80
-
81
-
82
-
83
-
84
-
85
-
86
-
87
-
88
-
89
-
90
-
91
-
92
-
93
-
94
-
95
-
96
-
97
-
98
-
99
-
100
-
101
-
102
-
103
-
104
-
105
-
106
-
107
-
108
-
109
-
110
-
111
-
112
-
113
-
114
-
115
-
116
-
117
-
118
-
119
-
120
-
121
-
122
-
123
-
124
-
125
-
126
-
127
-
128
-
129
-
130
-
131
-
132
-
133
-
134
-
135
-
136
-
137
-
138
-
139
-
140
-
 141
141 -
 142
142 -
 143
143 -
 144
144 -
 145
145 -
 146
146 -
 147
147 -
 148
148 -
 149
149 -
 150
150 -
 151
151 -
152
-
153
-
154
-
155
-
156
-
157
-
158
-
159
-
160
-
161
-
162
-
163
-
164
-
165
-
166
-
167
-
168
-
169
-
170
-
171
-
172
-
173
-
174
-
175
-
176
 |
 |