Casio CTK 671 User Guide - Page 15
Attaching of the Score Stand, Rear Panel - manual
 |
UPC - 079767312459
View all Casio CTK 671 manuals
Add to My Manuals
Save this manual to your list of manuals |
Page 15 highlights
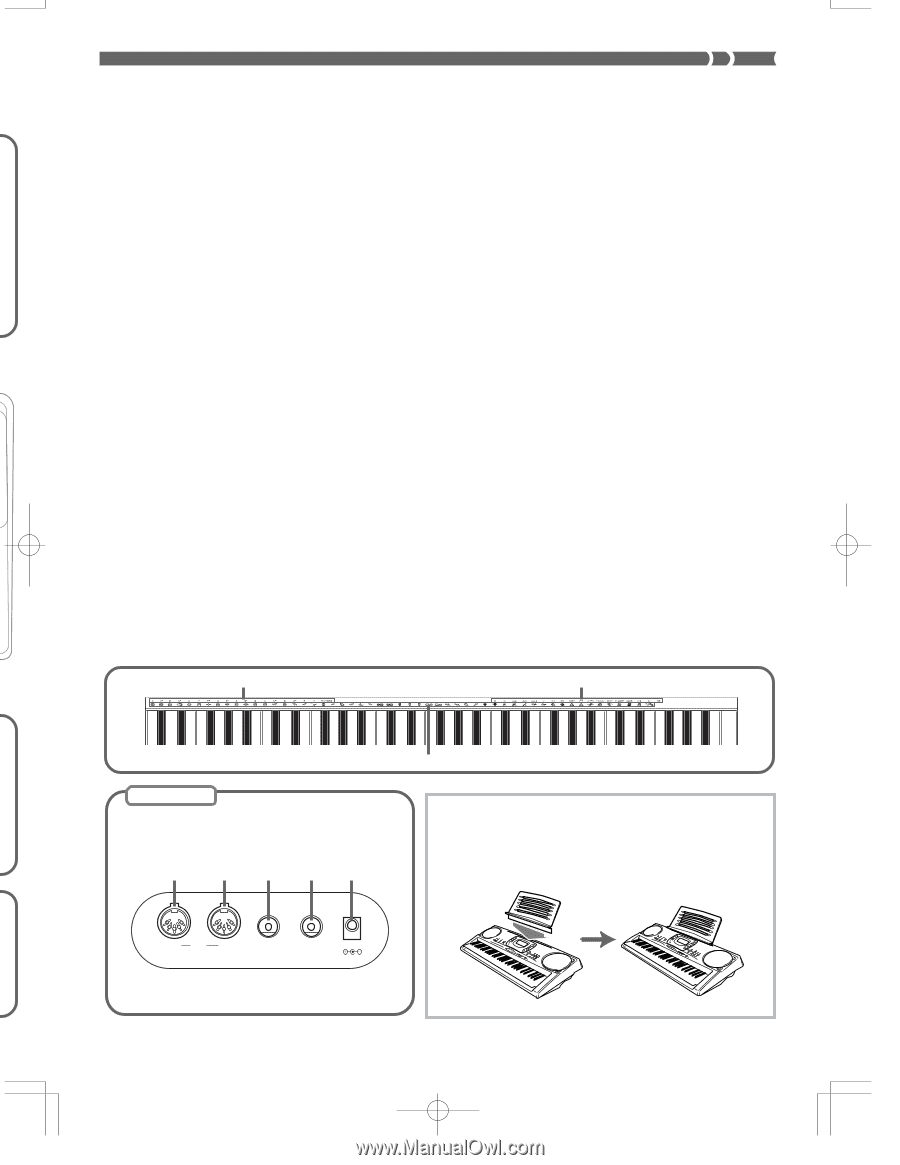
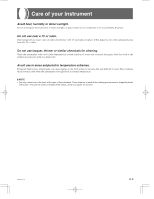
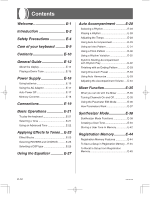
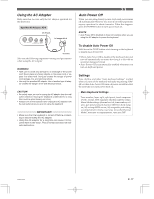
• Key, button, and other names are indicated in the text of this manual using bold type. 1 Speaker C Tone list H a) CHORD root names 2 POWER button D a) INTRO/ENDING 1/2 buttons b) Chord types name 3 Power indicator b) VARIATION/FILL-IN 1/2 buttons c) Percussion instrument list 4 MODE switch c) SYNCHRO/FILL-IN NEXT I MIDI OUT terminal 5 VOLUME slider button J MIDI IN terminal b 6 Rhythm list d) START/STOP button K SUSTAIN/ASSIGNABLE JACK 7 Equalizer list e) TEMPO buttons terminal 8 a) SONG MEMORY button E a) BANK button L PHONES/OUTPUT terminal b) ONE TOUCH PRESET button b) REGISTRATION buttons M DC 9V jack 9 a) EQUALIZER button c) STORE button b) REVERB button d) SONG MEMORY TRACK buttons c) CHORUS button F a) AUTO HARMONIZE button d) DSP button b) SPLIT button e) MIXER button c) LAYER button f) ACCOMP VOLUME button 0 Display d) TOUCH/TRANSPOSE/SETTING button A a) DEMO button G a) Number buttons b) SYNTH button c) ADVANCED TONE button d) TONE button e) RHYTHM button B a CURSOR buttons b) [̆] EXIT button • For input of numbers to change displayed settings. b) [+]/[-] buttons (YES/NO) • Negative values can be changed only by using [+] and [-] to increment and decrement the displayed value. c) [̄] ENTER button H a b Rear Panel I J K LM c * Attaching of the Score Stand Firmly press the music stand provided with the keyboard all the way into the groove on the top of the keyboard. OUT MIDI IN SUSTAIN/ PHONES/ ASSIGNABLE JACK OUTPUT DC 9V 703A-E-015A E-13
-
 1
1 -
2
-
3
-
4
-
5
-
6
-
7
-
8
-
9
-
 10
10 -
 11
11 -
 12
12 -
 13
13 -
 14
14 -
 15
15 -
 16
16 -
 17
17 -
 18
18 -
 19
19 -
 20
20 -
21
-
22
-
23
-
24
-
25
-
26
-
27
-
28
-
29
-
30
-
31
-
32
-
33
-
34
-
35
-
36
-
37
-
38
-
39
-
40
-
41
-
42
-
43
-
44
-
45
-
46
-
47
-
48
-
49
-
50
-
51
-
52
-
53
-
54
-
55
-
56
-
57
-
58
-
59
-
60
-
61
-
62
-
63
-
64
-
65
-
66
-
67
-
68
-
69
-
70
-
71
-
72
-
73
-
74
-
75
-
76
-
77
-
78
-
79
-
80
-
81
-
82
-
83
-
84
-
85
-
86
-
87
-
88
-
89
-
90
-
91
-
92
-
93
-
94
-
95
-
96
-
97
-
98
 |
 |