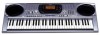
Casio CTK 671 User Guide - Page 37
Mixer Function
 |
UPC - 079767312459
View all Casio CTK 671 manuals
Add to My Manuals
Save this manual to your list of manuals |
Page 37 highlights
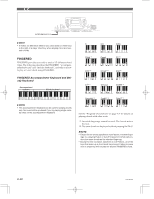
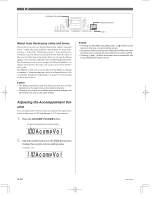
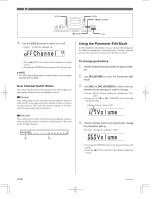
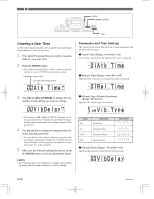
Mixer Function MIXER [̇]/[̈] CURSOR Number buttons [̄] ENTER [+]/[-] What you can do with the Mixer This keyboard lets you play multiple different musical instrument parts at the same time during auto-accompaniment play, song memory playback, receipt of data through the MIDI terminal, etc. The Mixer assigns each part to a separate channel (1 through 16) and lets you control the channel on/off, volume, and pan pot parameters of each channel. Channel Assignments The following shows the parts that are assigned to each of the 16 channels. Channel Number Channel 1 Channel 2 Channel 3 Channel 4 Channel 5 Channel 6 Channel 7 Channel 8 Channel 9 Channel 10 Channel 11 Channel 12 Channel 13 Channel 14 Channel 15 Channel 16 Part Main tone Layered tone Split tone Layered/split tone Harmonize Tone Auto Accompaniment chord part 1 Auto Accompaniment chord part 2 Auto Accompaniment chord part 3 Auto Accompaniment bass part Auto Accompaniment rhythm part Memory track 1 Memory track 2 Memory track 3 Memory track 4 Memory track 5 Memory track 6 See page E-59 and E-60 for information on layered, split, and layered/split tones. See page E-46 for information on the song memory. ❚ NOTE • Normally, keyboard play is assigned to Channel 1. When Auto Accompaniment is being used, each part of the accompaniment is assigned to Channels 6 through 10. • When this keyboard is being used as the sound source for an externally connected computer or other MIDI device, all 16 channels are assigned musical instrument parts. The notes played over the channel selected by steps 1 and 2 under "Turning Channels On and Off" in the right column of this page are shown on the displayed keyboard and staff. Turning Channels On and Off Turning a channel off mutes any instrument recorded in the channel. To turn channels on and off 1. Press the MIXER button. • This causes the MIXER indicator to appear on the display screen. • This displays the channel selection screen. Ch . Se l . 2. Use the [+]/[-] buttons to select a channel. Example: To select Channel 2. Ch . Se l . 3. Press [̄] (ENTER) and then [̈] (CURSOR) to display the on/off selection screen. Channe l 703A-E-037A E-35
-
 1
1 -
2
-
3
-
4
-
5
-
6
-
7
-
8
-
9
-
10
-
11
-
12
-
13
-
14
-
15
-
16
-
17
-
18
-
19
-
20
-
21
-
22
-
23
-
24
-
25
-
26
-
27
-
28
-
29
-
30
-
31
-
 32
32 -
 33
33 -
 34
34 -
 35
35 -
 36
36 -
 37
37 -
 38
38 -
 39
39 -
 40
40 -
 41
41 -
 42
42 -
43
-
44
-
45
-
46
-
47
-
48
-
49
-
50
-
51
-
52
-
53
-
54
-
55
-
56
-
57
-
58
-
59
-
60
-
61
-
62
-
63
-
64
-
65
-
66
-
67
-
68
-
69
-
70
-
71
-
72
-
73
-
74
-
75
-
76
-
77
-
78
-
79
-
80
-
81
-
82
-
83
-
84
-
85
-
86
-
87
-
88
-
89
-
90
-
91
-
92
-
93
-
94
-
95
-
96
-
97
-
98
 |
 |
