Cisco AIR-AP1252AG-A-K9 Hardware Installation Guide - Page 41
Installing Option One
 |
View all Cisco AIR-AP1252AG-A-K9 manuals
Add to My Manuals
Save this manual to your list of manuals |
Page 41 highlights
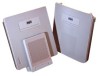
Chapter 2 Installing the Access Point Mounting Above a Suspended Ceiling Caution The 1250 series power injector (AIR-PWRINJ4), 1250 series DC power module (AIR-PWR-SPLY1), and the antennas have not been tested to UL 2043 and they should not be placed in a building's environmental air space, such as above suspended ceilings. The access point mounting bracket has been redesigned to permit the use of the B-Line and Erico mounting systems. Installing Option One This section provides instructions to installation 1 (B-Line mounting system) above a suspended ceiling. Follow these steps to mount the access point above a suspended ceiling using option 1. It may be helpful to refer to Figure 2-7 before you begin. Figure 2-7 Option 1 Mounting Details 3 6 2 1 4 5 6 2 1 275815 1 Suspended ceiling T-rail 2 T-rail clip 3 adjustable height box hanger 4 Access point mounting bracket 5 Access point mounting clip 6 Height adjustment rails Note The illustration shows the access point mounting plate mounted perpendicular to the adjustable height box hanger. You can also mount the bracket parallel to the box hanger. OL-8247-03 Cisco Aironet 1250 Series Access Point Hardware Installation Guide 2-13
-
 1
1 -
2
-
3
-
4
-
5
-
6
-
7
-
8
-
9
-
10
-
11
-
12
-
13
-
14
-
15
-
16
-
17
-
18
-
19
-
20
-
21
-
22
-
23
-
24
-
25
-
26
-
27
-
28
-
29
-
30
-
31
-
32
-
33
-
34
-
35
-
 36
36 -
 37
37 -
 38
38 -
 39
39 -
 40
40 -
 41
41 -
 42
42 -
 43
43 -
 44
44 -
 45
45 -
 46
46 -
47
-
48
-
49
-
50
-
51
-
52
-
53
-
54
-
55
-
56
-
57
-
58
-
59
-
60
-
61
-
62
-
63
-
64
-
65
-
66
-
67
-
68
-
69
-
70
-
71
-
72
-
73
-
74
-
75
-
76
-
77
-
78
-
79
-
80
-
81
-
82
-
83
-
84
-
85
-
86
-
87
-
88
-
89
-
90
-
91
-
92
-
93
-
94
-
95
-
96
-
97
-
98
-
99
-
100
-
101
-
102
-
103
-
104
-
105
-
106
-
107
-
108
-
109
-
110
-
111
-
112
-
113
-
114
-
115
-
116
-
117
-
118
-
119
-
120
-
121
-
122
-
123
-
124
-
125
-
126
-
127
-
128
-
129
-
130
-
131
-
132
-
133
-
134
-
135
-
136
-
137
-
138
-
139
-
140
-
141
-
142
 |
 |
