Cisco E2100L User Guide - Page 58
Create a User Account, read and write, Create, Cancel, Close, Storage, Administration, Create New
 |
View all Cisco E2100L manuals
Add to My Manuals
Save this manual to your list of manuals |
Page 58 highlights
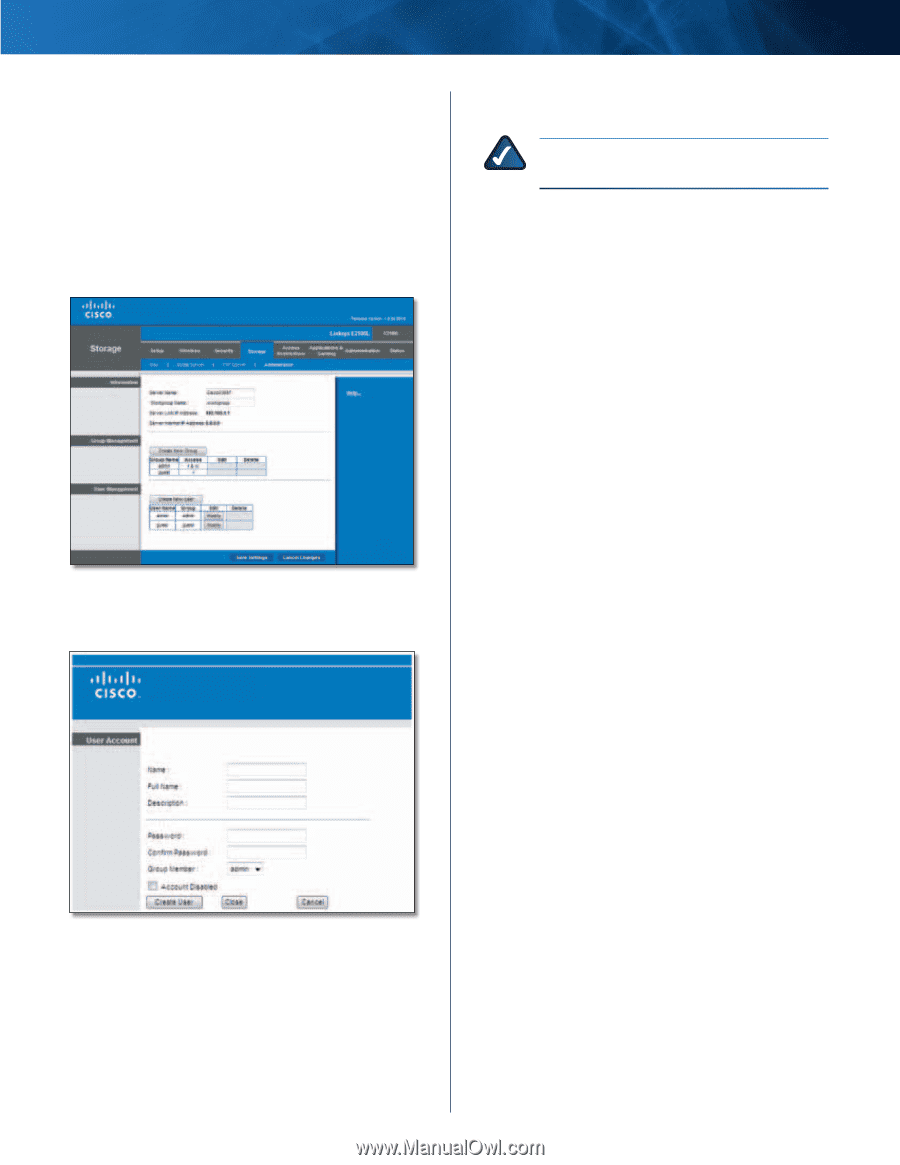
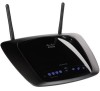
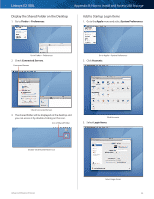
Linksys E2100L Appendix B: How to Install and Access USB Storage 6. From the Access drop-down menu, select the appropriate level of access, read and write or read only. 7. Click Create to apply your changes, or click Cancel to clear your changes. Click Close to exit the screen and return to the Administration screen. Create a User Account 1. Click the Storage tab. 2. Click the Administration tab. 8. From the Group Member drop-down menu, select the appropriate user group. NOTE: To temporarily disable an account, select Account Disabled. 9. Click Create User to apply your changes, or click Cancel to clear your changes. Click Close to exit the screen and return to the Administration screen. Storage > Administration 3. In the User Management section, click Create New User. The User Account screen appears. User Account 4. In the Name field, enter a name for the user. 5. In the Full Name field, enter the actual name of the user. 6. In the Description field, enter keywords to describe the user. 7. In the Password and Confirm Password fields, enter the password that the user will use for login. Advanced Wireless-N Router 55
-
 1
1 -
2
-
3
-
4
-
5
-
6
-
7
-
8
-
9
-
10
-
11
-
12
-
13
-
14
-
15
-
16
-
17
-
18
-
19
-
20
-
21
-
22
-
23
-
24
-
25
-
26
-
27
-
28
-
29
-
30
-
31
-
32
-
33
-
34
-
35
-
36
-
37
-
38
-
39
-
40
-
41
-
42
-
43
-
44
-
45
-
46
-
47
-
48
-
49
-
50
-
51
-
52
-
 53
53 -
 54
54 -
 55
55 -
 56
56 -
 57
57 -
 58
58 -
 59
59 -
 60
60 -
 61
61 -
 62
62 -
 63
63 -
64
-
65
-
66
-
67
-
68
-
69
-
70
-
71
-
72
-
73
-
74
-
75
-
76
-
77
-
78
 |
 |