D-Link G604T Product Manual - Page 4
Before You Start - dsl setup
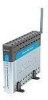 |
UPC - 790069265662
View all D-Link G604T manuals
Add to My Manuals
Save this manual to your list of manuals |
Page 4 highlights
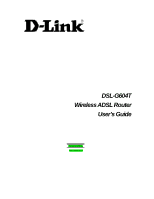
DSL-G604T Wireless A DSL Router User's Guide About This User's Guide This user's guide provides instructions on how to install the DSL-G604T Wireless ADSL Router and use it to provide Internet access for an Ethernet or 802.11g/802.11b wireless LAN. If you are using a computer with a functioning Ethernet port, the quickest and easiest way to set up the DSL-G604T is to insert the Installation CD into the CD-ROM drive of your computer and follow the instructions provided in the Quick Installation Guide. Before You Start Please read and make sure you understand all the prerequisites for proper installation of your new Router. Have all the necessary information and equipment on hand before beginning the installation. Installation Overview The procedure to install the Router can be described in general terms in the following steps: 1. Gather information and equipment needed to install the device. Before you begin the actual installation make sure you have all the necessary information and equipment. 2. Install the hardware, connect the cables to the device and connect the power adapter. 3. Check the IP settings on your computer and change them if necessary so the computer can access the web-based software built into the Router. 4. Use the web-based management software to configure the device to suit the requirements of your ADSL service and wireless LAN. The Setup Wizard Many users will be able to configure all the settings necessary to use the DSL-G604T with the Setup Wizard. For ADSL connections that use Dynamic, Statis IP, PPPoE/PPPoA, or Bridge connections, the simplest way to setup the DSL-G604T is to use the Setup Wizard to configure the Internet connection. Once you access the web interface used to configure the device, just launch the Setup Wizard to configure your Internet connection. Once you have the Internet connection established, set up the wireless nework and security settings using web manager. 1
-
 1
1 -
 2
2 -
 3
3 -
 4
4 -
 5
5 -
 6
6 -
 7
7 -
 8
8 -
 9
9 -
 10
10 -
11
-
12
-
13
-
14
-
15
-
16
-
17
-
18
-
19
-
20
-
21
-
22
-
23
-
24
-
25
-
26
-
27
-
28
-
29
-
30
-
31
-
32
-
33
-
34
-
35
-
36
-
37
-
38
-
39
-
40
-
41
-
42
-
43
-
44
-
45
-
46
-
47
-
48
-
49
-
50
-
51
-
52
-
53
-
54
-
55
-
56
-
57
-
58
-
59
-
60
-
61
-
62
-
63
-
64
-
65
-
66
-
67
-
68
-
69
-
70
-
71
-
72
-
73
-
74
-
75
-
76
-
77
-
78
-
79
 |
 |