Dell Inspiron Zino HD 400 Inspiron Zino HD Service Manual - Page 19
Replacing the Power, Button Bracket, Replacing the Optical Drive, Replacing the Top Bracket,
 |
View all Dell Inspiron Zino HD 400 manuals
Add to My Manuals
Save this manual to your list of manuals |
Page 19 highlights
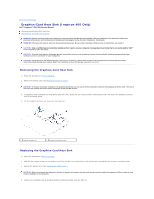
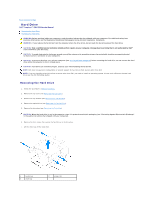
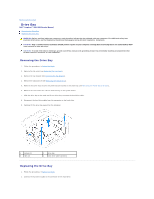
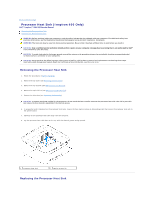
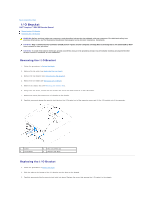
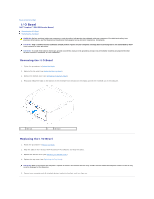
3. Align the tabs on the drive bay with the slots on the chassis. Slide the drive bay to align the screw holes on the drive bay with the screws holes on the system board. 4. Replace the two screws that secure the drive bay to the system board. 5. Replace the screw that secures the power-button bracket to the drive bay (see Replacing the Power-Button Bracket). 6. Replace the optical drive (see Replacing the Optical Drive). 7. Replace the top bracket (see Replacing the Top Bracket). 8. Replace the top cover (see Replacing the Top Cover). CAUTION: Before turning on the computer, replace all screws and ensure that no stray screws remain inside the computer. Failure to do so may result in damage to the computer. 9. Connect your computer and all attached devices to electrical outlets, and turn them on. Back to Contents Page
-
 1
1 -
2
-
3
-
4
-
5
-
6
-
7
-
8
-
9
-
10
-
11
-
12
-
13
-
 14
14 -
 15
15 -
 16
16 -
 17
17 -
 18
18 -
 19
19 -
 20
20 -
 21
21 -
 22
22 -
 23
23 -
 24
24 -
25
-
26
-
27
-
28
-
29
-
30
-
31
-
32
-
33
-
34
-
35
-
36
-
37
-
38
-
39
-
40
-
41
-
42
-
43
-
44
-
45
-
46
-
47
-
48
-
49
-
50
-
51
-
52
-
53
 |
 |