Dell Inspiron Zino HD 400 Inspiron Zino HD Service Manual - Page 40
Entering the Service Tag in the BIOS
 |
View all Dell Inspiron Zino HD 400 manuals
Add to My Manuals
Save this manual to your list of manuals |
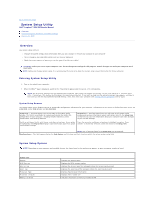
Page 40 highlights
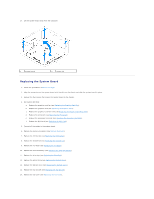
CAUTION: Before turning on the computer, replace all screws and ensure that no stray screws remain inside the computer. Failure to do so may result in damage to the computer. 16. Turn on the computer. NOTE: After you have replaced the system board, enter the computer's Service Tag into the BIOS of the replacement system board. 17. Enter the Service Tag (see Entering the Service Tag in the BIOS). Entering the Service Tag in the BIOS 1. Turn on the computer. 2. Press during POST to enter the system setup program. 3. Navigate to the main tab and enter the service tag in the Service Tag Setting field. Back to Contents Page
-
 1
1 -
2
-
3
-
4
-
5
-
6
-
7
-
8
-
9
-
10
-
11
-
12
-
13
-
14
-
15
-
16
-
17
-
18
-
19
-
20
-
21
-
22
-
23
-
24
-
25
-
26
-
27
-
28
-
29
-
30
-
31
-
32
-
33
-
34
-
 35
35 -
 36
36 -
 37
37 -
 38
38 -
 39
39 -
 40
40 -
 41
41 -
 42
42 -
 43
43 -
 44
44 -
 45
45 -
46
-
47
-
48
-
49
-
50
-
51
-
52
-
53
 |
 |

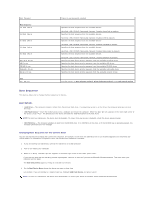
16.
Turn on the computer.
17.
Enter the Service Tag (see
Entering the Service Tag in the BIOS
).
Entering the Service Tag in the BIOS
1.
Turn on the computer.
2.
Press <F2> during POST to enter the system setup program.
3.
Navigate to the main tab and enter the service tag in the
Service Tag Setting
field.
Back to Contents Page
CAUTION:
Before turning on the computer, replace all screws and ensure that no stray screws remain inside the computer. Failure to do so may
result in damage to the computer.
NOTE:
After you have replaced the system board, enter the computer's Service Tag into the BIOS of the replacement system board.