Dell Inspiron Zino HD 400 Inspiron Zino HD Service Manual - Page 39
Replacing the System Board
 |
View all Dell Inspiron Zino HD 400 manuals
Add to My Manuals
Save this manual to your list of manuals |
Page 39 highlights
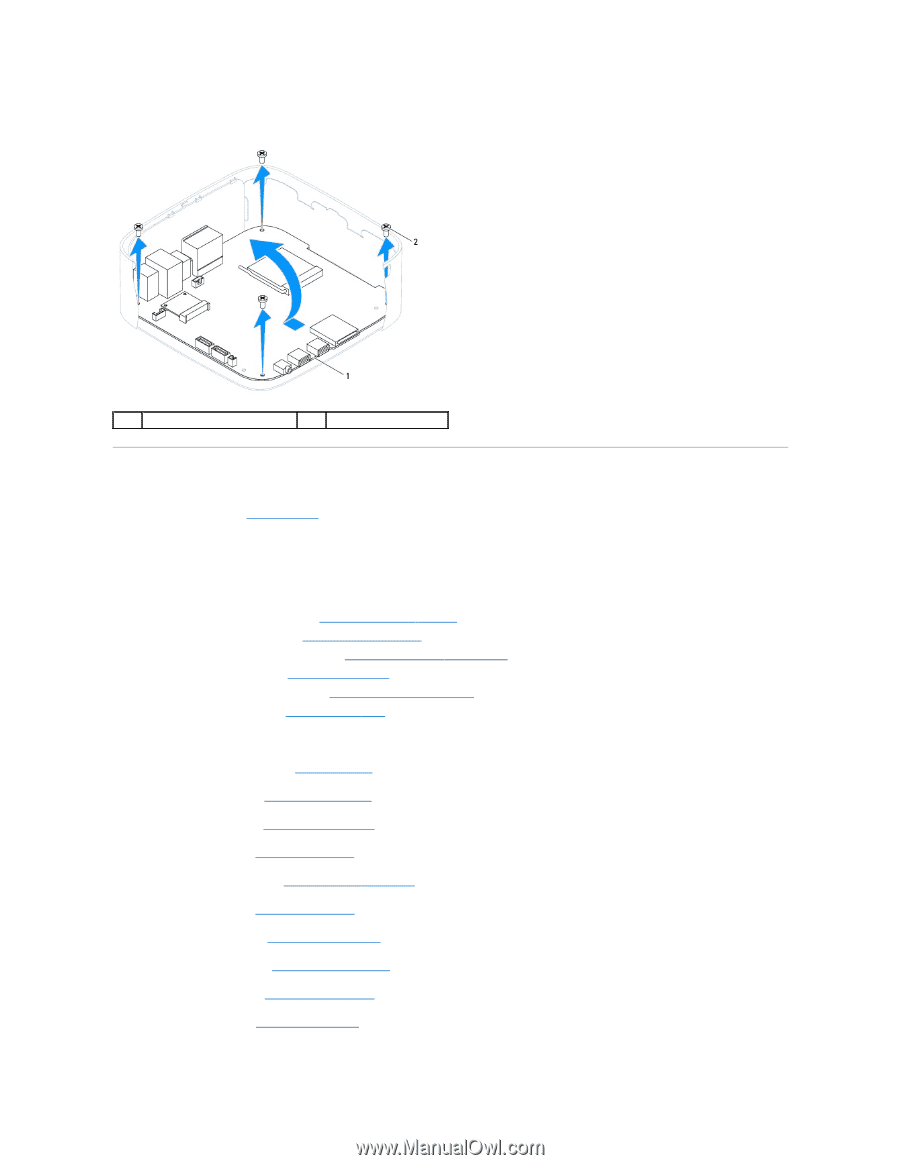
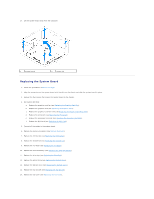
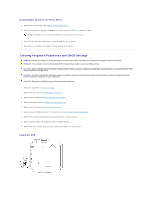
17. Lift the system board away from the computer. 1 system board 2 screws (4) Replacing the System Board 1. Follow the procedures in Before You Begin. 2. Align the connectors on the system board with the slots on the chassis and slide the system board in place. 3. Replace the four screws that secure the system board to the chassis. 4. For Inspiron 400 Only: a. Replace the graphics-card fan (see Replacing the Graphics-Card Fan). b. Replace the graphics card (see Replacing the Graphics Card). c. Replace the graphics-card heat sink (see Replacing the Graphics-Card Heat Sink). d. Replace the processor (see Replacing the Processor). e. Replace the processor heat sink (see Replacing the Processor Heat Sink). f. Replace the Mini-Card (see Replacing the Mini-Card). 5. Connect all the cables to the system board. 6. Replace the memory module(s) (see Memory Module(s)). 7. Replace the I/O bracket (see Replacing the I/O Bracket). 8. Replace the chassis fan (see Replacing the Chassis Fan). 9. Replace the I/O bezel (see Replacing the I/O Bezel). 10. Replace the coin-cell battery (see Replacing the Coin-Cell Battery). 11. Replace the drive bay (see Replacing the Drive Bay). 12. Replace the optical drive (see Replacing the Optical Drive). 13. Replace the bottom cover (see Replacing the Bottom Cover). 14. Replace the top bracket (see Replacing the Top Bracket). 15. Replace the top cover (see Replacing the Top Cover).
-
 1
1 -
2
-
3
-
4
-
5
-
6
-
7
-
8
-
9
-
10
-
11
-
12
-
13
-
14
-
15
-
16
-
17
-
18
-
19
-
20
-
21
-
22
-
23
-
24
-
25
-
26
-
27
-
28
-
29
-
30
-
31
-
32
-
33
-
 34
34 -
 35
35 -
 36
36 -
 37
37 -
 38
38 -
 39
39 -
 40
40 -
 41
41 -
 42
42 -
 43
43 -
 44
44 -
45
-
46
-
47
-
48
-
49
-
50
-
51
-
52
-
53
 |
 |