Dell OptiPlex 3050 Tower Owners Manual - Page 69
Deleting or changing an existing system setup password, System Setup options
 |
View all Dell OptiPlex 3050 manuals
Add to My Manuals
Save this manual to your list of manuals |
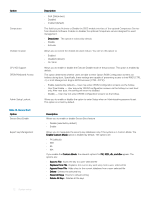
Page 69 highlights
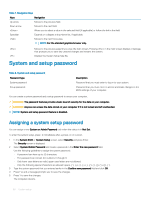
Deleting or changing an existing system setup password Ensure that the Password Status is Unlocked (in the System Setup) before attempting to delete or change the existing System and/or Setup password. You cannot delete or change an existing System or Setup password, if the Password Status is Locked. To enter the System Setup, press F2 immediately after a power-on or reboot. 1 In the System BIOS or System Setup screen, select System Security and press Enter. The System Security screen is displayed. 2 In the System Security screen, verify that Password Status is Unlocked. 3 Select System Password, alter or delete the existing system password and press Enter or Tab. 4 Select Setup Password, alter or delete the existing setup password and press Enter or Tab. NOTE: If you change the System and/or Setup password, re-enter the new password when promoted. If you delete the System and/or Setup password, confirm the deletion when promoted. 5 Press Esc and a message prompts you to save the changes. 6 Press Y to save the changes and exit from System Setup. The computer reboot. System Setup options NOTE: Depending on the computer and its installed devices, the items listed in this section may or may not appear. Table 9. General Option System Information Boot Sequence Advanced Boot Options Date/Time Description Displays the following information: • System Information: Displays BIOS Version, Service Tag, Asset Tag, Ownership Tag, Ownership Date, Manufacture Date, and the Express Service Code. • Memory Information: Displays Memory Installed, Memory Available, Memory Speed, Memory Channel Mode, Memory Technology, DIMM 1 Size, and DIMM 2 Size, DIMM 3 Size, and DIMM 4 Size. • PCI Information: Displays SLOT1, SLOT2, SLOT3, SLOT4, and SLOT5_M.2 • Processor Information: Displays Processor Type, Core Count, Processor ID, Current Clock Speed, Minimum Clock Speed, Maximum Clock Speed, Processor L2 Cache, Processor L3 Cache, HT Capable, and 64-Bit Technology. • Device Information: Displays SATA-0, SATA-1, SATA-2, SATA-3, SATA-4, M.2 PCIe SSD-0, LOM MAC Address, Video Controller, and Audio Controller. . Allows you to specify the order in which the computer attempts to find an operating system from the devices specified in this list. • Legacy • UEFI (selected by default) Allows you to select the Enable Legacy Option ROMs option, when in UEFI boot mode. By default, this option is selected. Allows you to set the date and time settings. Changes to the system date and time take effect immediately. System setup 69
-
 1
1 -
2
-
3
-
4
-
5
-
6
-
7
-
8
-
9
-
10
-
11
-
12
-
13
-
14
-
15
-
16
-
17
-
18
-
19
-
20
-
21
-
22
-
23
-
24
-
25
-
26
-
27
-
28
-
29
-
30
-
31
-
32
-
33
-
34
-
35
-
36
-
37
-
38
-
39
-
40
-
41
-
42
-
43
-
44
-
45
-
46
-
47
-
48
-
49
-
50
-
51
-
52
-
53
-
54
-
55
-
56
-
57
-
58
-
59
-
60
-
61
-
62
-
63
-
 64
64 -
 65
65 -
 66
66 -
 67
67 -
 68
68 -
 69
69 -
 70
70 -
 71
71 -
 72
72 -
 73
73 -
 74
74 -
75
-
76
-
77
-
78
-
79
-
80
-
81
-
82
-
83
-
84
-
85
-
86
-
87
-
88
-
89
-
90
-
91
-
92
-
93
-
94
-
95
-
96
-
97
-
98
 |
 |
