Dell PowerConnect B-8000 Reference Manual - Page 39
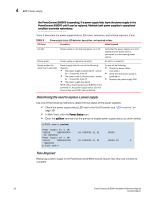
Items Required, Replacing a Power Supply, RRP: Power supply
 |
View all Dell PowerConnect B-8000 manuals
Add to My Manuals
Save this manual to your list of manuals |
Page 39 highlights
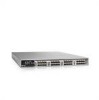
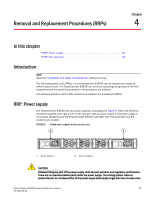
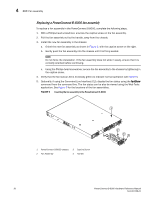
RRP: Power supply 4 Items Required The following items are required to replace a power supply: • New power supply • Phillips-head screwdriver #1 Replacing a Power Supply To replace a power supply unit in the PowerConnect B-8000 complete the following steps. 1. To leave the PowerConnect B-8000 in service while replacing a power supply, verify that the other power supply (the one not being replaced) has been powered on for at least four seconds and has a steady green LED. 2. Power off the power supply by pressing the AC power switch to the "0" symbol. See Figure 7 for the location of the AC power switch. 3. Unplug the power cord from the power supply that is being replaced. 4. Using a Phillips-head screwdriver, unscrew the captive screw on the power supply. 5. Remove the power supply from the chassis by pulling the handle on the power supply out, away from the chassis. 6. Install the new power supply in the chassis: CAUTION Do not force the installation. If the power supply does not slide in easily, ensure that the power supply is correctly oriented before continuing. a. Orient the power supply as shown in Figure 7, with the AC power switch on the left. (The actual appearance of the PowerConnect B-8000 may differ from this illustration but the locations are correct.) b. Gently push the power supply into the chassis until it is firmly seated. c. Secure the power supply to the chassis by screwing in the captive screw using the Phillips-head screwdriver. 7. Plug the power cord in to the power supply and power on the unit by pressing the AC power switch to the "1" symbol. 8. Verify that the LED on the new power supply displays a steady green light while the PowerConnect B-8000 is operating (see Table 4). If the LED is not a steady green, ensure that the power supply is securely installed and seated properly. PowerConnect B-8000 Hardware Reference Manual 27 53-1001788-01
-
 1
1 -
2
-
3
-
4
-
5
-
6
-
7
-
8
-
9
-
10
-
11
-
12
-
13
-
14
-
15
-
16
-
17
-
18
-
19
-
20
-
21
-
22
-
23
-
24
-
25
-
26
-
27
-
28
-
29
-
30
-
31
-
32
-
33
-
 34
34 -
 35
35 -
 36
36 -
 37
37 -
 38
38 -
 39
39 -
 40
40 -
 41
41 -
 42
42 -
 43
43 -
 44
44 -
45
-
46
-
47
-
48
-
49
-
50
-
51
-
52
-
53
-
54
-
55
-
56
-
57
-
58
 |
 |