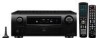
Denon 4310CI Owners Manual - Page 85
Saving, Frequently, Settings, Quick, Select, Function, Playing, Network, Audio, Different, Devices,
 |
UPC - 883795001014
View all Denon 4310CI manuals
Add to My Manuals
Save this manual to your list of manuals |
Page 85 highlights
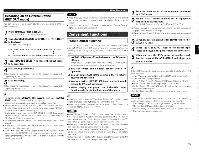
Saving Frequently Used Settings (Quick Select Function) All of the settings in step 1 can be memorized together. By memorizing frequently used settings, you can quickly access and enjoy a playback environment that is consistently the same. Saving the Settings 1 Set the items below to the settings you want to save. (i) Input Source 02rpage 27) ® Volume Level (C 'page 70) ® Surround Mode (A25- page 71) ® Audyssey Setting (MultEQ XT, Dynamic EQ, Dynamic Volume) (0- page 75, 76) ® Video Select (O- page 48) 2 Press and hold the desired QUICK SELECT until "Memory" appears on the display. The current settings will be memorized. Quick Select 1 Quick Select 2 Quick Select 3 (Quick Select Defaults] Input Source DVD SAT/CB L VCR Volume -40dB -40dB -40dB Calling the Settings Out Press QUICK SELECT at which the settings you want to call out are saved. The " Q1 " " Q2 " or " Q3 " indicator lights on the display. CI Naming Quick Select settings See "Quick Select Name" (A26- page 43). 4 1' The Quick Select function can be set separately for the different zones (ataT' page 88 "Quick Select Function"). NOTE Input sources stored with the quick select function cannot be selected if they have been deleted at "Source Delete" (page 42). In this case, store them again. Playing the Same Network Audio on Different Devices Connected in a Network (Party Mode Function) The same network audio (Internet Radio, Media Server or iPod DIRECT) can be played on multiple DENON products equipped with the Party Mode function and connected in a network. The party mode consists of one organizer and up to four attendees. When one unit starts the party mode as the organizer, up to four devices on which the party mode function is activated automatically participate in the party as attendees. "Party Mode Function" ((er page 40) must be set to "ON" ahead of time in order to use the party mode function. Starting the Party Mode as the Organizer 1 Press [PARTY] to become the organizer. "Do you enter Party Mode?" is displayed. An error message is displayed when you are not connected to a network. 2 Press < > to select "Yes", then press ENTER. The " PARTY " indicator on the display lights. The input source ORGANIZER automatically switches to "NET/USB" and the attendees are automatically selected. 3 Play the desired track. Li To Cancel the Party Mode 1 While in the party mode, press [PARTY]. "Do you exit Party Mode?" is displayed on the GUI screen. 2 Press to select "Yes", then press ENTER. "Do you turn Attendee's power off?" is displayed. Press d I> to select "Yes" or "No", then press lb/ ENTER. Yes : The power of the attendees is turned off and the party mode is canceled. No : The party mode is canceled without turning off the power of the attendees. Convenient Functions Participating in the Party Mode as an Attendee • When the organizer starts the party mode, up to four attendees are selected automatically. No operation is required. • When a device becomes an attendee, " PARTY ATTENDEE " appears on the display. The input source automatically switches to "NET/USB" and the same network audio as on the organizer is played. • If there are fewer than four attendees, a device can join the party mode after it has started. To participate in the party mode, perform the operation described below. 1 Press [PARTY]. "Do you enter Party Mode?" is displayed. An error message is displayed when you are not connected to a network. 2 Press < 1> to select "Yes", then press ENTER. u To Cancel the Party Mode 1 While in the party mode, press [PARTY]. "Do you exit Party Mode?" is displayed on the GUI screen. 2 Press to select "Yes", then press ENTER. In this case, the other devices remain in the party mode. "Rhapsody", "Napster" and "USB" are not available in the Party Mode. There can only be one organizer in the network. To form a new party mode, first cancel the current party mode. 82
-
 1
1 -
2
-
3
-
4
-
5
-
6
-
7
-
8
-
9
-
10
-
11
-
12
-
13
-
14
-
15
-
16
-
17
-
18
-
19
-
20
-
21
-
22
-
23
-
24
-
25
-
26
-
27
-
28
-
29
-
30
-
31
-
32
-
33
-
34
-
35
-
36
-
37
-
38
-
39
-
40
-
41
-
42
-
43
-
44
-
45
-
46
-
47
-
48
-
49
-
50
-
51
-
52
-
53
-
54
-
55
-
56
-
57
-
58
-
59
-
60
-
61
-
62
-
63
-
64
-
65
-
66
-
67
-
68
-
69
-
70
-
71
-
72
-
73
-
74
-
75
-
76
-
77
-
78
-
79
-
 80
80 -
 81
81 -
 82
82 -
 83
83 -
 84
84 -
 85
85 -
 86
86 -
 87
87 -
 88
88 -
 89
89 -
 90
90 -
91
-
92
-
93
-
94
-
95
-
96
-
97
-
98
-
99
-
100
-
101
-
102
-
103
-
104
-
105
-
106
-
107
-
108
-
109
-
110
-
111
-
112
-
113
-
114
-
115
-
116
-
117
-
118
-
119
-
120
-
121
-
122
-
123
-
124
-
125
-
126
-
127
-
128
-
129
-
130
-
131
-
132
-
133
-
134
-
135
-
136
-
137
-
138
 |
 |
