Epson ELPDC11 Document Camera User's Guide - Page 29
Return, arrow buttons to highlight the image - ads
 |
View all Epson ELPDC11 Document Camera manuals
Add to My Manuals
Save this manual to your list of manuals |
Page 29 highlights
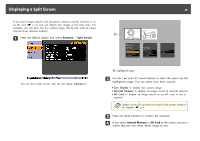
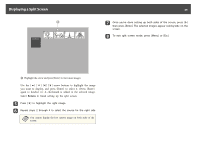
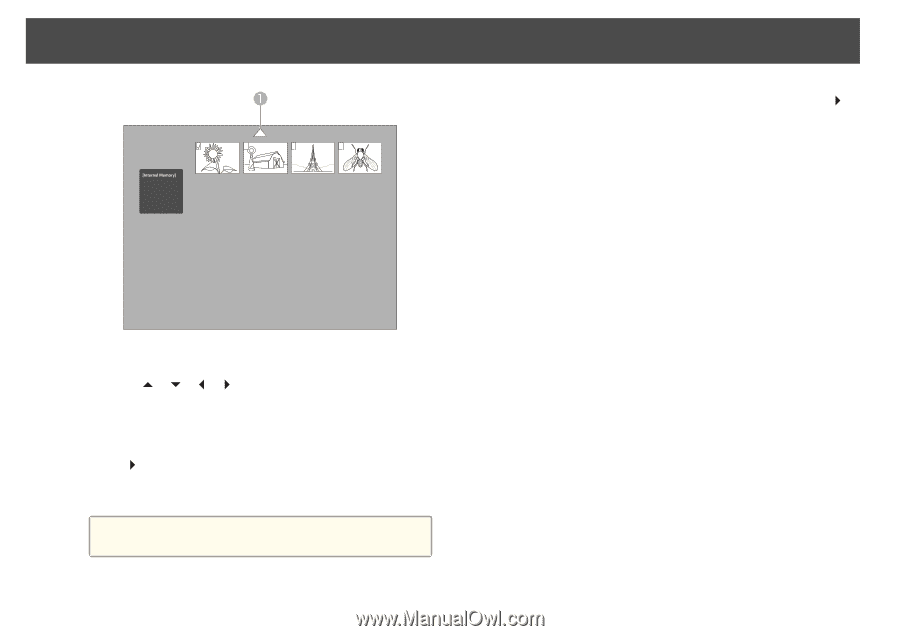
Displaying a Split Screen 29 g Once you're done setting up both sides of the screen, press [ ] then press [Enter]. The selected images appear side-by-side on the screen. h To exit split screen mode, press [Menu] or [Esc]. A Highlight the arrow and press [Enter] to view more images Use the arrow buttons to highlight the image you want to display, and press [Enter] to select it. (Press [Enter] again to deselect it.) A checkmark is added to the selected image. Select Return to finish setting up the split screen. e Press [ ] to highlight the right image. f Repeat steps 2 through 4 to select the source for the right side. a You cannot display the live camera image on both sides of the screen.
-
 1
1 -
2
-
3
-
4
-
5
-
6
-
7
-
8
-
9
-
10
-
11
-
12
-
13
-
14
-
15
-
16
-
17
-
18
-
19
-
20
-
21
-
22
-
23
-
 24
24 -
 25
25 -
 26
26 -
 27
27 -
 28
28 -
 29
29 -
 30
30 -
 31
31 -
 32
32 -
 33
33 -
 34
34 -
35
-
36
-
37
-
38
-
39
-
40
-
41
-
42
-
43
-
44
-
45
-
46
-
47
-
48
-
49
-
50
-
51
-
52
-
53
-
54
-
55
-
56
-
57
-
58
-
59
-
60
-
61
-
62
-
63
-
64
-
65
 |
 |
A
Highlight the arrow and press [Enter] to view more images
Use the [
] [
] [
] [
] arrow buttons to highlight the image
you want to display, and press [Enter] to select it. (Press [Enter]
again to deselect it.) A checkmark is added to the selected image.
Select
Return
to finish setting up the split screen.
e
Press [
] to highlight the right image.
f
Repeat steps 2 through 4 to select the source for the right side.
a
You cannot display the live camera image on both sides of the
screen.
g
Once you're done setting up both sides of the screen, press [
]
then press [Enter]. The selected images appear side-by-side on the
screen.
h
To exit split screen mode, press [Menu] or [Esc].
Displaying a Split Screen
29