Epson R380 Printer Basics - Page 22
to choose your paper size, then press, to select one of the following layout options
 |
UPC - 010343859074
View all Epson R380 manuals
Add to My Manuals
Save this manual to your list of manuals |
Page 22 highlights
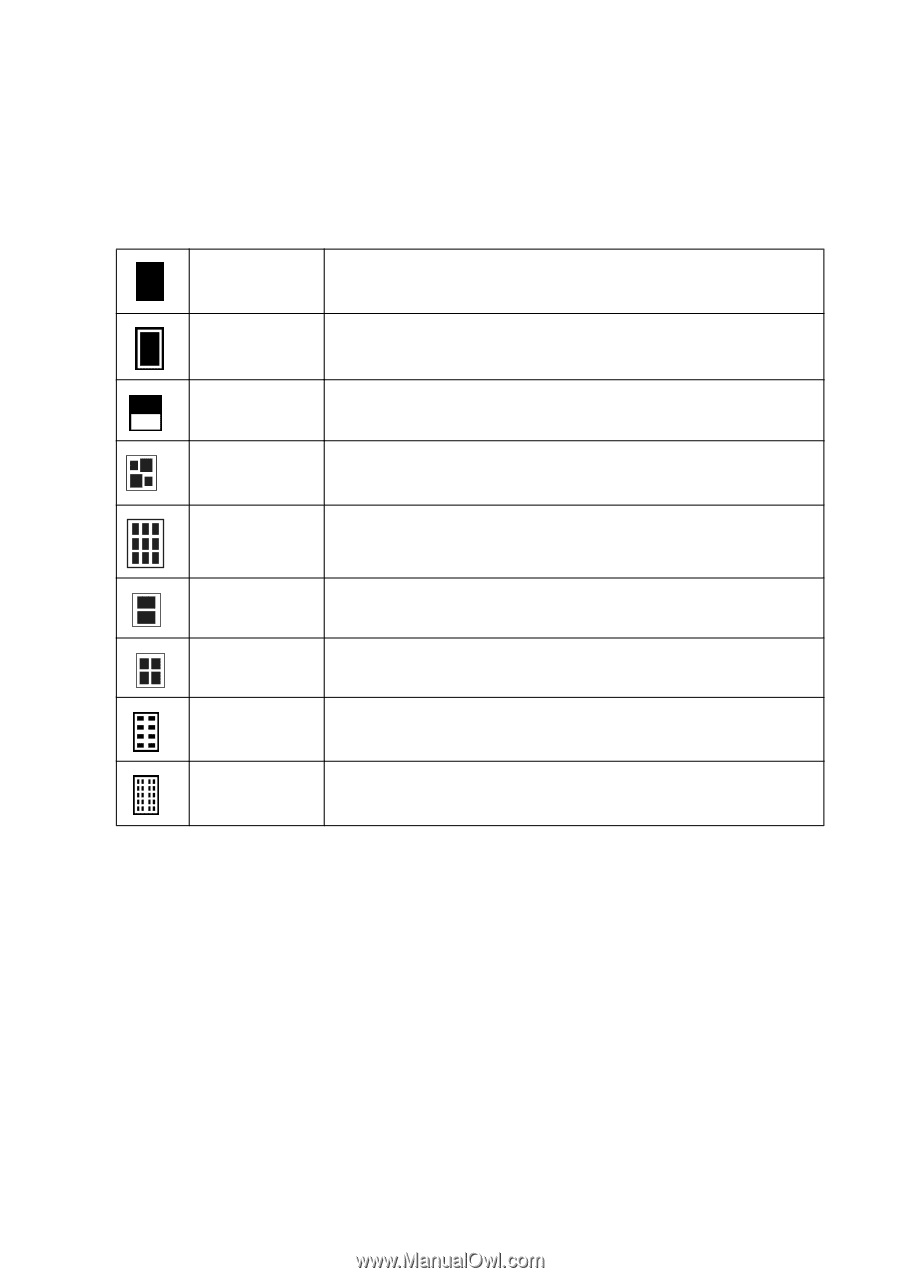
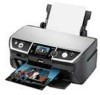
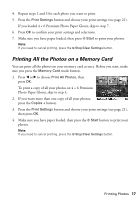
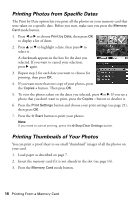
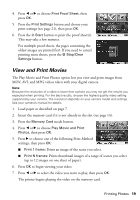
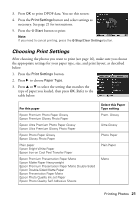
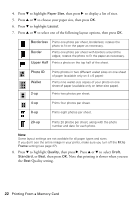
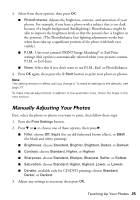
4. Press d to highlight Paper Size, then press r to display a list of sizes. 5. Press u or d to choose your paper size, then press OK. 6. Press d to highlight Layout. 7. Press u or d to select one of the following layout options, then press OK. Borderless Prints one photo per sheet, borderless; rotates the photo to fit on the paper as necessary. Border Prints one photo per sheet with borders around the edges; rotates the photo to fit the paper as necessary. Upper Half Prints a photo on the top half of the sheet. Photo ID Wallet 2-up Prints photos in two different wallet sizes on one sheet of paper (available only on 4 x 6 paper) Prints nine wallet-size copies of your photo on one sheet of paper (available only on letter-size paper). Prints two photos per sheet. 4-up Prints four photos per sheet. 8-up Prints eight photos per sheet. 20-up Prints 20 photos per sheet, along with the photo number and date for each photo. Note: Some layout settings are not available for all paper types and sizes. If you don't see the entire image in your prints, make sure you turn off the Fit to Frame setting (see page 27). 8. Press d to highlight Quality, then press r. Press u or d to select Draft, Standard, or Best, then press OK. Note that printing is slower when you use the Best Quality setting. 22 Printing From a Memory Card
-
 1
1 -
2
-
3
-
4
-
5
-
6
-
7
-
8
-
9
-
10
-
11
-
12
-
13
-
14
-
15
-
16
-
 17
17 -
 18
18 -
 19
19 -
 20
20 -
 21
21 -
 22
22 -
 23
23 -
 24
24 -
 25
25 -
 26
26 -
 27
27 -
28
-
29
-
30
-
31
-
32
-
33
-
34
-
35
-
36
-
37
-
38
-
39
-
40
-
41
-
42
-
43
-
44
-
45
-
46
-
47
-
48
-
49
-
50
-
51
-
52
-
53
-
54
-
55
-
56
-
57
-
58
-
59
-
60
-
61
-
62
-
63
-
64
-
65
-
66
-
67
-
68
-
69
-
70
-
71
-
72
 |
 |