Epson R380 Printer Basics - Page 51
Replacing Ink Cartridges, Checking Ink Cartridge Status
 |
UPC - 010343859074
View all Epson R380 manuals
Add to My Manuals
Save this manual to your list of manuals |
Page 51 highlights
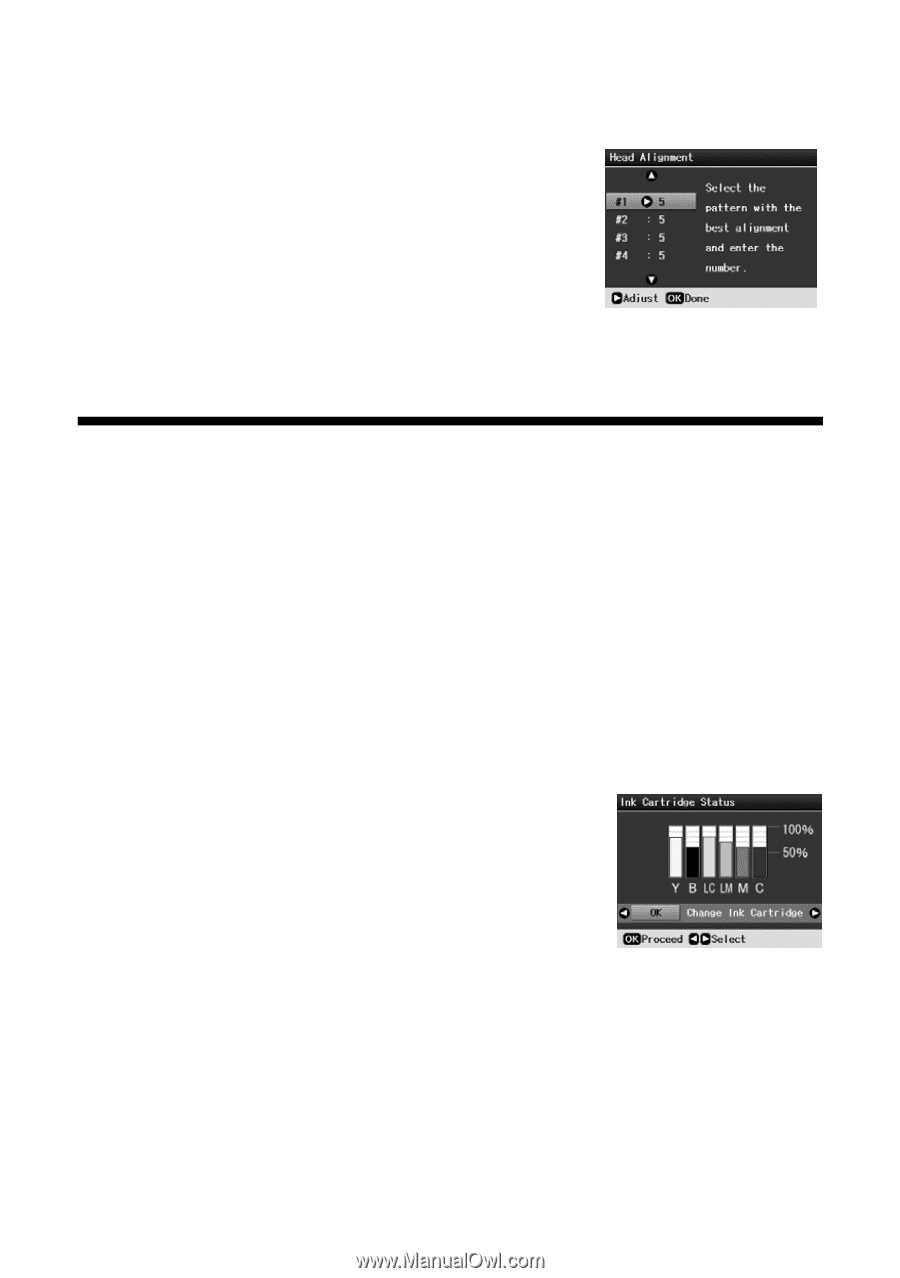
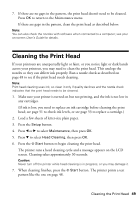
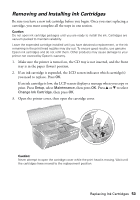
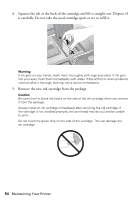
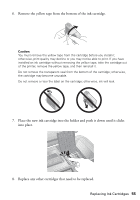
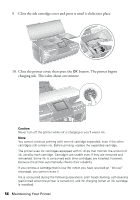
7. Look at pattern #1 and find the square that is most even, with no noticeable streaks or lines. 8. Press r, then press u or d to select the number for that square. 9. Press OK. 10. Press d to select the next pattern, then repeat steps 7 through 9. 11. When you are done, press OK. Replacing Ink Cartridges When you print with low or expended ink cartridges, you see a message on the LCD screen. You can check which cartridge is low or needs to be replaced. Note: When a cartridge is more than six months old, you may need to replace it if printouts don't look their best. If the quality doesn't improve after cleaning and aligning the print head, you can replace the cartridge even if the ink is not low. Checking Ink Cartridge Status 1. Press the Setup button. 2. Press l or r to select Ink Cartridge Status, then press OK. You see a screen showing the status of the cartridges: The cartridges are identified as follows: Y (Yellow), B (Black), LC (Light Cyan), LM (Light Magenta), M (Magenta), C (Cyan). 3. When you are done checking the ink cartridge status, press OK. If you want to replace an ink cartridge, press l or r to select Change Ink Cartridge, then press OK. See page 53 for instructions. 4. Press the Back button to return to the previous screen. When your ink starts getting low, make sure you have replacement cartridges available. You cannot print if a cartridge is expended. Replacing Ink Cartridges 51
-
 1
1 -
2
-
3
-
4
-
5
-
6
-
7
-
8
-
9
-
10
-
11
-
12
-
13
-
14
-
15
-
16
-
17
-
18
-
19
-
20
-
21
-
22
-
23
-
24
-
25
-
26
-
27
-
28
-
29
-
30
-
31
-
32
-
33
-
34
-
35
-
36
-
37
-
38
-
39
-
40
-
41
-
42
-
43
-
44
-
45
-
 46
46 -
 47
47 -
 48
48 -
 49
49 -
 50
50 -
 51
51 -
 52
52 -
 53
53 -
 54
54 -
 55
55 -
 56
56 -
57
-
58
-
59
-
60
-
61
-
62
-
63
-
64
-
65
-
66
-
67
-
68
-
69
-
70
-
71
-
72
 |
 |