Epson R380 Printer Basics - Page 59
Problems and Solutions, Noise Problems, Screen Problems, Printing Problems - printer problems
 |
UPC - 010343859074
View all Epson R380 manuals
Add to My Manuals
Save this manual to your list of manuals |
Page 59 highlights
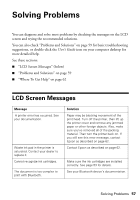
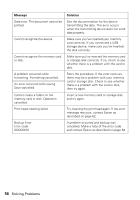
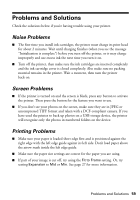
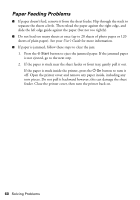
Problems and Solutions Check the solutions below if you're having trouble using your printer. Noise Problems ■ The first time you install ink cartridges, the printer must charge its print head for about 2 minutes. Wait until charging finishes (when you see the message "Initialization is complete") before you turn off the printer, or it may charge improperly and use excess ink the next time you turn it on. ■ Turn off the printer, then make sure the ink cartridges are inserted completely and the ink cartridge cover is closed completely. Also make sure no packing material remains in the printer. Wait a moment, then turn the printer back on. Screen Problems ■ If the printer is turned on and the screen is black, press any button to activate the printer. Then press the button for the feature you want to use. ■ If you don't see your photos on the screen, make sure they are in JPEG or uncompressed TIFF format and taken with a DCF-compliant camera. If you have used the printer to back up photos on a USB storage device, the printer will recognize only the photos in numbered folders on the device. Printing Problems ■ Make sure your paper is loaded short edge first and is positioned against the right edge with the left edge guide against its left side. Don't load paper above the arrow mark inside the left edge guide. ■ Make sure the paper size settings are correct for the paper you are using. ■ If part of your image is cut off, try using the Fit to Frame setting. Or, try setting Expansion to Mid or Min. See page 27 for more information. Problems and Solutions 59
-
 1
1 -
2
-
3
-
4
-
5
-
6
-
7
-
8
-
9
-
10
-
11
-
12
-
13
-
14
-
15
-
16
-
17
-
18
-
19
-
20
-
21
-
22
-
23
-
24
-
25
-
26
-
27
-
28
-
29
-
30
-
31
-
32
-
33
-
34
-
35
-
36
-
37
-
38
-
39
-
40
-
41
-
42
-
43
-
44
-
45
-
46
-
47
-
48
-
49
-
50
-
51
-
52
-
53
-
 54
54 -
 55
55 -
 56
56 -
 57
57 -
 58
58 -
 59
59 -
 60
60 -
 61
61 -
 62
62 -
 63
63 -
 64
64 -
65
-
66
-
67
-
68
-
69
-
70
-
71
-
72
 |
 |