Epson R380 Printer Basics - Page 27
Borderless Expansion, Fit to Frame, Restoring Default Settings
 |
UPC - 010343859074
View all Epson R380 manuals
Add to My Manuals
Save this manual to your list of manuals |
Page 27 highlights
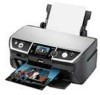
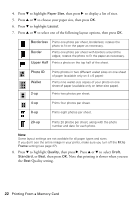
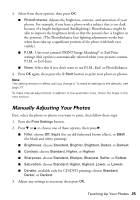
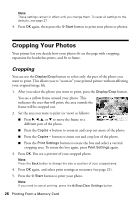
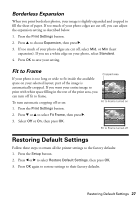
Borderless Expansion When you print borderless photos, your image is slightly expanded and cropped to fill the sheet of paper. If too much of your photo edges are cut off, you can adjust the expansion setting as described below. 1. Press the Print Settings button. 2. Press u to choose Expansion, then press r. 3. If too much of your photo edges are cut off, select Mid, or Min (least expansion). If you see a white edge on your photo, select Standard. 4. Press OK to save your setting. Fit to Frame If your photo is too long or wide to fit inside the available space on your selected layout, part of the image is automatically cropped. If you want your entire image to print with white space filling in the rest of the print area, you can turn off fit to frame. To turn automatic cropping off or on: Cropped area Fit to Frame turned on 1. Press the Print Settings button. 2. Press d or u to select Fit Frame, then press r. 3. Select Off or On, then press OK. Fit to Frame turned off Restoring Default Settings Follow these steps to return all the printer settings to the factory defaults: 1. Press the Setup button. 2. Press l or r to select Restore Default Settings, then press OK. 3. Press OK again to restore settings to their factory defaults. Restoring Default Settings 27
-
 1
1 -
2
-
3
-
4
-
5
-
6
-
7
-
8
-
9
-
10
-
11
-
12
-
13
-
14
-
15
-
16
-
17
-
18
-
19
-
20
-
21
-
 22
22 -
 23
23 -
 24
24 -
 25
25 -
 26
26 -
 27
27 -
 28
28 -
 29
29 -
 30
30 -
 31
31 -
 32
32 -
33
-
34
-
35
-
36
-
37
-
38
-
39
-
40
-
41
-
42
-
43
-
44
-
45
-
46
-
47
-
48
-
49
-
50
-
51
-
52
-
53
-
54
-
55
-
56
-
57
-
58
-
59
-
60
-
61
-
62
-
63
-
64
-
65
-
66
-
67
-
68
-
69
-
70
-
71
-
72
 |
 |