Epson R380 Printer Basics - Page 26
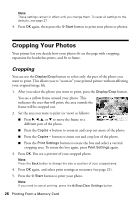
Cropping Your Photos, Cropping - parts
 |
UPC - 010343859074
View all Epson R380 manuals
Add to My Manuals
Save this manual to your list of manuals |
Page 26 highlights
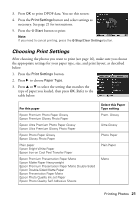
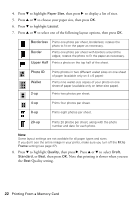
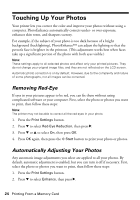
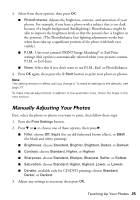
Note: These settings remain in effect until you change them. To reset all settings to the defaults, see page 27. 4. Press OK again, then press the x Start button to print your photo or photos. Cropping Your Photos Your printer lets you decide how your photos fit on the page with cropping, expansion for borderless prints, and fit to frame. Cropping You can use the Display/Crop button to select only the part of the photo you want to print. This allows you to "zoom in" your printed picture without affecting your original image file. 1. After you select the photo you want to print, press the Display/Crop button. You see a yellow frame around your photo. This indicates the area that will print; the area outside the frame will be cropped out. 2. Set the area you want to print (or view) as follows: ■ Press r, l, u, or d to move the frame to a different part of the photo. ■ Press the Copies + button to zoom in and crop out more of the photo. ■ Press the Copies - button to zoom out and crop less of the photo. ■ Press the Print Settings button to rotate the box and select a vertical cropping area. To rotate the box again, press Print Settings again. 3. Press OK. You see a preview of your cropped photo. Note: Press the Back button to change the size or position of your cropped area. 4. Press OK again, and select print settings as necessary (see page 21). 5. Press the x Start button to print your photo. Note: If you need to cancel printing, press the y Stop/Clear Settings button. 26 Printing From a Memory Card
-
 1
1 -
2
-
3
-
4
-
5
-
6
-
7
-
8
-
9
-
10
-
11
-
12
-
13
-
14
-
15
-
16
-
17
-
18
-
19
-
20
-
 21
21 -
 22
22 -
 23
23 -
 24
24 -
 25
25 -
 26
26 -
 27
27 -
 28
28 -
 29
29 -
 30
30 -
 31
31 -
32
-
33
-
34
-
35
-
36
-
37
-
38
-
39
-
40
-
41
-
42
-
43
-
44
-
45
-
46
-
47
-
48
-
49
-
50
-
51
-
52
-
53
-
54
-
55
-
56
-
57
-
58
-
59
-
60
-
61
-
62
-
63
-
64
-
65
-
66
-
67
-
68
-
69
-
70
-
71
-
72
 |
 |