Epson S60600 User Manual - Page 96
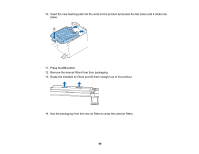
Insert the new flushing pad into the slots on the product and press the tab down until it clicks into
 |
View all Epson S60600 manuals
Add to My Manuals
Save this manual to your list of manuals |
Page 96 highlights
10. Insert the new flushing pad into the slots on the product and press the tab down until it clicks into place. 11. Press the OK button. 12. Remove the new air filters from their packaging. 13. Grasp the installed air filters and lift them straight out of the product. 14. Use the packaging from the new air filters to wrap the used air filters. 96
-
 1
1 -
2
-
3
-
4
-
5
-
6
-
7
-
8
-
9
-
10
-
11
-
12
-
13
-
14
-
15
-
16
-
17
-
18
-
19
-
20
-
21
-
22
-
23
-
24
-
25
-
26
-
27
-
28
-
29
-
30
-
31
-
32
-
33
-
34
-
35
-
36
-
37
-
38
-
39
-
40
-
41
-
42
-
43
-
44
-
45
-
46
-
47
-
48
-
49
-
50
-
51
-
52
-
53
-
54
-
55
-
56
-
57
-
58
-
59
-
60
-
61
-
62
-
63
-
64
-
65
-
66
-
67
-
68
-
69
-
70
-
71
-
72
-
73
-
74
-
75
-
76
-
77
-
78
-
79
-
80
-
81
-
82
-
83
-
84
-
85
-
86
-
87
-
88
-
89
-
90
-
 91
91 -
 92
92 -
 93
93 -
 94
94 -
 95
95 -
 96
96 -
 97
97 -
 98
98 -
 99
99 -
 100
100 -
 101
101 -
102
-
103
-
104
-
105
-
106
-
107
-
108
-
109
-
110
-
111
-
112
-
113
-
114
-
115
-
116
-
117
-
118
-
119
-
120
-
121
-
122
-
123
-
124
-
125
-
126
-
127
-
128
-
129
-
130
-
131
-
132
-
133
-
134
-
135
-
136
-
137
-
138
-
139
-
140
-
141
-
142
-
143
-
144
-
145
-
146
-
147
-
148
-
149
 |
 |
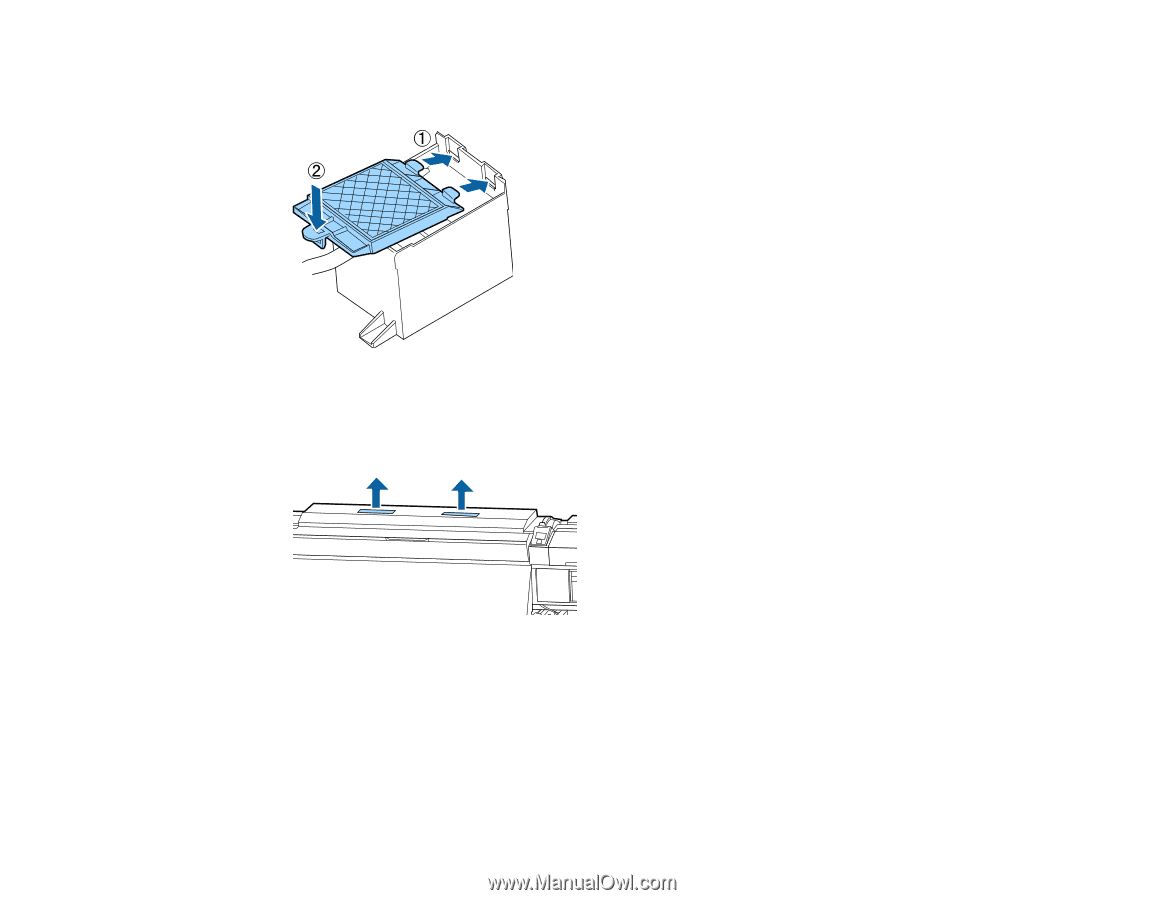
10. Insert the new flushing pad into the slots on the product and press the tab down until it clicks into
place.
11. Press the
OK
button.
12. Remove the new air filters from their packaging.
13. Grasp the installed air filters and lift them straight out of the product.
14. Use the packaging from the new air filters to wrap the used air filters.
96