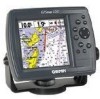
Garmin GPSMAP 172C Owner's Manual - Page 48
To add a proximity waypoint, To turn proximity alarms on or off, To display the waypoint menu
 |
UPC - 753759043537
View all Garmin GPSMAP 172C manuals
Add to My Manuals
Save this manual to your list of manuals |
Page 48 highlights
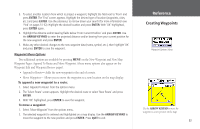
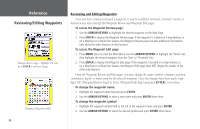
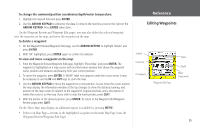
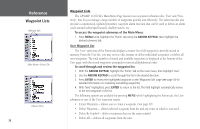
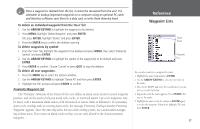
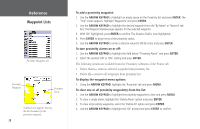
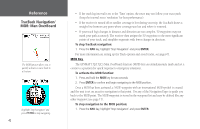
Reference Waypoint Lists Proximity Waypoints List Proximity Waypoint Proximity Circle A dashed circle appears showing the alert boundary for the proximity waypoints. 38 To add a proximity waypoint: 1. Use the ARROW KEYPAD to highlight an empty space on the Proximity list and press ENTER. The 'Find' screen appears. Highlight 'Waypoints' and press ENTER. 2. Use the ARROW KEYPAD to highlight the desired waypoint from the 'By Name' or 'Nearest' tab lists. The Waypoint Review page appears for the selected waypoint. 3. With 'OK' highlighted, press ENTER to confirm. The distance field is now highlighted. 4. Press ENTER to begin entry of the proximity radius. 5. Use the ARROW KEYPAD to enter a distance value (to 99.99 units) and press ENTER. To turn proximity alarms on or off: 1. Use the ARROW KEYPAD to highlight the field below "Proximity Alarm" and press ENTER. 2. Select the desired 'ON' or 'OFF' setting and press ENTER. The following options are available from the 'Proximity' submenu of the 'Points' tab: • Delete Alarm- removes selected waypoint from proximity list. • Delete All- removes all waypoints from proximity list. To display the waypoint menu options: 1. Using the ARROW KEYPAD, highlight the 'Proximity' tab and press MENU. To clear one or all proximity waypoint(s) from the list: 1. Use the ARROW KEYPAD to highlight the proximity waypoint to clear and press MENU. 2. To clear a single alarm, highlight the 'Delete Alarm' option and press ENTER. 3. To clear all proximity waypoints, select the 'Delete All' option and press ENTER. 4. Use the ARROW KEYPAD to highlight the 'OK' prompt and press ENTER to confirm.
-
 1
1 -
2
-
3
-
4
-
5
-
6
-
7
-
8
-
9
-
10
-
11
-
12
-
13
-
14
-
15
-
16
-
17
-
18
-
19
-
20
-
21
-
22
-
23
-
24
-
25
-
26
-
27
-
28
-
29
-
30
-
31
-
32
-
33
-
34
-
35
-
36
-
37
-
38
-
39
-
40
-
41
-
42
-
 43
43 -
 44
44 -
 45
45 -
 46
46 -
 47
47 -
 48
48 -
 49
49 -
 50
50 -
 51
51 -
 52
52 -
 53
53 -
54
-
55
-
56
-
57
-
58
-
59
-
60
-
61
-
62
-
63
-
64
-
65
-
66
-
67
-
68
-
69
-
70
-
71
-
72
-
73
-
74
-
75
-
76
-
77
-
78
-
79
-
80
-
81
-
82
-
83
-
84
-
85
-
86
-
87
-
88
-
89
-
90
-
91
-
92
-
93
-
94
-
95
-
96
-
97
-
98
-
99
-
100
-
101
-
102
-
103
-
104
-
105
-
106
-
107
-
108
-
109
-
110
 |
 |