Garmin GPSMAP 172C Owner's Manual - Page 50
Going to a Destination, TracBack Navigation, TracBack Navigation Follow Track
 |
UPC - 753759043537
View all Garmin GPSMAP 172C manuals
Add to My Manuals
Save this manual to your list of manuals |
Page 50 highlights
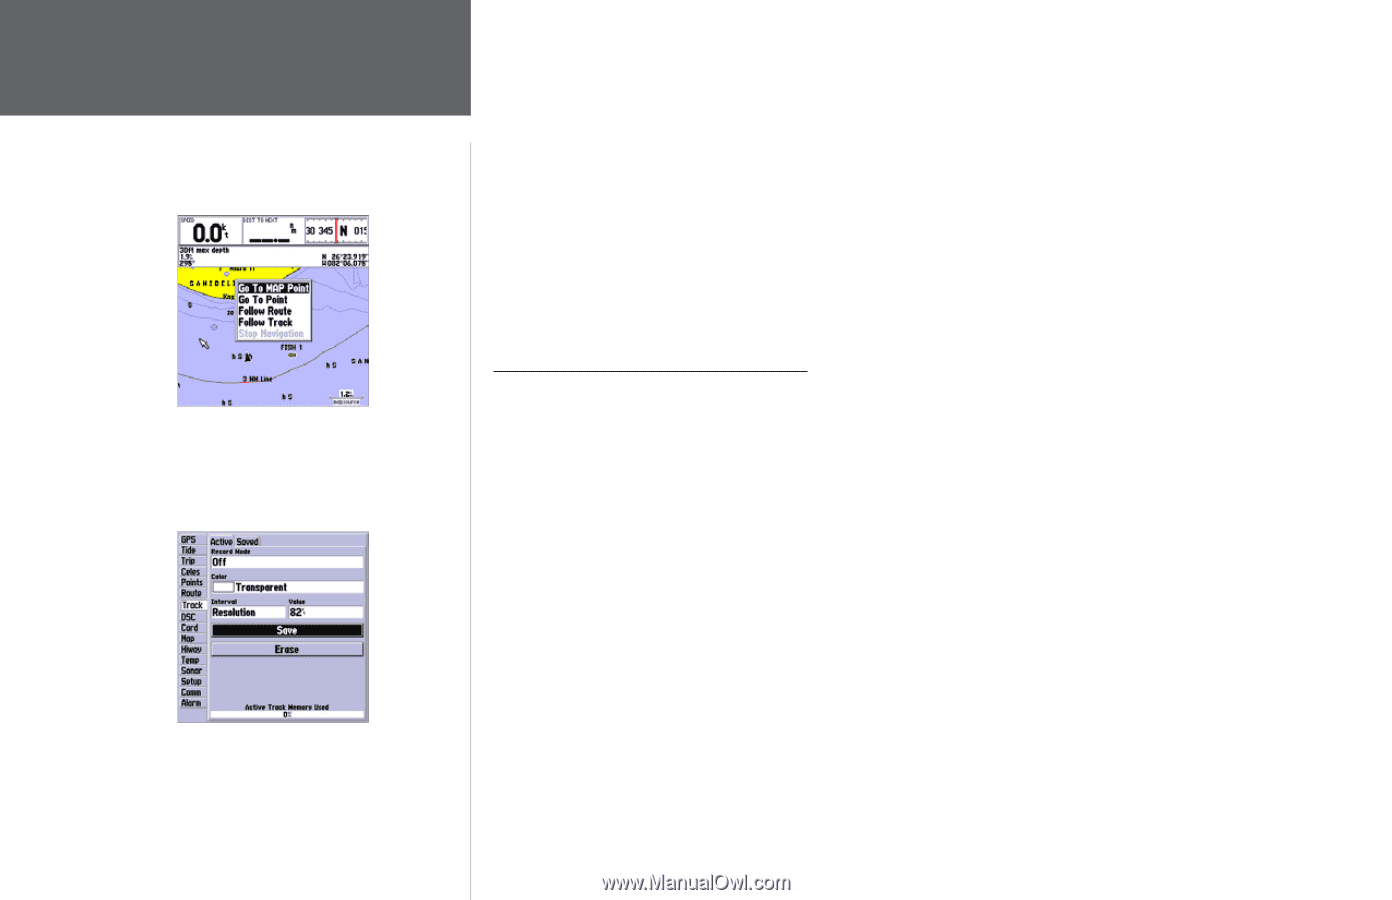
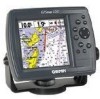
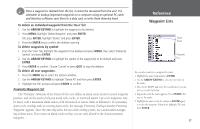
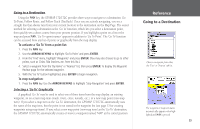
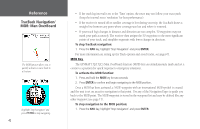
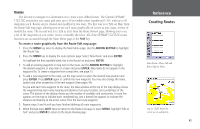
Reference Going to a Destination/ TracBack Navigation 'Go To MAP Point' allows you to navigate to a spot on the map that is not a waypoint or map item. Highlight 'Save' and press ENTER to save an active track log. 40 To activate an existing waypoint or map item as a 'Go To' from the map display: 1. Use the ARROW KEYPAD to highlight the waypoint or map item on the screen and press NAV. 2. With 'Go To ', press ENTER. To activate a new map point (non-map item) as a 'Go To' from the map display: 1. Use the ARROW KEYPAD to move the arrow cursor to the desired position and press NAV. 2. With 'Go To MAP Point' highlighted, press ENTER. To stop navigation: 1. Press the NAV key. Use the ARROW KEYPAD to highlight 'Stop Navigation' and press ENTER. TracBack Navigation (Follow Track) The TracBack function allows you to retrace your path using the track log automatically stored in the receiver's memory, which eliminates the need to store waypoints along the way. TracBack routes are created by reducing your track log into a route of up to 50 turns and activating an inverted route along those points. Once activated, a TracBack route leads you back to the oldest stored track log point, so it's a good idea to clear the existing track log before you start your current trip. To clear the track log and define a starting point for a TracBack route: 1. Press MENU twice to display the Main Menu page. 2. Using the ARROW KEYPAD, highlight the 'Track' tab, then highlight the 'Active' tab to the right. 3. Use the ARROW KEYPAD to highlight 'Erase' and press ENTER. 4. Highlight 'OK' and press ENTER. You must first save the track log before you can use the 'Follow Track' feature. The Save feature allows you to store up to 15 track logs from certain times and dates. To save a track log: 1. From the Main Menu, use the ARROW KEYPAD to highlight the 'Track' tab, then highlight the 'Active' tab to the right.
-
 1
1 -
2
-
3
-
4
-
5
-
6
-
7
-
8
-
9
-
10
-
11
-
12
-
13
-
14
-
15
-
16
-
17
-
18
-
19
-
20
-
21
-
22
-
23
-
24
-
25
-
26
-
27
-
28
-
29
-
30
-
31
-
32
-
33
-
34
-
35
-
36
-
37
-
38
-
39
-
40
-
41
-
42
-
43
-
44
-
 45
45 -
 46
46 -
 47
47 -
 48
48 -
 49
49 -
 50
50 -
 51
51 -
 52
52 -
 53
53 -
 54
54 -
 55
55 -
56
-
57
-
58
-
59
-
60
-
61
-
62
-
63
-
64
-
65
-
66
-
67
-
68
-
69
-
70
-
71
-
72
-
73
-
74
-
75
-
76
-
77
-
78
-
79
-
80
-
81
-
82
-
83
-
84
-
85
-
86
-
87
-
88
-
89
-
90
-
91
-
92
-
93
-
94
-
95
-
96
-
97
-
98
-
99
-
100
-
101
-
102
-
103
-
104
-
105
-
106
-
107
-
108
-
109
-
110
 |
 |