HP 4410t HP 4410t Mobile Thin Client - Page 29
User accounts, Creating a new user account, Creating user profiles, Start, Control Panel
 |
UPC - 884962419915
View all HP 4410t manuals
Add to My Manuals
Save this manual to your list of manuals |
Page 29 highlights
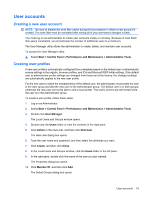
User accounts Creating a new user account NOTE: Be sure to disable the write filter cache during the boot session in which a new account is created. The write filter must be reenabled after saving all of your permanent changes to flash. You must log on as administrator to create user accounts locally or remotely. Because of local flash/ disk space constraints, you should keep the number of additional users to a minimum. The User Manager utility allows the administrator to create, delete, and maintain user accounts. To access the User Manager utility: ▲ Select Start > Control Panel > Performance and Maintenance > Administrative Tools. Creating user profiles A new user profile is automatically configured from a template based on the default user or administrator access settings in the registry, browser profiles, and ICA and Microsoft RDP initial settings. If the default user or administrator profile settings are changed from those set at the factory, the changed settings are automatically applied to the new user profile. For the new user to match the characteristics of the default user, the administrator must create the user in the User group and add the new user to the Administrator group. The default user is in both groups; otherwise the new user will not be able to add a local printer. The user's actions are still limited while the user is in the Administrator group. To create a user profile, follow these steps: 1. Log on as Administrator. 2. Select Start > Control Panel > Performance and Maintenance > Administrative Tools. 3. Double-click User Manager. The Local Users and Groups window opens. 4. Double-click the Users folder to view the contents in the right pane. 5. Click Action in the menu bar, and then click New User. The New User dialog box opens. 6. Type the user name and password, and then select the attributes you want. 7. Click Create, and then click Close. 8. In the Local Users and Groups window, click the Users folder in the left pane. 9. In the right pane, double-click the name of the user you just created. The Properties dialog box opens. 10. Click Member Of, and then click Add. The Select Groups dialog box opens. User accounts 19
-
 1
1 -
2
-
3
-
4
-
5
-
6
-
7
-
8
-
9
-
10
-
11
-
12
-
13
-
14
-
15
-
16
-
17
-
18
-
19
-
20
-
21
-
22
-
23
-
 24
24 -
 25
25 -
 26
26 -
 27
27 -
 28
28 -
 29
29 -
 30
30 -
 31
31 -
 32
32 -
 33
33 -
 34
34 -
35
-
36
-
37
-
38
-
39
-
40
-
41
-
42
-
43
-
44
-
45
-
46
-
47
-
48
-
49
-
50
-
51
-
52
-
53
-
54
-
55
-
56
-
57
-
58
-
59
-
60
-
61
-
62
-
63
-
64
-
65
-
66
-
67
-
68
-
69
-
70
-
71
-
72
-
73
-
74
-
75
-
76
-
77
-
78
-
79
-
80
-
81
-
82
-
83
-
84
-
85
-
86
-
87
-
88
-
89
-
90
-
91
-
92
-
93
-
94
-
95
-
96
-
97
-
98
-
99
-
100
-
101
-
102
-
103
-
104
 |
 |
