HP DL785 HP ProLiant DL785 G5 and G6 Servers - Maintenance and Service Guide, - Page 39
Hot-plug fans, Rear accessed hot-plug fans, Use tools with insulated handles.
 |
UPC - 883585262809
View all HP DL785 manuals
Add to My Manuals
Save this manual to your list of manuals |
Page 39 highlights
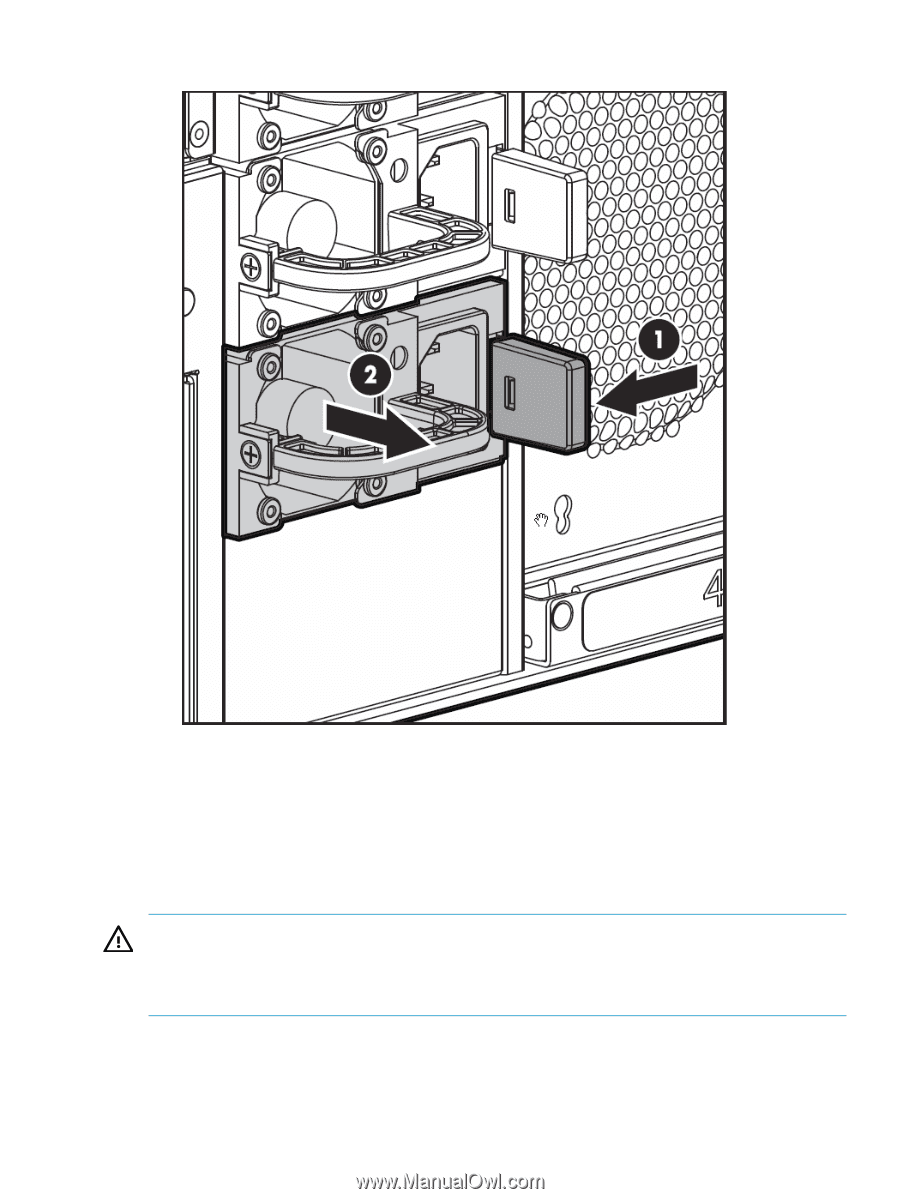
3. Remove the power supply. To replace the component, reverse the removal procedure. Hot-plug fans The server supports redundant hot-plug fans, each with two individual fans rotors, in a 5+1 configuration to provide proper airflow to the server. The airflow strategy contains two thermal zones with three fan units in the bottom zone (accessed from the server rear), and three fan units in the upper zone (accessed internally). See "Fan locations" (page 75). WARNING! To prevent personal injury from hazardous energy: • Remove watches, rings, or other metal objects. • Use tools with insulated handles. • Do not place tools or metal parts on top of batteries. Rear accessed hot-plug fans To replace a rear accessed hot-plug fan: 1. Identify the failed fan by locating an amber LED on the Systems Insight Display. Hot-plug fans 39
-
 1
1 -
2
-
3
-
4
-
5
-
6
-
7
-
8
-
9
-
10
-
11
-
12
-
13
-
14
-
15
-
16
-
17
-
18
-
19
-
20
-
21
-
22
-
23
-
24
-
25
-
26
-
27
-
28
-
29
-
30
-
31
-
32
-
33
-
 34
34 -
 35
35 -
 36
36 -
 37
37 -
 38
38 -
 39
39 -
 40
40 -
 41
41 -
 42
42 -
 43
43 -
 44
44 -
45
-
46
-
47
-
48
-
49
-
50
-
51
-
52
-
53
-
54
-
55
-
56
-
57
-
58
-
59
-
60
-
61
-
62
-
63
-
64
-
65
-
66
-
67
-
68
-
69
-
70
-
71
-
72
-
73
-
74
-
75
-
76
-
77
-
78
-
79
-
80
-
81
-
82
-
83
-
84
-
85
-
86
-
87
-
88
-
89
-
90
 |
 |