HP EliteDesk 705 G2 Maintenance and Service Guide - Page 59
Hood lock, When installing the hood lock, on the inside rear of the computer
 |
View all HP EliteDesk 705 G2 manuals
Add to My Manuals
Save this manual to your list of manuals |
Page 59 highlights
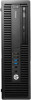
Hood lock The hood lock is attached to the rear of the chassis. 1. Prepare the computer for disassembly (Preparation for disassembly on page 19). 2. Remove the access panel (Access panel on page 20). 3. On the rear of the computer, remove the security screw that secures the lock. NOTE: The security screw requires a special security wrench to remove. 4. From the inside of the computer, lift the hood lock out of the computer.. To install the hood lock, reverse the removal procedure. When installing the hood lock, on the inside rear of the computer, insert the clips on the back of the lock into the slots on the computer rear panel (1), and then rotate the lock down into place (2). Hood lock 49
-
 1
1 -
2
-
3
-
4
-
5
-
6
-
7
-
8
-
9
-
10
-
11
-
12
-
13
-
14
-
15
-
16
-
17
-
18
-
19
-
20
-
21
-
22
-
23
-
24
-
25
-
26
-
27
-
28
-
29
-
30
-
31
-
32
-
33
-
34
-
35
-
36
-
37
-
38
-
39
-
40
-
41
-
42
-
43
-
44
-
45
-
46
-
47
-
48
-
49
-
50
-
51
-
52
-
53
-
 54
54 -
 55
55 -
 56
56 -
 57
57 -
 58
58 -
 59
59 -
 60
60 -
 61
61 -
 62
62 -
 63
63 -
 64
64 -
65
-
66
-
67
-
68
-
69
-
70
-
71
-
72
-
73
-
74
-
75
-
76
-
77
-
78
-
79
-
80
-
81
-
82
-
83
-
84
-
85
-
86
-
87
-
88
-
89
-
90
-
91
-
92
-
93
-
94
-
95
-
96
-
97
-
98
-
99
-
100
-
101
-
102
-
103
-
104
-
105
-
106
-
107
-
108
-
109
-
110
-
111
-
112
-
113
-
114
-
115
-
116
-
117
-
118
-
119
-
120
-
121
-
122
-
123
-
124
-
125
-
126
-
127
-
128
-
129
-
130
-
131
-
132
-
133
-
134
-
135
-
136
-
137
-
138
-
139
-
140
-
141
-
142
-
143
-
144
-
145
-
146
-
147
-
148
-
149
-
150
-
151
-
152
-
153
 |
 |

Hood lock
The hood lock is attached to the rear of the chassis.
1.
Prepare the computer for disassembly (
Preparation for disassembly
on page
19
).
2.
Remove the access panel (
Access panel
on page
20
).
3.
On the rear of the computer, remove the security screw that secures the lock.
NOTE:
The security screw requires a special security wrench to remove.
4.
From the inside of the computer, lift the hood lock out of the computer..
To install the hood lock, reverse the removal procedure.
When installing the hood lock, on the inside rear of the computer, insert the clips on the back of the lock into
the slots on the computer rear panel
(1)
, and then rotate the lock down into place
(2)
.
Hood lock
49