HP LaserJet M9040/M9050 HP LaserJet M9040/M9050 MFP - Software Technical Refer - Page 276
Processing Job, Administration, Information, Configuration/Status s, Configuration
 |
View all HP LaserJet M9040/M9050 manuals
Add to My Manuals
Save this manual to your list of manuals |
Page 276 highlights
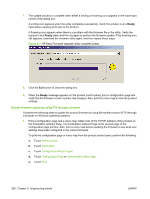
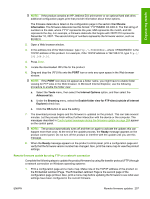
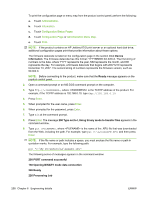
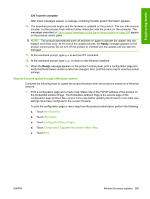
To print the configuration page or menu map from the product control panel, perform the following: a. Touch Administration. b. Touch Information. c. Touch Configuration/Status Pages. d. Touch Configuration Page or Administration Menu Map. e. Touch Print. NOTE: If the product contains an HP Jetdirect EIO print server or an optional hard disk drive, additional configuration pages print that provide information about those options. The firmware datecode is listed on the configuration page in the section titled Device Information. The firmware datecode has this format: YYYYMMDD XX.XXX.X. The first string of numbers is the date, where YYYY represents the year, MM represents the month, and DD represents the day. For example, a firmware datecode that begins with 20071210 represents December 10, 2007. The second string of numbers represents the firmware version, such as 50.002.0. NOTE: Before connecting to the product, make sure that the Ready message appears on the product control panel. 2. Open a command prompt or an MS-DOS command prompt on the computer. 3. Type ftp://, where is the TCP/IP address of the product. For example, if the TCP/IP address is 192.168.0.10, type ftp://192.168.0.10. 4. Press Enter. 5. When prompted for the user name, press Enter. 6. When prompted for the password, press Enter. 7. Type bin at the command prompt. 8. Press Enter. The message 200 Type set to I, Using binary mode to transfer files appears in the command window. 9. Type put , where is the name of the .RFU file that was downloaded from the Web, including the path. For example, type put C:\LJ\xxxxFW.RFU, and then press Enter. NOTE: If the file name or path includes a space, you must enclose the file name or path in quotation marks. For example, type the following path: put "c:\My Documents\LJ\xxxxfw.rfu". The following series of messages appears in the command window: 200 PORT command successful 150 Opening BINARY mode data connection 226 Ready 226 Processing Job 258 Chapter 6 Engineering details ENWW
-
 1
1 -
2
-
3
-
4
-
5
-
6
-
7
-
8
-
9
-
10
-
11
-
12
-
13
-
14
-
15
-
16
-
17
-
18
-
19
-
20
-
21
-
22
-
23
-
24
-
25
-
26
-
27
-
28
-
29
-
30
-
31
-
32
-
33
-
34
-
35
-
36
-
37
-
38
-
39
-
40
-
41
-
42
-
43
-
44
-
45
-
46
-
47
-
48
-
49
-
50
-
51
-
52
-
53
-
54
-
55
-
56
-
57
-
58
-
59
-
60
-
61
-
62
-
63
-
64
-
65
-
66
-
67
-
68
-
69
-
70
-
71
-
72
-
73
-
74
-
75
-
76
-
77
-
78
-
79
-
80
-
81
-
82
-
83
-
84
-
85
-
86
-
87
-
88
-
89
-
90
-
91
-
92
-
93
-
94
-
95
-
96
-
97
-
98
-
99
-
100
-
101
-
102
-
103
-
104
-
105
-
106
-
107
-
108
-
109
-
110
-
111
-
112
-
113
-
114
-
115
-
116
-
117
-
118
-
119
-
120
-
121
-
122
-
123
-
124
-
125
-
126
-
127
-
128
-
129
-
130
-
131
-
132
-
133
-
134
-
135
-
136
-
137
-
138
-
139
-
140
-
141
-
142
-
143
-
144
-
145
-
146
-
147
-
148
-
149
-
150
-
151
-
152
-
153
-
154
-
155
-
156
-
157
-
158
-
159
-
160
-
161
-
162
-
163
-
164
-
165
-
166
-
167
-
168
-
169
-
170
-
171
-
172
-
173
-
174
-
175
-
176
-
177
-
178
-
179
-
180
-
181
-
182
-
183
-
184
-
185
-
186
-
187
-
188
-
189
-
190
-
191
-
192
-
193
-
194
-
195
-
196
-
197
-
198
-
199
-
200
-
201
-
202
-
203
-
204
-
205
-
206
-
207
-
208
-
209
-
210
-
211
-
212
-
213
-
214
-
215
-
216
-
217
-
218
-
219
-
220
-
221
-
222
-
223
-
224
-
225
-
226
-
227
-
228
-
229
-
230
-
231
-
232
-
233
-
234
-
235
-
236
-
237
-
238
-
239
-
240
-
241
-
242
-
243
-
244
-
245
-
246
-
247
-
248
-
249
-
250
-
251
-
252
-
253
-
254
-
255
-
256
-
257
-
258
-
259
-
260
-
261
-
262
-
263
-
264
-
265
-
266
-
267
-
268
-
269
-
270
-
 271
271 -
 272
272 -
 273
273 -
 274
274 -
 275
275 -
 276
276 -
 277
277 -
 278
278 -
 279
279 -
 280
280 -
 281
281 -
282
-
283
-
284
-
285
-
286
-
287
-
288
-
289
-
290
-
291
-
292
-
293
-
294
-
295
-
296
-
297
-
298
-
299
-
300
-
301
-
302
-
303
-
304
-
305
-
306
-
307
-
308
-
309
-
310
-
311
-
312
-
313
-
314
-
315
-
316
-
317
-
318
-
319
-
320
-
321
-
322
-
323
-
324
-
325
-
326
 |
 |