HP LaserJet Pro CP1025 Service Manual - Page 101
Solve image-quality problems
 |
View all HP LaserJet Pro CP1025 manuals
Add to My Manuals
Save this manual to your list of manuals |
Page 101 highlights
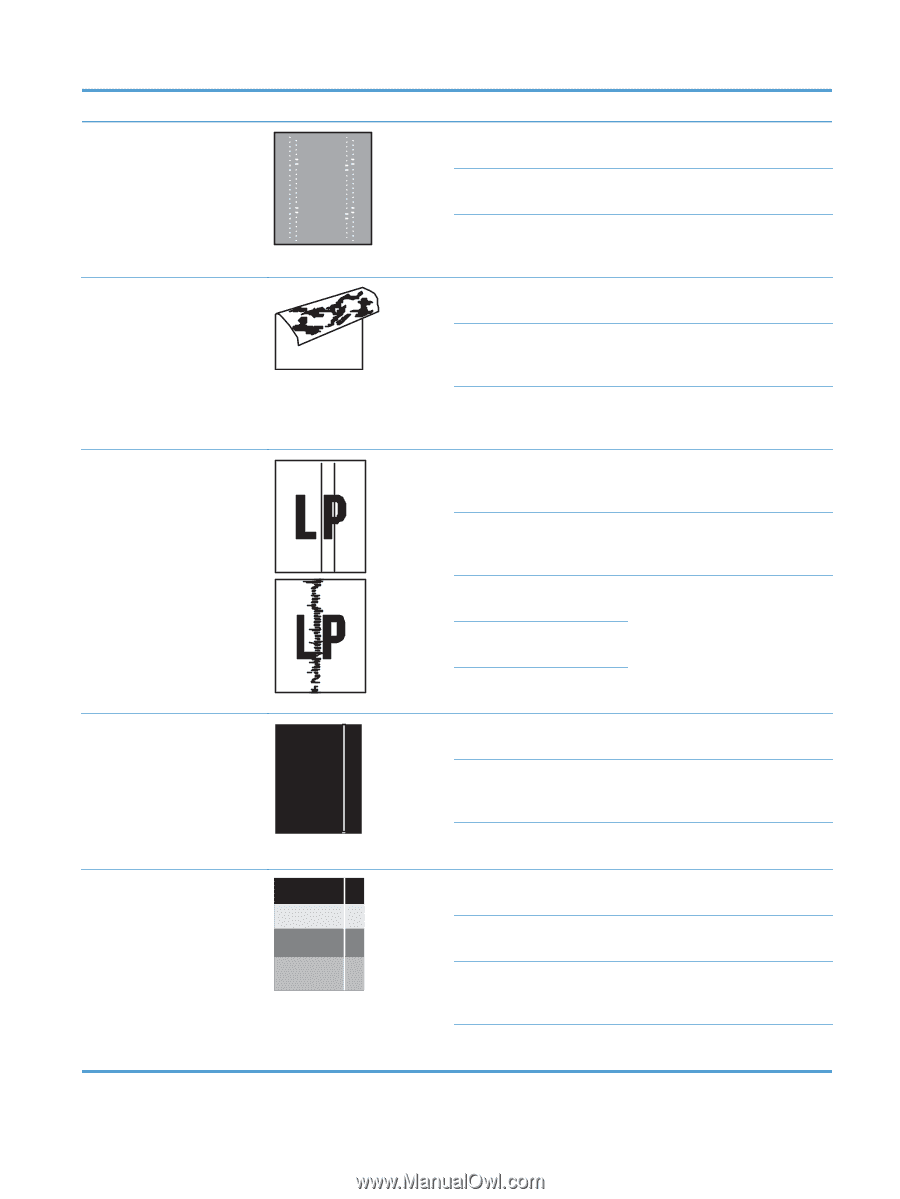
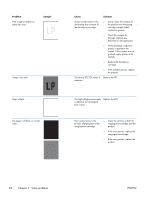
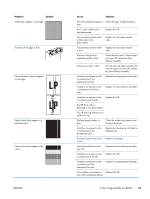
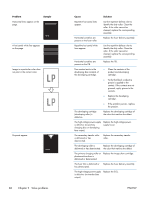
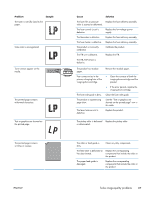
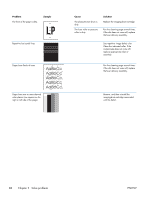
Problem Sample White spots appear in an image The back of the page is dirty. Vertical streaks or bands appear on the page. Vertical white lines appear in a particular color. Vertical white lines appear in all colors. ENWW Cause Solution The static charge eliminator is Clean the static charge eliminator. dirty. The T1 pad is deformed or has deteriorated. Replace the ITB. The secondary transfer roller is deformed or has deteriorated. Replace the secondary transfer roller. The secondary transfer roller is dirty. Replace the secondary transfer roller. The fuser inlet guide or separation guide is dirty. Clean the dirty parts. If the dirt does not come off, replace the fuser delivery assembly. The pressure roller is dirty. Run the cleaning page several times. If the dirt does not come off, replace the fuser delivery assembly. Scratches are present on the circumference of the photosensitive drum. Replace the imaging-drum-cartridge. Scratches are present on the circumference of the fuser roller. Replace the fuser delivery assembly. Scratches are present on the circumference of the ITB. Replace the ITB. The ITB drive roller is deformed or has deteriorated. The ITB cleaning mechanism is malfunctioning. The laser beam window is dirty. Clean the window and remove any foreign substances. Scratches are present on the circumference of the developing roller. Replace the developing cartridge for affected color. The laser/scanner-unit mirror is dirty. Replace the product. Horizontal scratches on the fuser film. Replace the fuser delivery assembly. Scratches are present on the circumference of the ITB. Replace the ITB. Scratches are present on the circumference of the photosensitive drum. Replace the imaging-drum-cartridge. No scratches are present on Replace the ITB. any of the components above. Solve image-quality problems 85
-
 1
1 -
2
-
3
-
4
-
5
-
6
-
7
-
8
-
9
-
10
-
11
-
12
-
13
-
14
-
15
-
16
-
17
-
18
-
19
-
20
-
21
-
22
-
23
-
24
-
25
-
26
-
27
-
28
-
29
-
30
-
31
-
32
-
33
-
34
-
35
-
36
-
37
-
38
-
39
-
40
-
41
-
42
-
43
-
44
-
45
-
46
-
47
-
48
-
49
-
50
-
51
-
52
-
53
-
54
-
55
-
56
-
57
-
58
-
59
-
60
-
61
-
62
-
63
-
64
-
65
-
66
-
67
-
68
-
69
-
70
-
71
-
72
-
73
-
74
-
75
-
76
-
77
-
78
-
79
-
80
-
81
-
82
-
83
-
84
-
85
-
86
-
87
-
88
-
89
-
90
-
91
-
92
-
93
-
94
-
95
-
 96
96 -
 97
97 -
 98
98 -
 99
99 -
 100
100 -
 101
101 -
 102
102 -
 103
103 -
 104
104 -
 105
105 -
 106
106 -
107
-
108
-
109
-
110
-
111
-
112
-
113
-
114
-
115
-
116
-
117
-
118
-
119
-
120
-
121
-
122
-
123
-
124
-
125
-
126
-
127
-
128
-
129
-
130
-
131
-
132
-
133
-
134
-
135
-
136
-
137
-
138
-
139
-
140
-
141
-
142
-
143
-
144
-
145
-
146
-
147
-
148
-
149
-
150
-
151
-
152
-
153
-
154
-
155
-
156
-
157
-
158
-
159
-
160
-
161
-
162
-
163
-
164
-
165
-
166
 |
 |