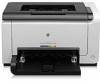
HP LaserJet Pro CP1025 Service Manual - Page 8

Solve problems, Power subsystem

Page 8 highlights

Remove the control panel 25 Front door 27 Remove the front door 27 Main assemblies ...29 ITB assembly 29 Remove the ITB assembly 29 Fuser delivery assembly 38 Remove the fuser delivery assembly 39 Formatter PCA (base model 43 Remove the formatter PCA (base model 43 Formatter and wireless PCA (plus model 44 Remove the formatter and wireless PCA (plus model 44 Engine controller assembly 46 Remove the engine controller assembly 46 Low-voltage power supply assembly 49 Remove the low-voltage power supply assembly 49 2 Solve problems ...53 Solve problems checklist ...54 Step 1: Make sure that the product is set up correctly 54 Step 2: Check the cabling or wireless connection (network models only 54 Step 3: Check to see if any control-panel lights are lit 54 Step 4: Check the paper 54 Step 5: Check the software 55 Step 6: Test print functionality 55 Step 7: Check the supplies 55 Step 8: Try sending a print job from a computer 55 Troubleshooting process ...56 Determine the problem source 56 Power subsystem ...57 Power-on checks 57 Tools for troubleshooting ...58 Component diagnostics 58 Engine diagnostics 58 Engine test page 58 Diagrams ...59 Plug/jack locations 59 Locations of connectors 60 Locations of major components 61 General timing chart 63 General circuit diagram 64 Internal print-quality test pages 65 Print quality troubleshooting page 65 vi ENWW

  • 1
  • 2
  • 3
  • 4
  • 5
  • 6
  • 7
  • 8
  • 9
  • 10
  • 11
  • 12
  • 13
  • 14
  • 15
  • 16
  • 17
  • 18
  • 19
  • 20
  • 21
  • 22
  • 23
  • 24
  • 25
  • 26
  • 27
  • 28
  • 29
  • 30
  • 31
  • 32
  • 33
  • 34
  • 35
  • 36
  • 37
  • 38
  • 39
  • 40
  • 41
  • 42
  • 43
  • 44
  • 45
  • 46
  • 47
  • 48
  • 49
  • 50
  • 51
  • 52
  • 53
  • 54
  • 55
  • 56
  • 57
  • 58
  • 59
  • 60
  • 61
  • 62
  • 63
  • 64
  • 65
  • 66
  • 67
  • 68
  • 69
  • 70
  • 71
  • 72
  • 73
  • 74
  • 75
  • 76
  • 77
  • 78
  • 79
  • 80
  • 81
  • 82
  • 83
  • 84
  • 85
  • 86
  • 87
  • 88
  • 89
  • 90
  • 91
  • 92
  • 93
  • 94
  • 95
  • 96
  • 97
  • 98
  • 99
  • 100
  • 101
  • 102
  • 103
  • 104
  • 105
  • 106
  • 107
  • 108
  • 109
  • 110
  • 111
  • 112
  • 113
  • 114
  • 115
  • 116
  • 117
  • 118
  • 119
  • 120
  • 121
  • 122
  • 123
  • 124
  • 125
  • 126
  • 127
  • 128
  • 129
  • 130
  • 131
  • 132
  • 133
  • 134
  • 135
  • 136
  • 137
  • 138
  • 139
  • 140
  • 141
  • 142
  • 143
  • 144
  • 145
  • 146
  • 147
  • 148
  • 149
  • 150
  • 151
  • 152
  • 153
  • 154
  • 155
  • 156
  • 157
  • 158
  • 159
  • 160
  • 161
  • 162
  • 163
  • 164
  • 165
  • 166

Remove the control panel
...........................................................
25
Front door
...............................................................................................
27
Remove the front door
................................................................
27
Main assemblies
.....................................................................................................
29
ITB assembly
............................................................................................
29
Remove the ITB assembly
............................................................
29
Fuser delivery assembly
............................................................................
38
Remove the fuser delivery assembly
.............................................
39
Formatter PCA (base model)
......................................................................
43
Remove the formatter PCA (base model)
.......................................
43
Formatter and wireless PCA (plus model)
.....................................................
44
Remove the formatter and wireless PCA (plus model)
.....................
44
Engine controller assembly
........................................................................
46
Remove the engine controller assembly
........................................
46
Low-voltage power supply assembly
...........................................................
49
Remove the low-voltage power supply assembly
............................
49
2
Solve problems
...............................................................................................................
53
Solve problems checklist
.........................................................................................................
54
Step 1: Make sure that the product is set up correctly
..................................................
54
Step 2: Check the cabling or wireless connection (network models only)
........................
54
Step 3: Check to see if any control-panel lights are lit
..................................................
54
Step 4: Check the paper
..........................................................................................
54
Step 5: Check the software
.......................................................................................
55
Step 6: Test print functionality
...................................................................................
55
Step 7: Check the supplies
.......................................................................................
55
Step 8: Try sending a print job from a computer
.........................................................
55
Troubleshooting process
..........................................................................................................
56
Determine the problem source
...................................................................................
56
Power subsystem
.....................................................................................................
57
Power-on checks
......................................................................................
57
Tools for troubleshooting
.........................................................................................................
58
Component diagnostics
............................................................................................
58
Engine diagnostics
...................................................................................
58
Engine test page
......................................................................................
58
Diagrams
...............................................................................................................
59
Plug/jack locations
...................................................................................
59
Locations of connectors
.............................................................................
60
Locations of major components
..................................................................
61
General timing chart
.................................................................................
63
General circuit diagram
............................................................................
64
Internal print-quality test pages
..................................................................................
65
Print quality troubleshooting page
..............................................................
65
vi
ENWW