HP Media Center m1000 HP Media Center Desktop PCs - Software Guide - Page 28
Assigning a Drive Letter to the HP Personal Media Drive, Storing Files, Playing Media Files - hard drive removal
 |
View all HP Media Center m1000 manuals
Add to My Manuals
Save this manual to your list of manuals |
Page 28 highlights
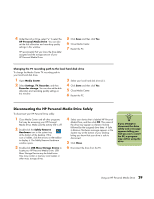
n The installation CD that came with your HP Personal Media Drive allows you to assign a drive letter to the HP Personal Media Drive. n To avoid multiple hard disk drives using the same drive letter when connecting and removing the drives, assign the letter Z. Assigning a Drive Letter to the HP Personal Media Drive You can permanently assign a drive letter to avoid the letter changing when you connect and disconnect this drive and other devices. Also, it is easier for a software program to locate files on the HP Personal Media Drive if a drive letter is assigned. Some programs may not be able to find files if the drive has a new drive letter. It is best to always remove your drive safely to avoid errors. See "Disconnecting the HP Personal Media Drive Safely" on page 29. To assign a drive letter: 1 Click Start. 2 Right-click My Computer. 3 Select Manage and then click Disk Management. 4 Right-click the HP Personal Media Drive. 5 Select Change Drive Letter and Paths. HP recommends that you pick the drive letter Z. 6 Click Change and select a letter, and then apply the changes by clicking OK. Storing Files The best way to transfer files to the HP Personal Media Drive is to drag them from your local hard disk drive to your HP Personal Media Drive. This allows you to place files in specific folders so that they can be viewed in Media Center. Refer to the following procedures for more detailed instructions about creating these linked folders. Playing Media Files You can play all kinds of media from an HP Personal Media Drive: 1 Click Start on the taskbar. 2 Click My Computer. 3 Double-click the HP Personal Media Drive icon to locate your media file. 4 Double-click the file. Most media files open in Windows Media Player. 24 HP Media Center PC Software Guide
-
 1
1 -
2
-
3
-
4
-
5
-
6
-
7
-
8
-
9
-
10
-
11
-
12
-
13
-
14
-
15
-
16
-
17
-
18
-
19
-
20
-
21
-
22
-
 23
23 -
 24
24 -
 25
25 -
 26
26 -
 27
27 -
 28
28 -
 29
29 -
 30
30 -
 31
31 -
 32
32 -
 33
33 -
34
-
35
-
36
-
37
-
38
-
39
-
40
-
41
-
42
-
43
-
44
-
45
-
46
-
47
-
48
-
49
-
50
-
51
-
52
-
53
-
54
-
55
-
56
-
57
-
58
-
59
-
60
-
61
-
62
-
63
-
64
-
65
-
66
-
67
-
68
-
69
-
70
-
71
-
72
-
73
-
74
-
75
-
76
-
77
-
78
-
79
-
80
-
81
-
82
-
83
-
84
-
85
-
86
-
87
-
88
-
89
-
90
-
91
-
92
-
93
-
94
-
95
-
96
-
97
-
98
-
99
-
100
-
101
-
102
-
103
-
104
-
105
-
106
-
107
-
108
-
109
-
110
-
111
-
112
-
113
-
114
-
115
-
116
-
117
-
118
-
119
-
120
-
121
-
122
-
123
-
124
-
125
-
126
-
127
-
128
-
129
-
130
-
131
-
132
-
133
-
134
-
135
-
136
-
137
-
138
-
139
-
140
-
141
-
142
-
143
-
144
-
145
-
146
-
147
-
148
-
149
-
150
-
151
-
152
-
153
-
154
-
155
-
156
-
157
-
158
-
159
-
160
-
161
-
162
 |
 |
