HP Officejet 600 HP OfficeJet 600 Series All-in-One - (English) User Guide - Page 32
Make Sure Everything, Works Properly - scan to pc
 |
View all HP Officejet 600 manuals
Add to My Manuals
Save this manual to your list of manuals |
Page 32 highlights
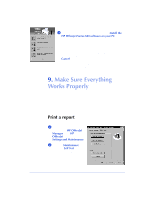
3 At the HP OfficeJet Welcome screen, click Install the HP OfficeJet Series 600 software on your PC to begin installing the software. You'll be asked to confirm the file location and computer port where the OfficeJet will be installed. Follow all instructions on the screen. After the files are copied to your computer, you may choose to install the OmniPage LE software for scanning text for editing. If you do not want to install it now, click Cancel to continue with the HP OfficeJet software setup. The HP OfficeJet Setup Wizard will help you customize your HP OfficeJet so that it runs best with your particular office setup. 9. Make Sure Everything Works Properly Congratulations! Your office is now set up to print, fax, copy and scan with your new HP OfficeJet. If you want to make sure everything is working well - or to get a quick start on learning some basics - follow the instructions below to print, fax, copy, and scan. Print a report Print the Self Test Report to test the printing feature. Here's how: 1 On your Windows desktop, double-click HP OfficeJet Manager, click HP OfficeJet, then select Settings and Maintenance. 2 Click the Maintenance tab, then click Self Test to begin printing the Self Test Report. This report shows you the current and factory settings in your HP OfficeJet, and can help you diagnose print cartridge problems. 1-24
-
 1
1 -
2
-
3
-
4
-
5
-
6
-
7
-
8
-
9
-
10
-
11
-
12
-
13
-
14
-
15
-
16
-
17
-
18
-
19
-
20
-
21
-
22
-
23
-
24
-
25
-
26
-
 27
27 -
 28
28 -
 29
29 -
 30
30 -
 31
31 -
 32
32 -
 33
33 -
 34
34 -
 35
35 -
 36
36 -
 37
37 -
38
-
39
-
40
-
41
-
42
-
43
-
44
-
45
-
46
-
47
-
48
-
49
-
50
-
51
-
52
-
53
-
54
-
55
-
56
-
57
-
58
-
59
-
60
-
61
-
62
-
63
-
64
-
65
-
66
-
67
-
68
-
69
-
70
-
71
-
72
-
73
-
74
-
75
-
76
-
77
-
78
-
79
-
80
-
81
-
82
-
83
-
84
-
85
-
86
-
87
-
88
-
89
-
90
-
91
-
92
-
93
-
94
-
95
-
96
-
97
-
98
-
99
-
100
-
101
-
102
-
103
-
104
-
105
-
106
-
107
-
108
-
109
-
110
-
111
-
112
-
113
-
114
-
115
-
116
-
117
-
118
-
119
-
120
-
121
-
122
-
123
-
124
-
125
-
126
-
127
-
128
-
129
-
130
-
131
-
132
-
133
-
134
-
135
-
136
-
137
-
138
-
139
-
140
 |
 |
