HP Officejet 600 HP OfficeJet 600 Series All-in-One - (English) User Guide - Page 44
Printing
 |
View all HP Officejet 600 manuals
Add to My Manuals
Save this manual to your list of manuals |
Page 44 highlights
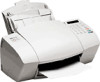
Scanning text for editing (OCR) Note: Scanning text for editing will only work if OmniPage LE is installed on your computer. For more information on installing HP OfficeJet software, refer to Step "8. Install the Software REQUIRED!" on page 1-23. 1 Follow the previous instructions for scanning images, except click Text and then select the Scan text for editing (OCR) checkbox in the "Optimize the scan for:" section. 2 The scanned text will appear in your selected word processor for editing. Make sure you proofread the text in your word processor and edit the document accordingly. Printing You can print on many types of paper and other media: plain paper, premium paper, transparencies, envelopes, and more. Refer to Chapter 6 for specific information on supported media sizes, types, and weights, and for special loading instructions. q To access the print settings - the Paper, Setup, and Advanced tabs - double-click HP OfficeJet Manager on your Windows desktop, click Print, then select Print Settings. Explore all three Print settings tabs: Paper, Setup, and Advanced. See the Help system and Chapter 6 for more information on printing and the print settings. 2-10
-
 1
1 -
2
-
3
-
4
-
5
-
6
-
7
-
8
-
9
-
10
-
11
-
12
-
13
-
14
-
15
-
16
-
17
-
18
-
19
-
20
-
21
-
22
-
23
-
24
-
25
-
26
-
27
-
28
-
29
-
30
-
31
-
32
-
33
-
34
-
35
-
36
-
37
-
38
-
 39
39 -
 40
40 -
 41
41 -
 42
42 -
 43
43 -
 44
44 -
 45
45 -
 46
46 -
 47
47 -
 48
48 -
 49
49 -
50
-
51
-
52
-
53
-
54
-
55
-
56
-
57
-
58
-
59
-
60
-
61
-
62
-
63
-
64
-
65
-
66
-
67
-
68
-
69
-
70
-
71
-
72
-
73
-
74
-
75
-
76
-
77
-
78
-
79
-
80
-
81
-
82
-
83
-
84
-
85
-
86
-
87
-
88
-
89
-
90
-
91
-
92
-
93
-
94
-
95
-
96
-
97
-
98
-
99
-
100
-
101
-
102
-
103
-
104
-
105
-
106
-
107
-
108
-
109
-
110
-
111
-
112
-
113
-
114
-
115
-
116
-
117
-
118
-
119
-
120
-
121
-
122
-
123
-
124
-
125
-
126
-
127
-
128
-
129
-
130
-
131
-
132
-
133
-
134
-
135
-
136
-
137
-
138
-
139
-
140
 |
 |
