HP Officejet Pro 276dw HP Officejet Pro 276dw - User Guide - Page 56
Scan a Document or Photo, Print, Scan & Fax
 |
View all HP Officejet Pro 276dw manuals
Add to My Manuals
Save this manual to your list of manuals |
Page 56 highlights
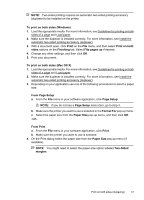
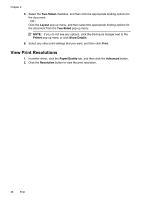
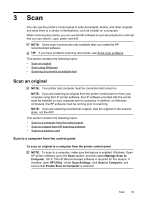
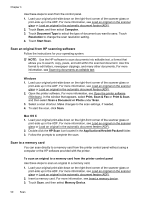
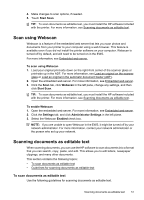
Chapter 3 Follow the instructions for your operating system. Windows 1. Load your original print-side down on the right-front corner of the scanner glass or print-side up in the ADF. For more information, see Load an original on the scanner glass or Load an original in the automatic document feeder (ADF). 2. Open the printer software. For more information, see Open the printer software (Windows). In the window that appears, select Print, Scan & Fax or Print & Scan, and then select Scan a Document or Photo under Scan. 3. Select the type of editable text you want to use in the scan: I want to... Extract just the text, without any of the formatting of the original Extract the text, as well as some of the formatting of the original Follow these steps Select the Save as Editable Text (OCR) shortcut from the list, and then select Text (.txt) from the File Type drop-down menu. Select the Save as Editable Text (OCR) shortcut from the list, and then select Rich Text (.rtf) from the File Type drop-down menu. Or Select the Save as PDF shortcut from the list, and then select Searchable PDF (.pdf) from the File Type drop-down menu. 4. To start the scan, click Scan, and then follow the on-screen instructions. Mac OS X 1. Load your original print-side down on the right-front corner of the scanner glass or print-side up in the ADF. For more information, see Load an original on the scanner glass or Load an original in the automatic document feeder (ADF). 2. Double-click the HP Scan icon located in the Applications/Hewlett-Packard folder. 3. Click the Scan button. A dialog appears requesting confirmation of your scanning device and the scan settings preset. 4. Select the Documents with Text preset from the Presets pop-up menu, and then click Continue. 5. When all of the pages have been scanned, select Save from the File menu. The Save dialog appears. 6. Enter a file name and the folder in which you want to save the file, and then select an output file format: I want to... Extract just the text, without any of the formatting of the original Extract the text, as well as some of the formatting of the original Follow these steps Select TXT from the Format pop-up menu. Select RTF from the Format pop-up menu. 7. Click Save. 52 Scan
-
 1
1 -
2
-
3
-
4
-
5
-
6
-
7
-
8
-
9
-
10
-
11
-
12
-
13
-
14
-
15
-
16
-
17
-
18
-
19
-
20
-
21
-
22
-
23
-
24
-
25
-
26
-
27
-
28
-
29
-
30
-
31
-
32
-
33
-
34
-
35
-
36
-
37
-
38
-
39
-
40
-
41
-
42
-
43
-
44
-
45
-
46
-
47
-
48
-
49
-
50
-
 51
51 -
 52
52 -
 53
53 -
 54
54 -
 55
55 -
 56
56 -
 57
57 -
 58
58 -
 59
59 -
 60
60 -
 61
61 -
62
-
63
-
64
-
65
-
66
-
67
-
68
-
69
-
70
-
71
-
72
-
73
-
74
-
75
-
76
-
77
-
78
-
79
-
80
-
81
-
82
-
83
-
84
-
85
-
86
-
87
-
88
-
89
-
90
-
91
-
92
-
93
-
94
-
95
-
96
-
97
-
98
-
99
-
100
-
101
-
102
-
103
-
104
-
105
-
106
-
107
-
108
-
109
-
110
-
111
-
112
-
113
-
114
-
115
-
116
-
117
-
118
-
119
-
120
-
121
-
122
-
123
-
124
-
125
-
126
-
127
-
128
-
129
-
130
-
131
-
132
-
133
-
134
-
135
-
136
-
137
-
138
-
139
-
140
-
141
-
142
-
143
-
144
-
145
-
146
-
147
-
148
-
149
-
150
-
151
-
152
-
153
-
154
-
155
-
156
-
157
-
158
-
159
-
160
-
161
-
162
-
163
-
164
-
165
-
166
-
167
-
168
-
169
-
170
-
171
-
172
-
173
-
174
-
175
-
176
-
177
-
178
-
179
-
180
-
181
-
182
-
183
-
184
-
185
-
186
-
187
-
188
-
189
-
190
-
191
-
192
-
193
-
194
-
195
-
196
-
197
-
198
-
199
-
200
-
201
-
202
-
203
-
204
-
205
-
206
-
207
-
208
-
209
-
210
-
211
-
212
-
213
-
214
-
215
-
216
-
217
-
218
-
219
-
220
-
221
-
222
-
223
-
224
-
225
-
226
-
227
-
228
-
229
-
230
-
231
-
232
-
233
-
234
-
235
-
236
-
237
-
238
-
239
-
240
-
241
-
242
-
243
-
244
-
245
-
246
-
247
-
248
-
249
-
250
-
251
-
252
-
253
-
254
-
255
-
256
-
257
-
258
-
259
-
260
 |
 |