HP Officejet Pro 276dw HP Officejet Pro 276dw - User Guide - Page 63
Set up HP Digital Fax, Step 2: Add email addresses to the Email Address Book
 |
View all HP Officejet Pro 276dw manuals
Add to My Manuals
Save this manual to your list of manuals |
Page 63 highlights
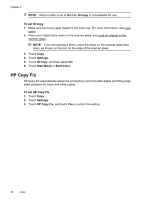
Step 2: Add email addresses to the Email Address Book To add email addresses to the Email Address Book, complete the following steps: 1. Open the embedded web server (EWS). For more information, see Embedded web server. 2. On the Scan tab, click Email Address Book. 3. Click New to add a single email address. -OrClick Group to create an email distribution list. NOTE: Before you can create an email distribution list, you must have already added at least one email address to the Email Address Book. 4. Follow the on-screen instructions. The entry is added to the Email Address Book. NOTE: Contact names appear on the printer's control panel display and in your email application. Step 3: Configure other email options To configure other email options (such as configuring default SUBJECT and body text that is included in all email messages sent from the printer, as well as scan settings used when sending email from the printer), complete the following steps: 1. Open the embedded web server (EWS). For more information, see Embedded web server. 2. On the Scan tab, click Email Options. 3. Change any settings, and then click Apply. Set up HP Digital Fax With HP Digital Fax, the printer automatically receives faxes and saves them directly to a network folder (Fax to Network Folder) or forwards them as email attachments (Fax to Email). NOTE: You can configure HP Digital Fax to use either Fax to Network Folder or to use Fax to Email. You cannot use both at the same time. Received faxes are saved as TIFF (Tagged Image File Format) or PDF files. CAUTION: HP Digital Fax is available for receiving black-and-white faxes only. Color faxes are printed instead of being saved. Windows 1. Open the HP printer software. 2. Go to the Fax section under the Print, Scan & Fax, and then double-click Digital Fax Setup. 3. Follow the on-screen instructions. Set up HP Digital Solutions 59
-
 1
1 -
2
-
3
-
4
-
5
-
6
-
7
-
8
-
9
-
10
-
11
-
12
-
13
-
14
-
15
-
16
-
17
-
18
-
19
-
20
-
21
-
22
-
23
-
24
-
25
-
26
-
27
-
28
-
29
-
30
-
31
-
32
-
33
-
34
-
35
-
36
-
37
-
38
-
39
-
40
-
41
-
42
-
43
-
44
-
45
-
46
-
47
-
48
-
49
-
50
-
51
-
52
-
53
-
54
-
55
-
56
-
57
-
 58
58 -
 59
59 -
 60
60 -
 61
61 -
 62
62 -
 63
63 -
 64
64 -
 65
65 -
 66
66 -
 67
67 -
 68
68 -
69
-
70
-
71
-
72
-
73
-
74
-
75
-
76
-
77
-
78
-
79
-
80
-
81
-
82
-
83
-
84
-
85
-
86
-
87
-
88
-
89
-
90
-
91
-
92
-
93
-
94
-
95
-
96
-
97
-
98
-
99
-
100
-
101
-
102
-
103
-
104
-
105
-
106
-
107
-
108
-
109
-
110
-
111
-
112
-
113
-
114
-
115
-
116
-
117
-
118
-
119
-
120
-
121
-
122
-
123
-
124
-
125
-
126
-
127
-
128
-
129
-
130
-
131
-
132
-
133
-
134
-
135
-
136
-
137
-
138
-
139
-
140
-
141
-
142
-
143
-
144
-
145
-
146
-
147
-
148
-
149
-
150
-
151
-
152
-
153
-
154
-
155
-
156
-
157
-
158
-
159
-
160
-
161
-
162
-
163
-
164
-
165
-
166
-
167
-
168
-
169
-
170
-
171
-
172
-
173
-
174
-
175
-
176
-
177
-
178
-
179
-
180
-
181
-
182
-
183
-
184
-
185
-
186
-
187
-
188
-
189
-
190
-
191
-
192
-
193
-
194
-
195
-
196
-
197
-
198
-
199
-
200
-
201
-
202
-
203
-
204
-
205
-
206
-
207
-
208
-
209
-
210
-
211
-
212
-
213
-
214
-
215
-
216
-
217
-
218
-
219
-
220
-
221
-
222
-
223
-
224
-
225
-
226
-
227
-
228
-
229
-
230
-
231
-
232
-
233
-
234
-
235
-
236
-
237
-
238
-
239
-
240
-
241
-
242
-
243
-
244
-
245
-
246
-
247
-
248
-
249
-
250
-
251
-
252
-
253
-
254
-
255
-
256
-
257
-
258
-
259
-
260
 |
 |