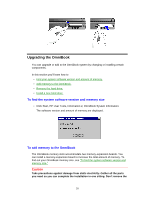
HP OmniBook 5500 HP OmniBook 5500 - User Guide, Windows 95 - Page 32
To set up a PCMCIA or parallel port CD-ROM drive
 |
View all HP OmniBook 5500 manuals
Add to My Manuals
Save this manual to your list of manuals |
Page 32 highlights
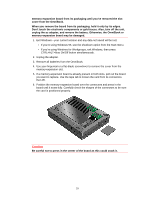
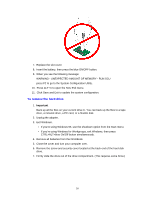
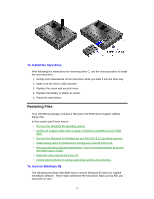
The entire recovery process takes approximately 1 hour. To recover your Windows 95 operating system, you'll need a CD-ROM drive, floppy disk drive, the Recovery CD, and the Support Utility disk. 1. If you have an internal CD-ROM drive, connect the floppy disk drive to the OmniBook's parallel port and install the CD-ROM drive in the OmniBook. -or- If you have a SCSI CD-ROM drive and a docking system, connect the SCSI CD-ROM drive to the docking system and install the floppy disk drive in the OmniBook. -or- If you have a PCMCIA or Parallel Port CD-ROM drive, connect the PCMCIA or Parallel CD-ROM drive and install the floppy disk drive in the OmniBook. See "To set up a PCMCIA or parallel port CD-ROM drive." 2. Connect the ac adapter to the OmniBook. 3. Insert the Recovery CD in the CD-ROM drive. 4. Insert the Support Utility disk in the floppy disk drive. 5. Press the reset button. The DOS 6.22 Startup menu appears. 6. Choose option 2: Recover Windows 95 from Recovery CD 7. Choose the type of CD-ROM drive you're using-internal OmniBook, SCSI with docking system, or PCMCIA or parallel port. Do not interrupt the recovery process or unplug the ac adapter until recovery is completed. To set up a PCMCIA or parallel port CD-ROM drive The general steps for setting up a PCMCIA CD-ROM drive are as follows: 1. Copy the device drivers-from the installation software provided with the CD- ROM drive-to the HP Support Utility Disk into the A:\tools directory. 2. Add the device=driver statements to the CONFIG.SYS file on the Support Utility disk. The device statements should immediately follow the [USERCD] label. 3. Check the AUTOEXEC.BAT file to make sure that the CD-ROM drive is assigned as drive G:. Before the OmniBook can recognize the CD-ROM drive, you'll need to edit the CONFIG.SYS and AUTOEXEC.BAT files on the Support Utility disk. The required device-drivers statements come from the CD-ROM manufacturer. What you'll need from your CD-ROM manufacturer 1. The names of the device drivers to copy to the Support Utility disk. 2. The device=drivers statements to add the CONFIG.SYS file. 32
-
 1
1 -
2
-
3
-
4
-
5
-
6
-
7
-
8
-
9
-
10
-
11
-
12
-
13
-
14
-
15
-
16
-
17
-
18
-
19
-
20
-
21
-
22
-
23
-
24
-
25
-
26
-
 27
27 -
 28
28 -
 29
29 -
 30
30 -
 31
31 -
 32
32 -
 33
33 -
 34
34 -
 35
35 -
 36
36 -
 37
37 -
38
-
39
-
40
-
41
-
42
-
43
-
44
-
45
-
46
-
47
-
48
-
49
-
50
-
51
-
52
-
53
-
54
-
55
-
56
-
57
-
58
-
59
-
60
-
61
-
62
-
63
-
64
-
65
-
66
-
67
-
68
-
69
-
70
-
71
-
72
-
73
-
74
-
75
-
76
-
77
-
78
-
79
-
80
-
81
-
82
-
83
-
84
-
85
-
86
-
87
-
88
-
89
-
90
 |
 |