HP P Class 450/500/550/600/650/700/750 fx2+, fx4+, fx6+ graphics installation - Page 18
Installing the HP Visualize fx+ Graphics Card
 |
View all HP P Class 450/500/550/600/650/700/750 manuals
Add to My Manuals
Save this manual to your list of manuals |
Page 18 highlights
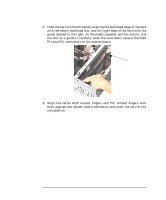
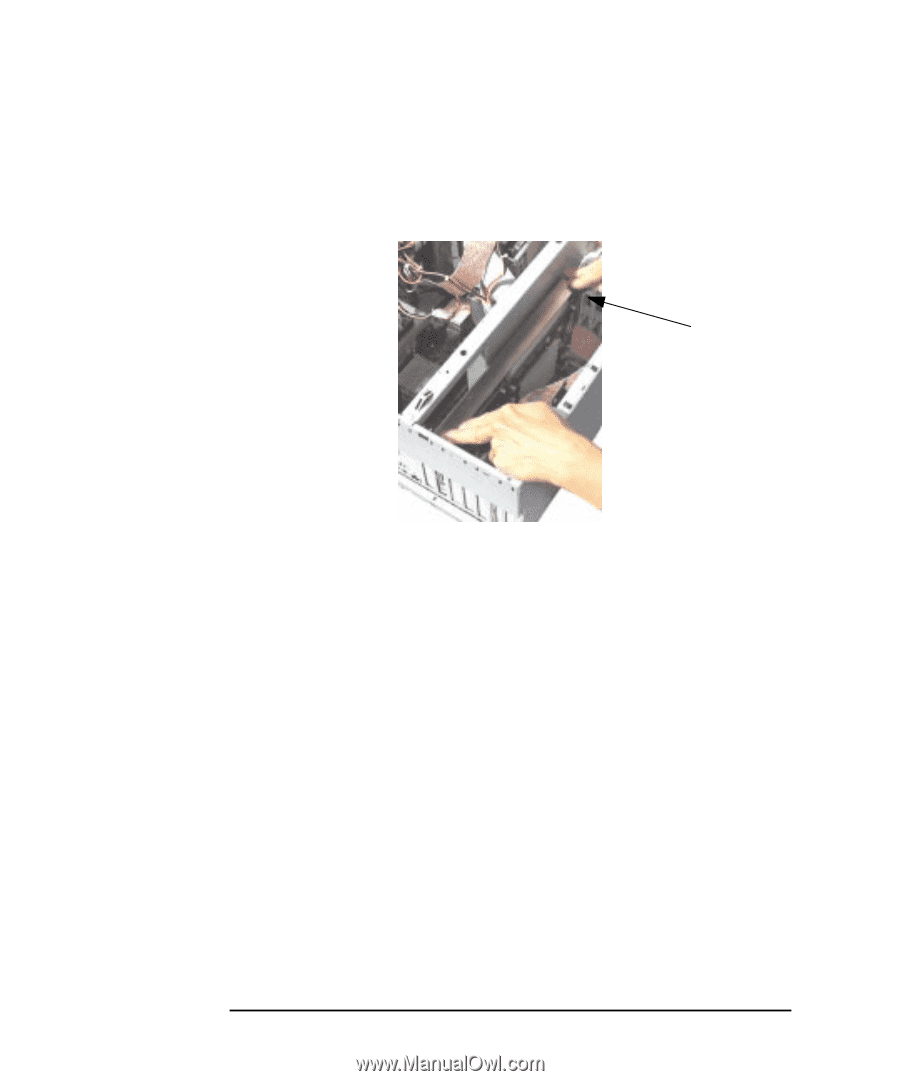
HP Visualize fx2+, fx4+, fx6+ Graphics Cards and Texture Module Installing the HP Visualize fx+ Graphics Card 5. Hold the card with both hands, aligning the bulkhead edge of the card with the empty bulkhead slot, and the right edge of the card with the guide located to the right, on the plastic speaker and fan mount. Use the slot as a guide to carefully slide the card down toward the AGP Pro and PCI connectors on the system board. Guide on Fan Mount 6. Align the card's AGP contact fingers and PCI contact fingers with their appropriate system board connectors and push the card firmly into position. 18 Chapter 1
-
 1
1 -
2
-
3
-
4
-
5
-
6
-
7
-
8
-
9
-
10
-
11
-
12
-
 13
13 -
 14
14 -
 15
15 -
 16
16 -
 17
17 -
 18
18 -
 19
19 -
 20
20 -
 21
21 -
 22
22 -
 23
23 -
24
-
25
-
26
-
27
-
28
-
29
-
30
-
31
-
32
-
33
-
34
-
35
-
36
-
37
-
38
-
39
-
40
-
41
-
42
-
43
-
44
-
45
-
46
-
47
-
48
-
49
-
50
-
51
-
52
-
53
-
54
-
55
-
56
-
57
-
58
-
59
-
60
 |
 |
18
Chapter 1
HP Visualize fx2+, fx4+, fx6+ Graphics Cards and Texture Module
Installing the HP Visualize fx+ Graphics Card
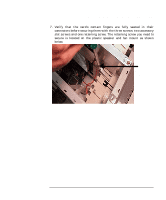
5.
Hold the card with both hands, aligning the bulkhead edge of the card
with the empty bulkhead slot, and the right edge of the card with the
guide located to the right, on the plastic speaker and fan mount. Use
the slot as a guide to carefully slide the card down toward the AGP
Pro and PCI connectors on the system board.
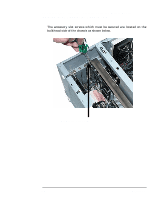
6.
Align the card’s AGP contact fingers and PCI contact fingers with
their appropriate system board connectors and push the card firmly
into position.
Guide on
Fan Mount