HP P Class 450/500/550/600/650/700/750 fx2+, fx4+, fx6+ graphics installation - Page 45
Texture Module
 |
View all HP P Class 450/500/550/600/650/700/750 manuals
Add to My Manuals
Save this manual to your list of manuals |
Page 45 highlights
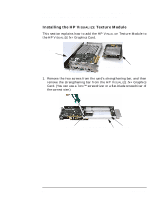
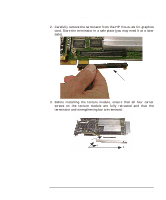
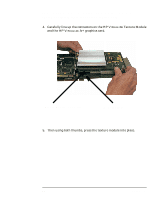
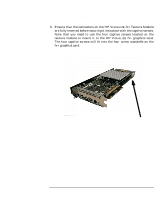
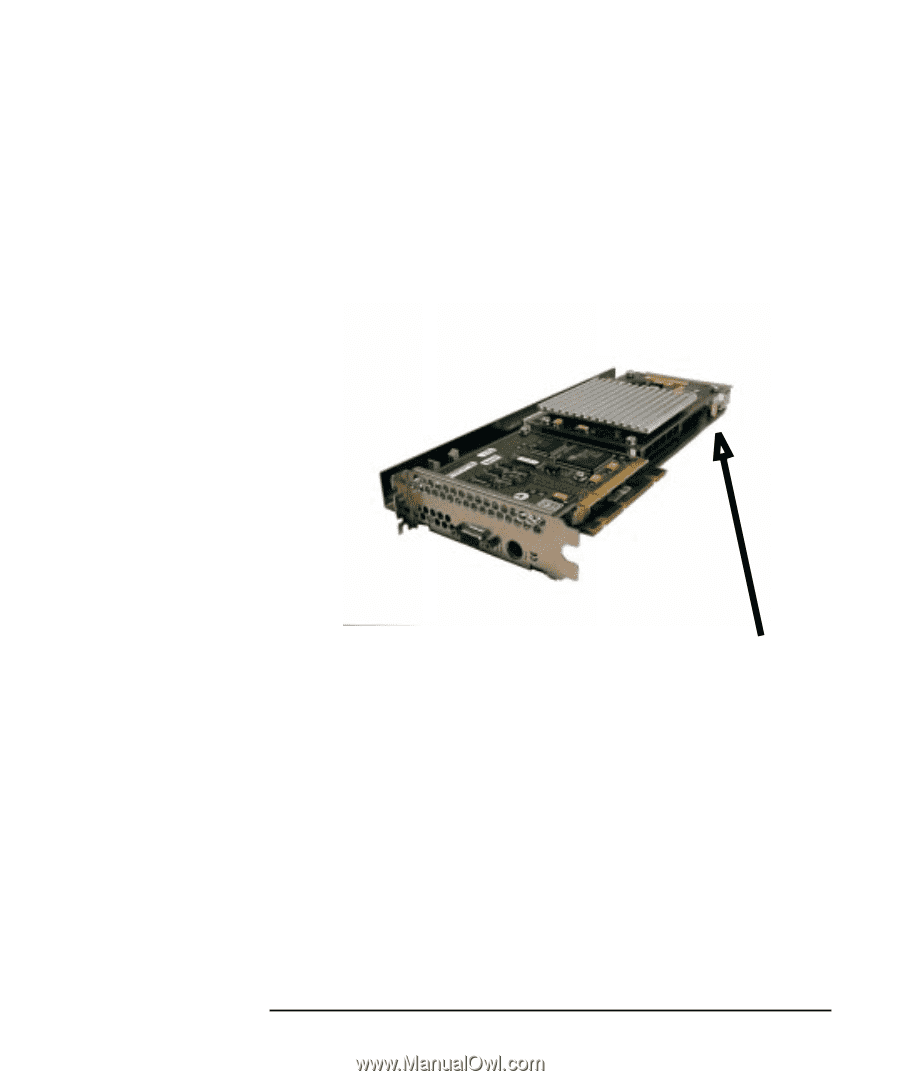
HP Visualize fx2+, fx4+, fx6+ Graphics Cards and Texture Module Adding a Texture Module to Your fx+ Graphics Card 6. Ensure that the connectors on the HP VISUALIZE fx+ Texture Module are fully inserted before securing it into place with the captive screws. Note that you need to use the four captive screws located on the texture module to mount it to the HP VISUALIZE fx+ graphics card. The four captive screws will fit into the four screw standoffs on the fx+ graphics card. Chapter 1 Standoff 45
-
 1
1 -
2
-
3
-
4
-
5
-
6
-
7
-
8
-
9
-
10
-
11
-
12
-
13
-
14
-
15
-
16
-
17
-
18
-
19
-
20
-
21
-
22
-
23
-
24
-
25
-
26
-
27
-
28
-
29
-
30
-
31
-
32
-
33
-
34
-
35
-
36
-
37
-
38
-
39
-
 40
40 -
 41
41 -
 42
42 -
 43
43 -
 44
44 -
 45
45 -
 46
46 -
 47
47 -
 48
48 -
 49
49 -
 50
50 -
51
-
52
-
53
-
54
-
55
-
56
-
57
-
58
-
59
-
60
 |
 |
Chapter 1
45
HP Visualize fx2+, fx4+, fx6+ Graphics Cards and Texture Module
Adding a Texture Module to Your fx+ Graphics Card
6.
Ensure that the connectors on the HP V
ISUALIZE
fx
+ Texture Module
are fully inserted before securing it into place with the captive screws.
Note that you need to use the four captive screws located on the
texture module to mount it to the HP V
ISUALIZE
fx
+ graphics card.
The four captive screws will fit into the four screw standoffs on the
fx+ graphics card.
Standoff