HP P Class 450/500/550/600/650/700/750 fx2+, fx4+, fx6+ graphics installation - Page 43
Adding a Texture Module to Your fx+ Graphics Card
 |
View all HP P Class 450/500/550/600/650/700/750 manuals
Add to My Manuals
Save this manual to your list of manuals |
Page 43 highlights
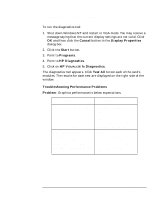
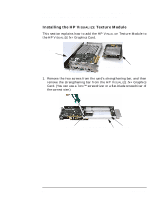
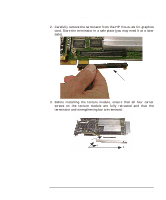
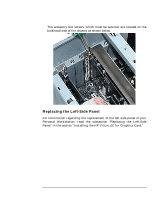
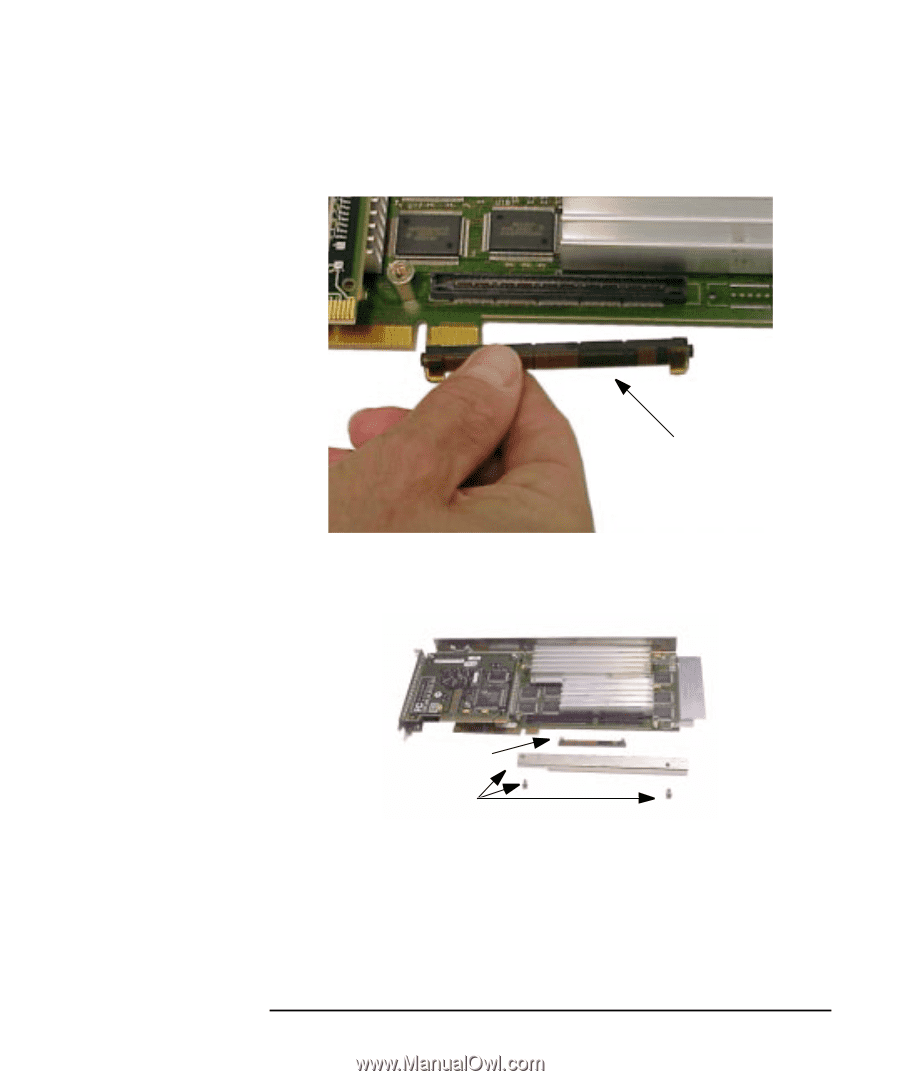
HP Visualize fx2+, fx4+, fx6+ Graphics Cards and Texture Module Adding a Texture Module to Your fx+ Graphics Card 2. Carefully remove the terminator from the HP VISUALIZE fx+ graphics card. Store the terminator in a safe place (you may need it at a later date). Terminator 3. Before installing the texture module, ensure that all four corner screws on the texture module are fully retracted and that the terminator and strengthening bar are removed. Terminator Strengthening Bar and its screws Chapter 1 43
-
 1
1 -
2
-
3
-
4
-
5
-
6
-
7
-
8
-
9
-
10
-
11
-
12
-
13
-
14
-
15
-
16
-
17
-
18
-
19
-
20
-
21
-
22
-
23
-
24
-
25
-
26
-
27
-
28
-
29
-
30
-
31
-
32
-
33
-
34
-
35
-
36
-
37
-
 38
38 -
 39
39 -
 40
40 -
 41
41 -
 42
42 -
 43
43 -
 44
44 -
 45
45 -
 46
46 -
 47
47 -
 48
48 -
49
-
50
-
51
-
52
-
53
-
54
-
55
-
56
-
57
-
58
-
59
-
60
 |
 |
Chapter 1
43
HP Visualize fx2+, fx4+, fx6+ Graphics Cards and Texture Module
Adding a Texture Module to Your fx+ Graphics Card
2.
Carefully remove the terminator from the HP V
ISUALIZE
fx
+ graphics
card. Store the terminator in a safe place (you may need it at a later
date).
3.
Before installing the texture module, ensure that all four corner
screws
on
the
texture
module
are
fully
retracted
and
that
the
terminator and strengthening bar are removed.
Terminator
Terminator
Strengthening Bar and its screws