HP PageWide Enterprise Color MFP 586 User Guide - Page 128
Scan and send to email, Introduction, Scan and send a document to email
 |
View all HP PageWide Enterprise Color MFP 586 manuals
Add to My Manuals
Save this manual to your list of manuals |
Page 128 highlights
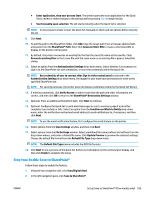
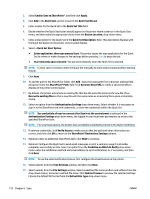
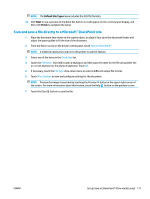
Scan and send to email Introduction The printer has a feature that enables it to scan a document and send it to one or more email addresses. Before using this feature, use the HP Embedded Web Server to enable it and set it up. Scan and send a document to email 1. Place the document face-down on the scanner glass, or place it face-up in the document feeder and adjust the paper guides to fit the size of the document. 2. From the Home screen on the printer control panel, touch the E-mail button. NOTE: If prompted, type your user name and password. 3. Touch the To field to open a keyboard. NOTE: If you are signed in to the printer, your user name or other default information might appear in the From field. If so, you might not be able to change it. 4. Specify the recipients by using one of these methods: Enter addresses manually ▲ Enter the address in the To field. To send to multiple addresses, separate the addresses with a semicolon, or touch the Enter button on the touchscreen keyboard after typing each address. Enter addresses from the Contacts list a. Touch the Address Book button that is next to the To: field to open the Address Book screen. b. From the drop-down list, select the address book view that you want to use. c. Select a name from the list of contacts, and then touch the right arrow button to add the name to the recipients list. Repeat this step for each recipient, and then touch the OK button. 5. Complete the Subject, and File Name fields by touching the field and using the touchscreen keyboard to enter information. Touch the OK button when you have completed the fields. 6. To configure settings for the document, touch the More Options button. For example: ● Select File Type and Resolution to specify the type of file to create, the resolution, and the output quality. ● If the original document is printed on both sides, select Original Sides, and then select 2 Sided. 7. Touch the preview button to preview the document. In the preview screen, use the buttons at the bottom of the screen to adjust the preview options, and to rearrange, rotate, insert, or remove pages. 8. Touch the Start button to send. NOTE: The printer might prompt you to add the email address to the address book or the contact list. 114 Chapter 6 Scan ENWW
-
 1
1 -
2
-
3
-
4
-
5
-
6
-
7
-
8
-
9
-
10
-
11
-
12
-
13
-
14
-
15
-
16
-
17
-
18
-
19
-
20
-
21
-
22
-
23
-
24
-
25
-
26
-
27
-
28
-
29
-
30
-
31
-
32
-
33
-
34
-
35
-
36
-
37
-
38
-
39
-
40
-
41
-
42
-
43
-
44
-
45
-
46
-
47
-
48
-
49
-
50
-
51
-
52
-
53
-
54
-
55
-
56
-
57
-
58
-
59
-
60
-
61
-
62
-
63
-
64
-
65
-
66
-
67
-
68
-
69
-
70
-
71
-
72
-
73
-
74
-
75
-
76
-
77
-
78
-
79
-
80
-
81
-
82
-
83
-
84
-
85
-
86
-
87
-
88
-
89
-
90
-
91
-
92
-
93
-
94
-
95
-
96
-
97
-
98
-
99
-
100
-
101
-
102
-
103
-
104
-
105
-
106
-
107
-
108
-
109
-
110
-
111
-
112
-
113
-
114
-
115
-
116
-
117
-
118
-
119
-
120
-
121
-
122
-
 123
123 -
 124
124 -
 125
125 -
 126
126 -
 127
127 -
 128
128 -
 129
129 -
 130
130 -
 131
131 -
 132
132 -
 133
133 -
134
-
135
-
136
-
137
-
138
-
139
-
140
-
141
-
142
-
143
-
144
-
145
-
146
-
147
-
148
-
149
-
150
-
151
-
152
-
153
-
154
-
155
-
156
-
157
-
158
-
159
-
160
-
161
-
162
-
163
-
164
-
165
-
166
-
167
-
168
-
169
-
170
-
171
-
172
-
173
-
174
-
175
-
176
-
177
-
178
-
179
-
180
-
181
-
182
-
183
-
184
-
185
-
186
-
187
-
188
-
189
-
190
-
191
-
192
-
193
-
194
-
195
-
196
-
197
-
198
-
199
-
200
-
201
-
202
-
203
-
204
-
205
-
206
-
207
-
208
-
209
-
210
-
211
-
212
-
213
-
214
-
215
-
216
-
217
-
218
-
219
-
220
-
221
-
222
-
223
-
224
-
225
-
226
-
227
-
228
-
229
-
230
-
231
-
232
-
233
-
234
-
235
-
236
-
237
-
238
-
239
-
240
-
241
-
242
-
243
-
244
-
245
-
246
-
247
-
248
-
249
-
250
 |
 |
