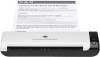
HP Scanjet 1000 User Guide - Page 14
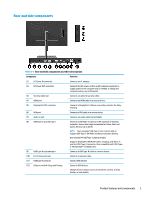
Connecting the cables, Input Control
 |
View all HP Scanjet 1000 manuals
Add to My Manuals
Save this manual to your list of manuals |
Page 14 highlights
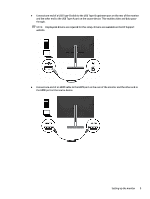
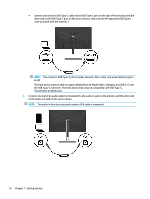
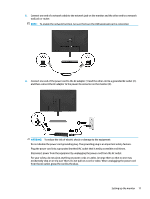
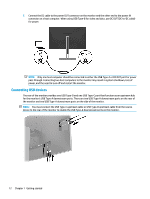
Connecting the cables NOTE: The monitor ships with select cables. Not all cables shown in this section are included with the monitor. 1. Place the monitor in a convenient, well-ventilated location near the computer. 2. Before connecting the cables, route the cables through the cable routing hole in the center of the stand. 3. Connect a video cable. NOTE: The monitor automatically determines which inputs have valid video signals. The inputs can be selected by pressing the Menu button to access the on-screen display (OSD) menu and then selecting Input Control. ● Connect one end of a VGA cable to the VGA port on the rear of the monitor and the other end to the VGA port on the source device. 8 Chapter 1 Getting started
-
 1
1 -
2
-
3
-
4
-
5
-
6
-
7
-
8
-
 9
9 -
 10
10 -
 11
11 -
 12
12 -
 13
13 -
 14
14 -
 15
15 -
 16
16 -
 17
17 -
 18
18 -
 19
19 -
20
-
21
-
22
-
23
-
24
-
25
-
26
-
27
-
28
-
29
-
30
-
31
-
32
-
33
-
34
-
35
-
36
-
37
-
38
-
39
-
40
-
41
-
42
-
43
-
44
-
45
-
46
-
47
 |
 |

Connecting the cables
NOTE:
The monitor ships with select cables. Not all cables shown in this section are included with the
monitor.
1.
Place the monitor in a convenient, well-ventilated location near the computer.
2.
Before connecting the cables, route the cables through the cable routing hole in the center of the stand.
3.
Connect a video cable.
NOTE:
The monitor automatically determines which inputs have valid video signals. The inputs can be
selected by pressing the
Menu
button to access the on-screen display (OSD) menu and then selecting
Input Control
.
●
Connect one end of a VGA cable to the VGA port on the rear of the monitor and the other end to the
VGA port on the source device.
8
Chapter 1
Getting started